firstgear
Well-known member
- Joined
- Oct 11, 2003
- Messages
- 1,895
- Location
- Norwalk, Ohio
- Corvette
- 15 Z06, 01 Vert, 63 SWC & 60 ALL RED
The day started off bad with the a wheel needing to go back to Newstalgia Wheels then it really got side tracked with the McLeod scatter shiled we were putting on.
There is a boss that is threaded and screwed into the scatter shield that hold the pivot ball stud for the clutch fork pivot. Eddie tried to screw it in and it seemed like the thread had a burr or something on it. So I tried it and figuring that I was pushing up against the burr I though this sure is tough as Eddie yelled "your are cross threading it".
Well, we got it out and figured we could get the threads fixed by screwing in from behind the scatter shield. Not to be this day, it was like whoever tapped it didn't run the tap all the way in, only part way and the threaded boss wasn't going to go in at all from the back, never mind cross threading. So we were trying to figure out the thread and did I have a tap to run down through the scattershield. NOPE!!! It was 13/16-16!!!! Extra Fine!!! Who the heck has a 13/16-16 tap in their tool box!!!! Not me!!!!
Quick call to Fastnal, NOPE they would have to order. Then Eddie remembered one of his jeep racing buddies has a nice fabrication and welding shop on the other side of town. Eddie called but he was out, so we went over anyways hoping to catch his son, last time Eddie had seen the son was probably 15-20 years ago, but the son remembered Eddie and took us into the shop and after going through some various drawers, there was a 13/16-16 tap. We could not believe that we actually found one.
The son took us over to a BIG drill press, hooked us up with the tap and in 3 minutes we had the hole fixed with new threads and we were back in business! This ate up over 1.5 hours, because of course it was lunch time by the time we headed out after figuring what kind of odd ball thread we had.
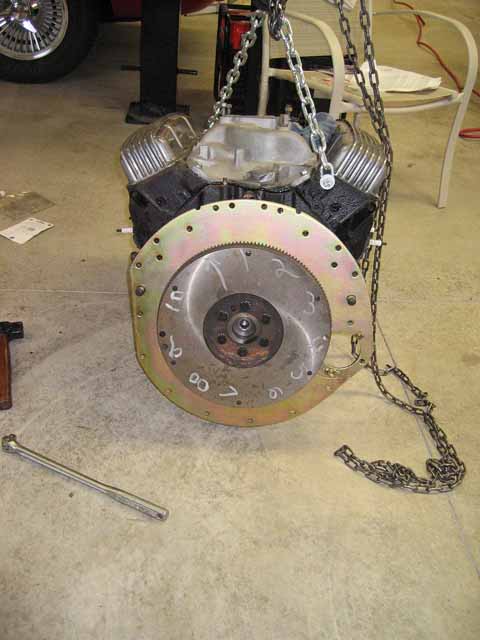
We got back to the house and went full bore at getting the back side of the scatter shield in place (between the motor and the flywheel). Because of the extra thickness of the scatter shield back plate, we had to install extra long dowel pins, which was no big deal as I expected this and had ordered some in from Summit.
After mounting the scatter shield back plate, next was the flywheel, clutch and pressure plate. But as I got everything bolted up nice and tight with RED Loctite, Eddie says, "you know I am hardly holding this screw driver on the starter teeth to keep the flywheel from turning, something isn't right". And he was right, the flywheel was rubbing against the scatter shield back plate. BIG TIME!
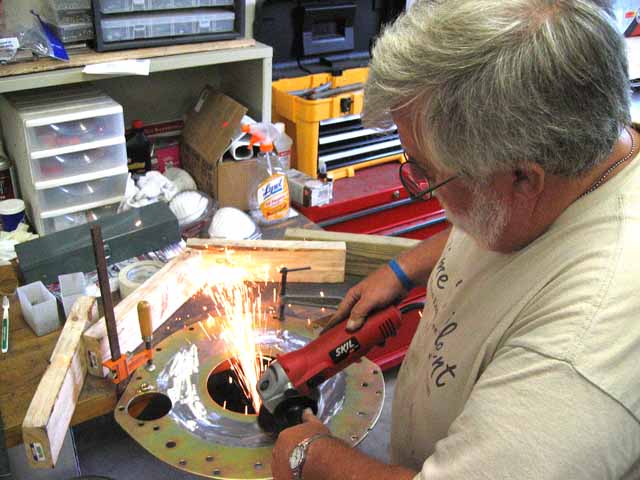
So we decide to press ahead and grind the scatter shield back plate only where clearance needs to be for the flywheel. We went through several ginding discs as well as several grinding 150 grit sanding wheels. Here is Eddie grinding.
You can see from the shinny area of the back of the scatter shield where we had to take material off. In this case, I think my flywheel was just enough different that in the process of me ordering parts, we didn't discuss the particulars of the fly wheel. Need less to say this was a surprise. Only problem was, we weren't sure how much had to be taken off. So we went through this process mounting of the scatter shield back plate and the the flywheel and rotating it, hearing it scrape, only to take it off and grind some more. This process wne t on like this for 4 more times. If was getting easier to turn the flywheel, but we could still hear it scraping, so this time we painted the backing with black spray paint. Assembled everything and then turned the flywheel again, now we knew exactly where the high points were and ground some more off. We did this 2 more times. We finally had it, but this was a royal PIA!!!
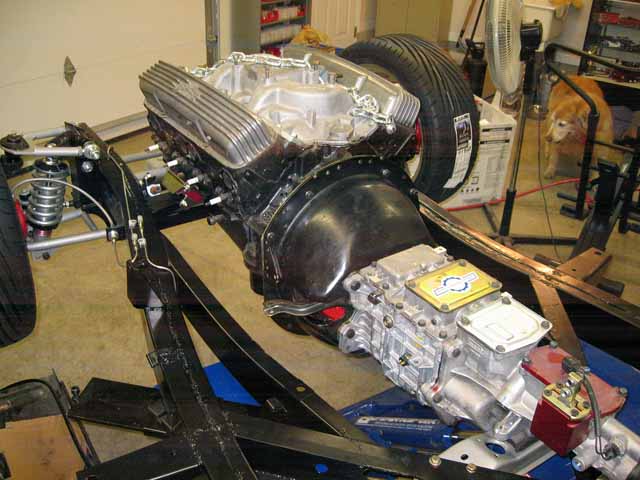
Between the back plate and the ball stud boss, we burned up over 4-5 hours of fussing and messing. Once we got that in place, I called Jeff at CC5S and we talked through one more time how to assemble and adjust the ball stud. Then it was time to mount the Tremec TKO600. At first it didn't seem to want to go, then as we were fussing and moving around that beauty, all of a sudden it slide all the way in! We looked at each other in disbelief, given all the other problems of the day. But it was in and we only had to put a few bolts in place and she was home for good!
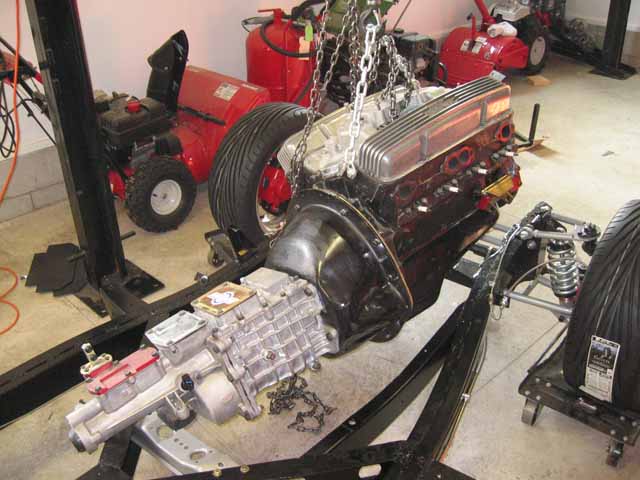
We got the motor mounts attached with ARP 12 point bolts, got the motor in place and everything was where it should be.
Pushed the rolling frame back into the "Surgery Suite" and positioned it on the operating room table.
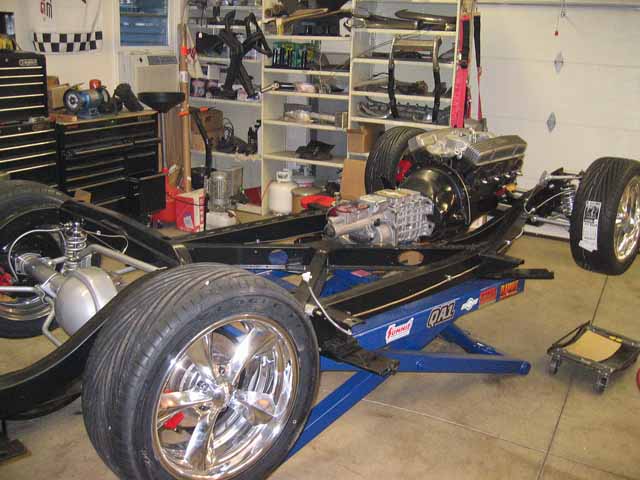
By this time it was 7:30pm and we were both dragging. We didn't get as far as we wanted today. Our goal was to have the drive shaft in place coupled with the rear pinion set to the same angle that the output shaft of the Tremec. We got as far as determining that the front and back were off by a few degrees and decided that would be left for another day.
We could have made it had it not been for the two problems with the scatter shield. So there you have it. More photos in the next day or so on the brake lines and how I ran them. It is coming together ever so slowly!!
I need help with reccommendations for the exhaust system. Vendors or web sites are most welcomed!!!
regards, Herb
There is a boss that is threaded and screwed into the scatter shield that hold the pivot ball stud for the clutch fork pivot. Eddie tried to screw it in and it seemed like the thread had a burr or something on it. So I tried it and figuring that I was pushing up against the burr I though this sure is tough as Eddie yelled "your are cross threading it".
Well, we got it out and figured we could get the threads fixed by screwing in from behind the scatter shield. Not to be this day, it was like whoever tapped it didn't run the tap all the way in, only part way and the threaded boss wasn't going to go in at all from the back, never mind cross threading. So we were trying to figure out the thread and did I have a tap to run down through the scattershield. NOPE!!! It was 13/16-16!!!! Extra Fine!!! Who the heck has a 13/16-16 tap in their tool box!!!! Not me!!!!
Quick call to Fastnal, NOPE they would have to order. Then Eddie remembered one of his jeep racing buddies has a nice fabrication and welding shop on the other side of town. Eddie called but he was out, so we went over anyways hoping to catch his son, last time Eddie had seen the son was probably 15-20 years ago, but the son remembered Eddie and took us into the shop and after going through some various drawers, there was a 13/16-16 tap. We could not believe that we actually found one.
The son took us over to a BIG drill press, hooked us up with the tap and in 3 minutes we had the hole fixed with new threads and we were back in business! This ate up over 1.5 hours, because of course it was lunch time by the time we headed out after figuring what kind of odd ball thread we had.
We got back to the house and went full bore at getting the back side of the scatter shield in place (between the motor and the flywheel). Because of the extra thickness of the scatter shield back plate, we had to install extra long dowel pins, which was no big deal as I expected this and had ordered some in from Summit.
After mounting the scatter shield back plate, next was the flywheel, clutch and pressure plate. But as I got everything bolted up nice and tight with RED Loctite, Eddie says, "you know I am hardly holding this screw driver on the starter teeth to keep the flywheel from turning, something isn't right". And he was right, the flywheel was rubbing against the scatter shield back plate. BIG TIME!
So we decide to press ahead and grind the scatter shield back plate only where clearance needs to be for the flywheel. We went through several ginding discs as well as several grinding 150 grit sanding wheels. Here is Eddie grinding.
You can see from the shinny area of the back of the scatter shield where we had to take material off. In this case, I think my flywheel was just enough different that in the process of me ordering parts, we didn't discuss the particulars of the fly wheel. Need less to say this was a surprise. Only problem was, we weren't sure how much had to be taken off. So we went through this process mounting of the scatter shield back plate and the the flywheel and rotating it, hearing it scrape, only to take it off and grind some more. This process wne t on like this for 4 more times. If was getting easier to turn the flywheel, but we could still hear it scraping, so this time we painted the backing with black spray paint. Assembled everything and then turned the flywheel again, now we knew exactly where the high points were and ground some more off. We did this 2 more times. We finally had it, but this was a royal PIA!!!
Between the back plate and the ball stud boss, we burned up over 4-5 hours of fussing and messing. Once we got that in place, I called Jeff at CC5S and we talked through one more time how to assemble and adjust the ball stud. Then it was time to mount the Tremec TKO600. At first it didn't seem to want to go, then as we were fussing and moving around that beauty, all of a sudden it slide all the way in! We looked at each other in disbelief, given all the other problems of the day. But it was in and we only had to put a few bolts in place and she was home for good!
We got the motor mounts attached with ARP 12 point bolts, got the motor in place and everything was where it should be.
Pushed the rolling frame back into the "Surgery Suite" and positioned it on the operating room table.
By this time it was 7:30pm and we were both dragging. We didn't get as far as we wanted today. Our goal was to have the drive shaft in place coupled with the rear pinion set to the same angle that the output shaft of the Tremec. We got as far as determining that the front and back were off by a few degrees and decided that would be left for another day.
We could have made it had it not been for the two problems with the scatter shield. So there you have it. More photos in the next day or so on the brake lines and how I ran them. It is coming together ever so slowly!!
I need help with reccommendations for the exhaust system. Vendors or web sites are most welcomed!!!
regards, Herb


