youwish2bme
Well-known member
I just thought that I would share what I learned this weekend.. I recently put a 2.5" manifolds and had to use a "F" style alternator bracket to allow the mounting of the alternator. In doing so this moves the alternator closer to the fender well and in turn moving it closer to the voltage regulator. I was not happy with this situation and my good friend Bill recommended to rotate the back of the case. Needless to say I didn't realize that rotating the case I lifted it a little bit and the top brush was sprung or not lined up correctly and I had an alternator failure.
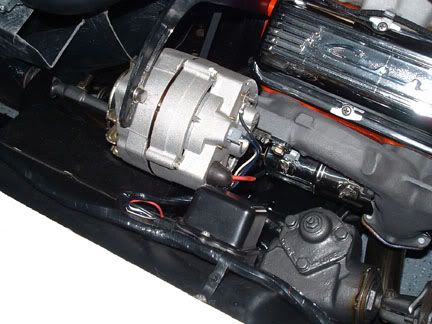
Well the second time around I learned the correct way to rotate the case without causing alternator failure. Here is the pic of my orginal orientation of the alternator, if you look closely you can see the boot for the positive terminal is almost touching the regulator
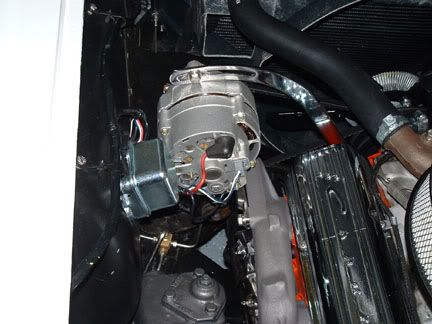
This one shows how it is now
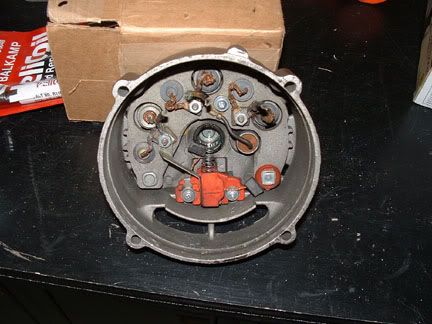
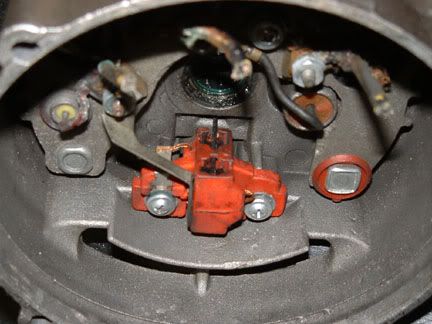
Once you remove the rear case the brushes and springs become sprung like this. (look towards the center bottom of this photo above the red this is the actual brush holder)
So to get everything back in you only need a small allen wrench. If you insert it thru the back of the case this will allow you to hold the springs and brushes in until you have the case in the proper position.
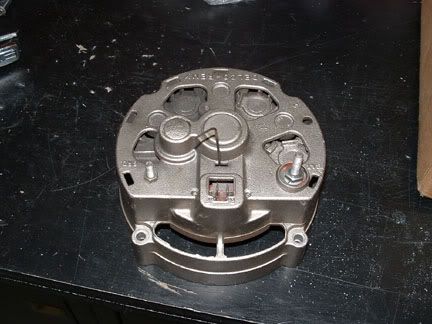
Once you have the allen inserted from the back of the case you can put the top spring and brush in and then slide the allen thru the keyway to hold all of this together.
Now you can put the case back together in any orientation you want.
Sorry this was so long but it was something that held me up and I had to learn so I thought that I would post it incase someone else ran into this problem.. Bill thanks for the instructions today... Dave..
Well the second time around I learned the correct way to rotate the case without causing alternator failure. Here is the pic of my orginal orientation of the alternator, if you look closely you can see the boot for the positive terminal is almost touching the regulator
This one shows how it is now
Once you remove the rear case the brushes and springs become sprung like this. (look towards the center bottom of this photo above the red this is the actual brush holder)
So to get everything back in you only need a small allen wrench. If you insert it thru the back of the case this will allow you to hold the springs and brushes in until you have the case in the proper position.
Once you have the allen inserted from the back of the case you can put the top spring and brush in and then slide the allen thru the keyway to hold all of this together.
Now you can put the case back together in any orientation you want.
Sorry this was so long but it was something that held me up and I had to learn so I thought that I would post it incase someone else ran into this problem.. Bill thanks for the instructions today... Dave..


