Welcome to the Corvette Forums at the Corvette Action Center!

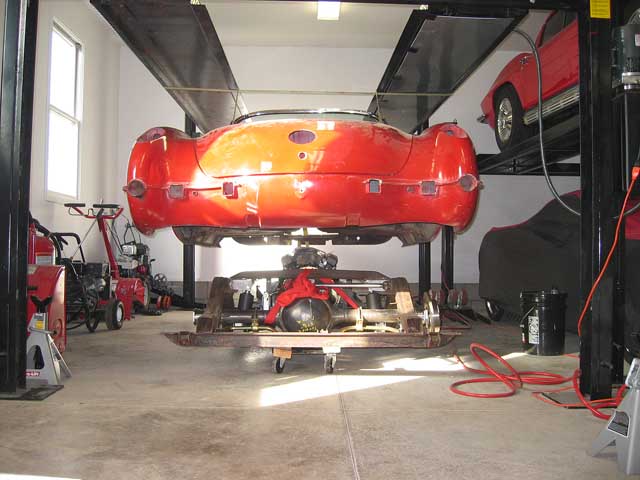
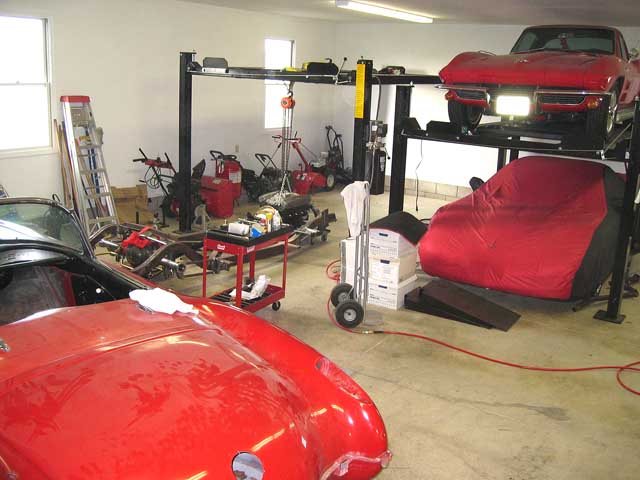
C1 '60 Body back on and off today...getting ready for final welding....

firstgear

Well-known member
Joined
Oct 11, 2003
Messages
1,895
Location
Norwalk, Ohio
Corvette
15 Z06, 01 Vert, 63 SWC & 60 ALL RED
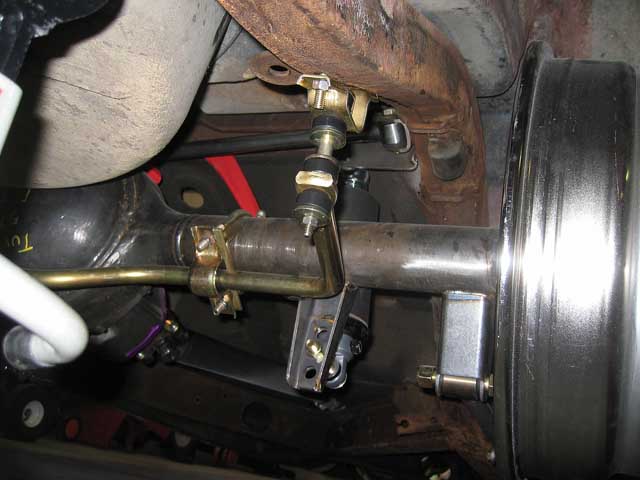
I got the rear sway bar installed today and I was ready to put the body back on to check for clearances as well as see where the rear wheels will be when fully reassembled.

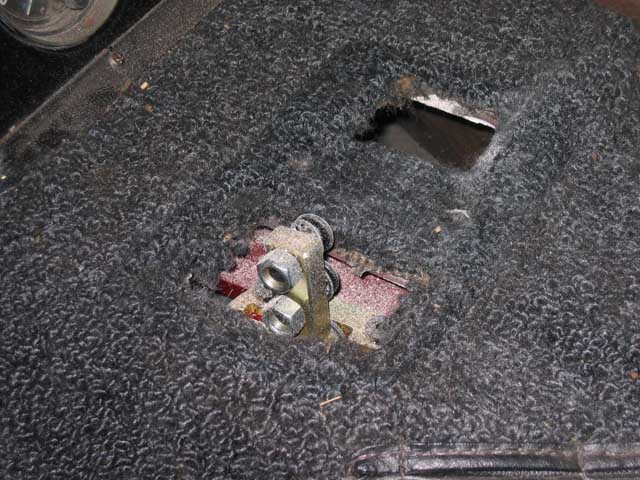
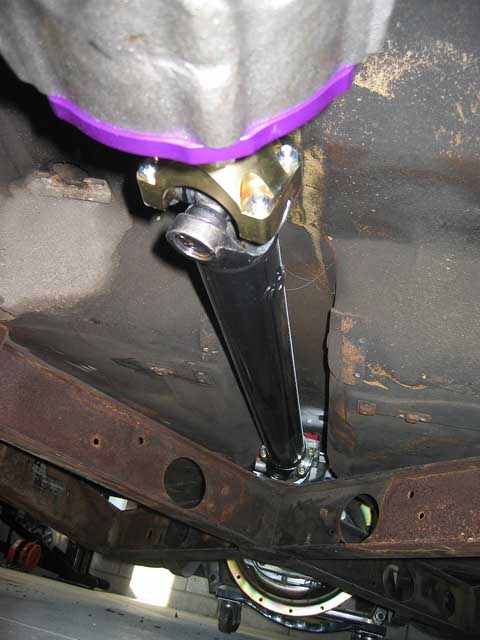
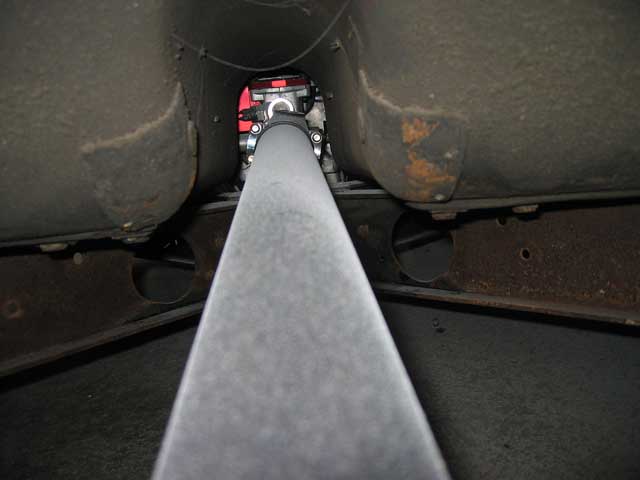
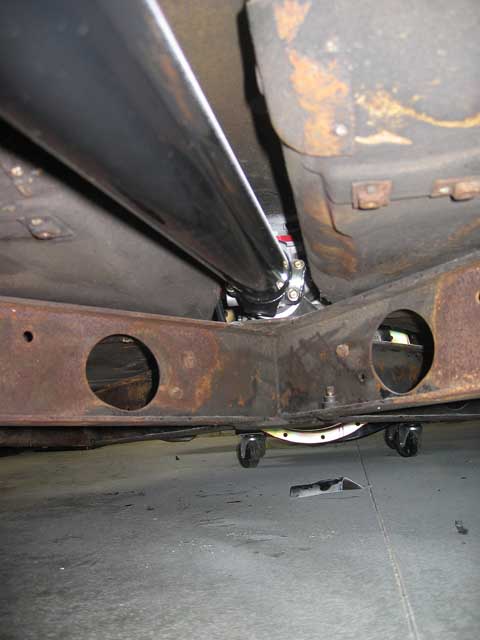
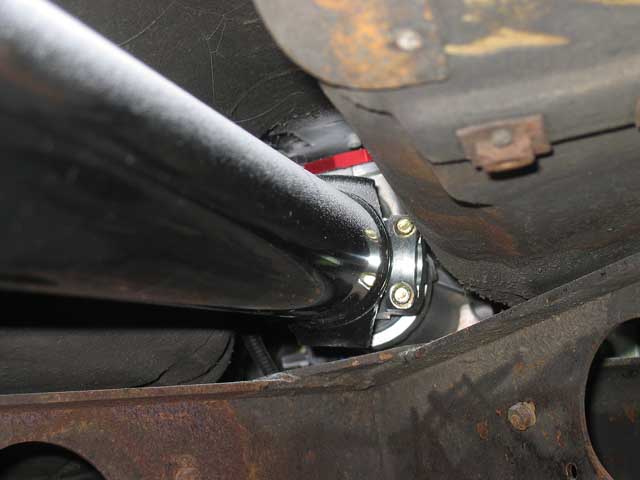
First, I have to tell you I am really impressed with the Classic Chevy 5 Speed Tremce TKO600......wow that fit nicey....with the 1310 yoke there was a ton of clearance in the drive shaft tunnel, I had cut the bottom of the ash tray out as that is what you are supposed to do because the tranny is supposed to hit it...it looked to me that I probably could have gotten away without cutting it. I know some people talked about having the sagging tunnel problem, allI can say is when I looked under the frame, I sure didn't see any of that.....

The shifter came right where it was supposed to and the top of the attachment point for the shift handle was prottruding through the shifter hole.

I cut out a couple of the areas around the front suspension, I don't think I cut enough on one side as it looked like the glass in that section was slightly hung up. I figure once I get the complete front end together that I will notch the necessary clearances.

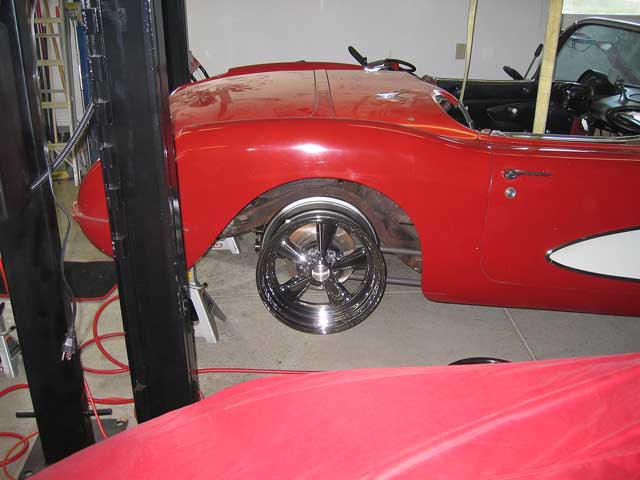
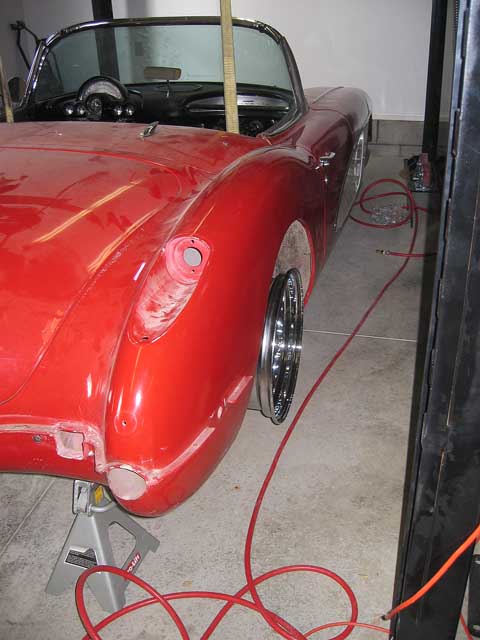
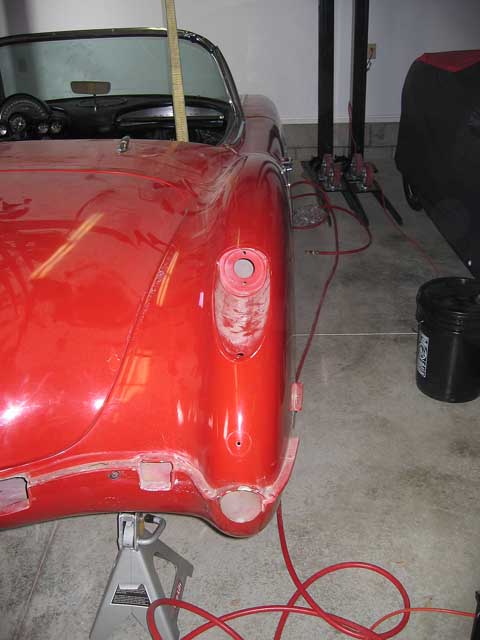
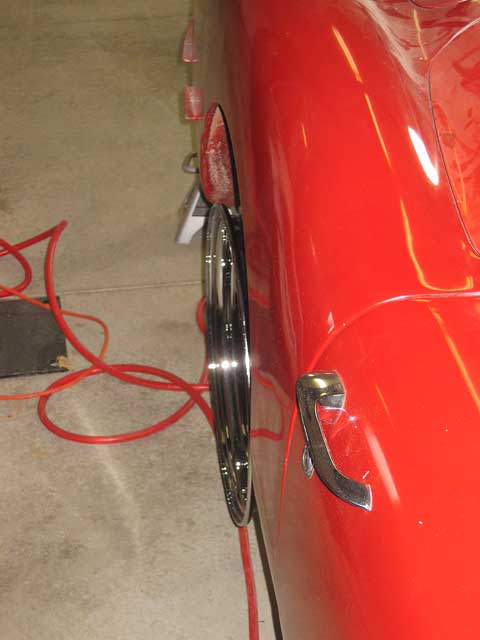
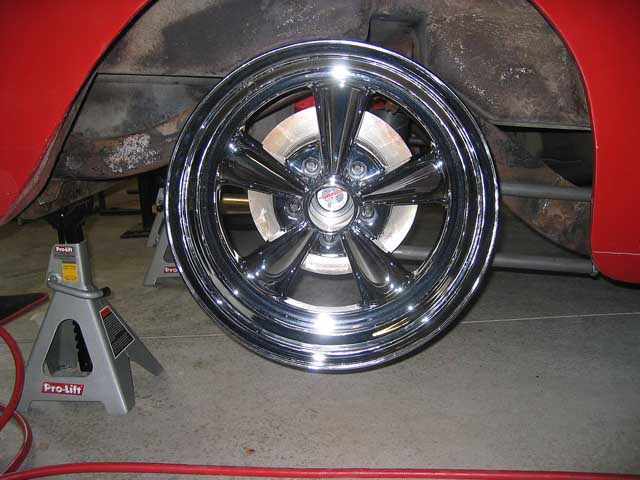
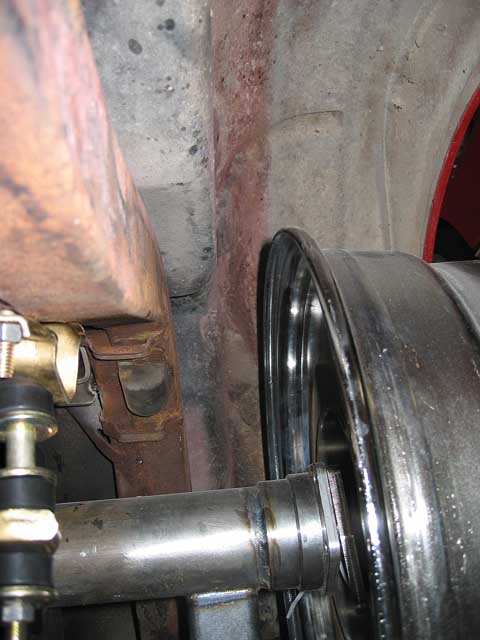
The Cragar 8" wheel with the 3.5" backspace looks like it will be just fine...I would have liked another 1/4-1/2" tucked under the wheel well, but I think everything will look great.....I just don't like it when the wheels stick out beyond the fenders.....

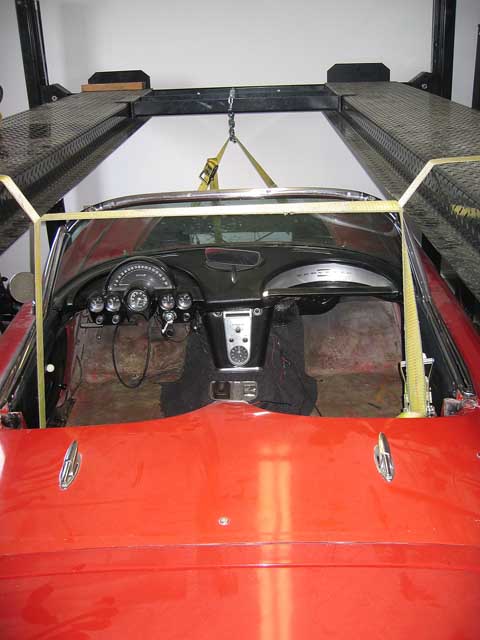
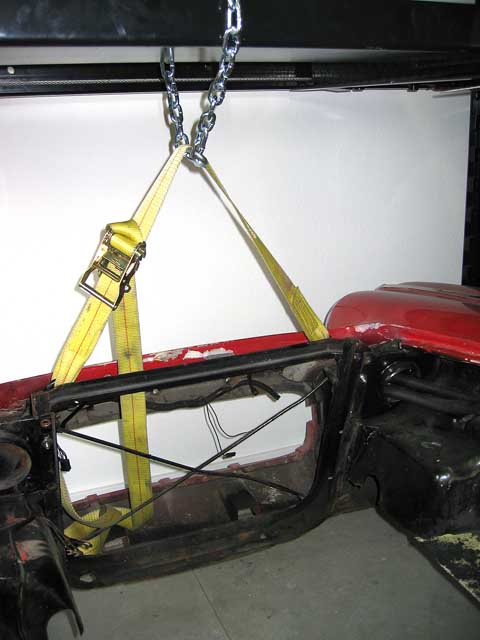
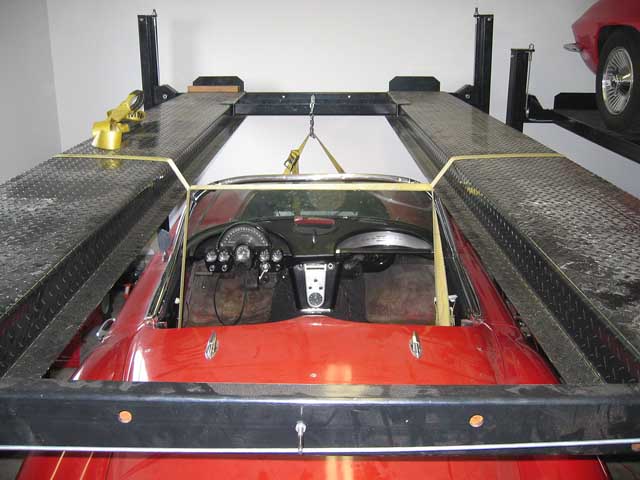
I changed the way I lifted the car this time. I used equal lift strap lengths and attached them to the seat belt points. I also put the radiator frame back in the car and bolted that in. After doing that I attached a couple of hooks with a lift strap and lifted on the radiator frame. No problem, it worked great and the car was equally balanced front to rear as well as left to right.

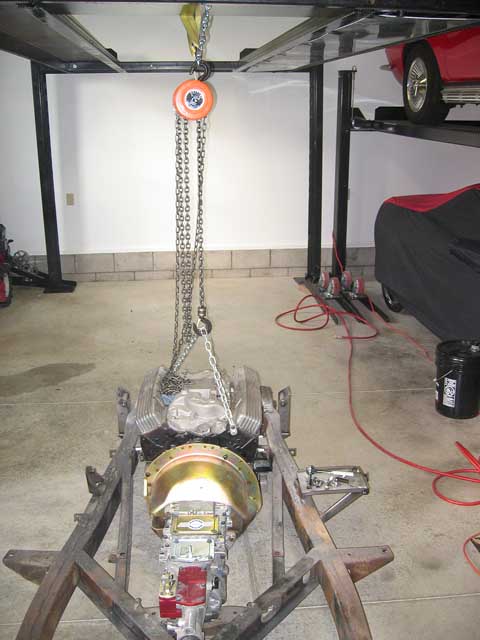
Pulled the body back off, and then proceeded with removing the engine, bell housing and Tremec TKO600. No big deal, used my chain hoist and she lifted right out. I sold the motor mounts including those pieces that are attached to the frame to another Corvette owner. I need to make some templates of where everything goes so that they can get them welded in the right location.

Tomorrow I plan to get the rear end off the frame and get everything ready for final welding. I have decided to take the battery tray off (anyone need a "like new" battery tray?, only reason like new is that it was welded on, but other than that never had a battery in the tray).

I have photos and will add them in when I get home....right now I am at the hospital with Sharon....found a computer so I could keep busy while she does her work....when she is done, then we can scoot.....check back later...more photos to be posted....

Herb
 
ok...lots of photos now.....

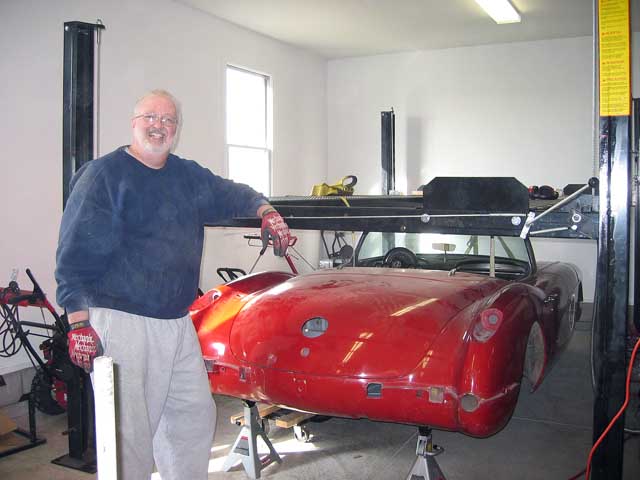
lets start out with the body lift first...I put the radiator support back in, fastened it up with about 6 bolts. I attached my straps to the seat belt anchors and over the ramps of the four post lift. for the front, I attached the strap to the radiator support and used my lift center jack support with a chain around it to grab on there.

I tightened up both straps with the ratchet and up she went off the body dolly....

IMG_5062s-vi.jpg


IMG_5063s-vi.jpg


IMG_5065s-vi.jpg


IMG_5066s-vi.jpg


First, I have to tell you I am really impressed with the Classic Chevy 5 Speed Tremce TKO600......wow that fit nicey....with the 1310 yoke there was a ton of clearance in the drive shaft tunnel, I had cut the bottom of the ash tray out as that is what you are supposed to do because the tranny is supposed to hit it...it looked to me that I probably could have gotten away without cutting it. I know some people talked about having the sagging tunnel problem, allI can say is when I looked under the frame, I sure didn't see any of that.....

IMG_5104s-vi.jpg


IMG_5068s-vi.jpg


IMG_5093s-vi.jpg

the white dust is from when I cut the front fiberglass around the front suspension and white dust was everywhere....even found its way underneath to the drive shaft....

IMG_5095s-vi.jpg


Classic Chevy suggests lowering the tranny mount 3/8" to provide more clearance around the tunnel, the mount is lowered 3/8"....as I get this back together after all final setting are in place, I will want to come back and double check the clearance in this area where the knuckle on the driveshaft and the X frame are close, not touching, but close....

IMG_5096s-vi.jpg

perhaps I will only lower it 1/4" - 1/8"

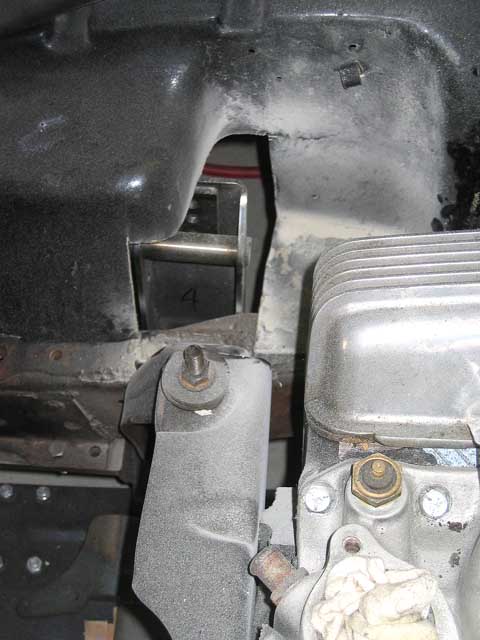
I mentioned I had to cut the front fiberglass for clearance to the inner fender area. I had to do a rough cut because I couldn't see exactly where everything was going to come together, once the front end is all together, I will have a better idea of what needs to be trimmed up....grrr...I don't like the thought of fiberglass dust going everywhere, because when I check it next time the frame will have been painted as well as every part on the frame, I suppose that is why they made hoses and sprayers...

IMG_5076s-vi.jpg

in the photo above, the fibergalss sat on top of the upper mount location....not by much, perhaps 1/16" or so.

IMG_5077s-vi.jpg


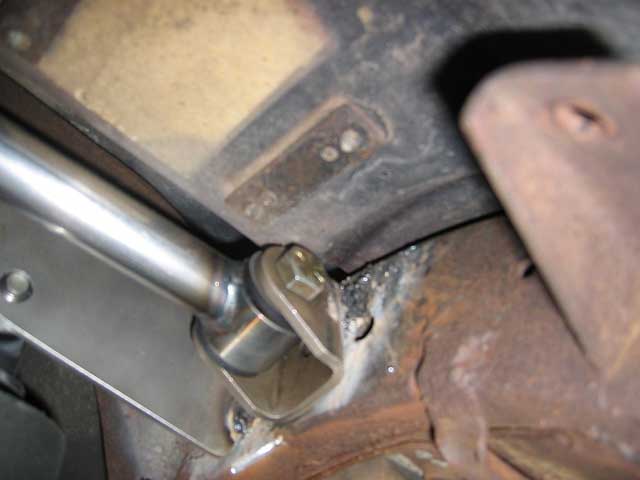
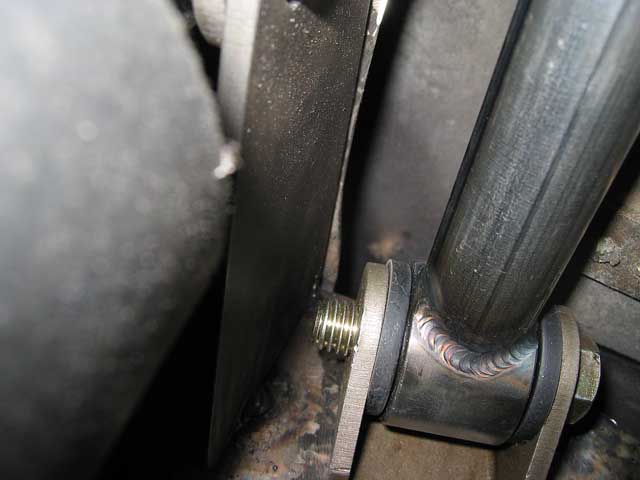
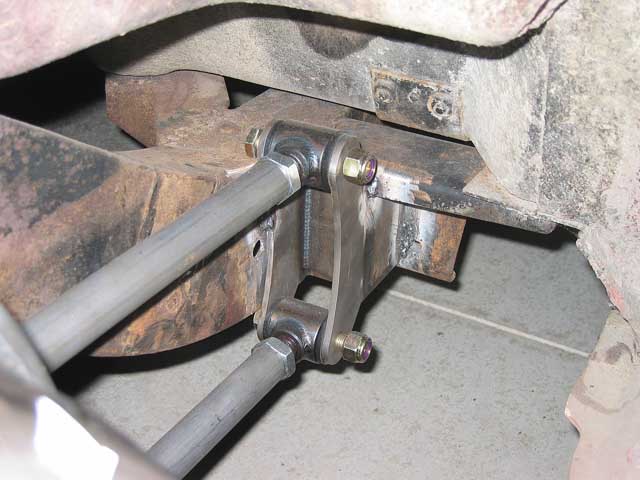
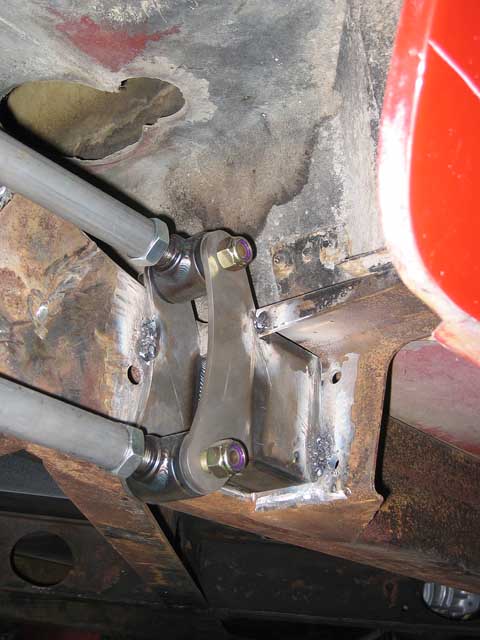
I got my panhard bracket tacked in (I am a terrible welder, of course it doesn't help that I have a $50 welder that doesn't have any power, Sharon found that the local adult education center had welding classes....if I do much more of this, I need to go).
IMG_5097s-vi.jpg
+

IMG_5098s-vi.jpg

in the photo above, there is just enough room to insert the nut that goes on the end of the bolt that retains the panhard bar in place. All of these pieces need welding and then powder coating....

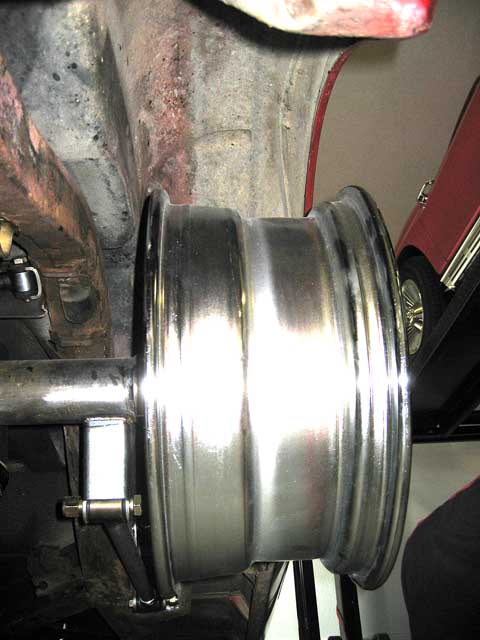
I wanted to make sure that the wheels stayed underneath the wheelwells....so I put the disc brake in place and put the Cragar wheel on, it is an 8" wheel with a 3.5" back spacing to give more of a dish look to it...
IMG_5107s-vi.jpg


IMG_5106s-vi.jpg


IMG_5105s-vi.jpg

can't even see the rim in this shot.....now for tires....I need to make sure that whatever size I get also stays within the wheel well.....oh, forgot, the wheels are 17" diameter.....

IMG_5112s-vi.jpg


IMG_5111s-vi.jpg


again, looking down the side of the car, the wheel doesn't protrude at all....


IMG_5108s-vi.jpg


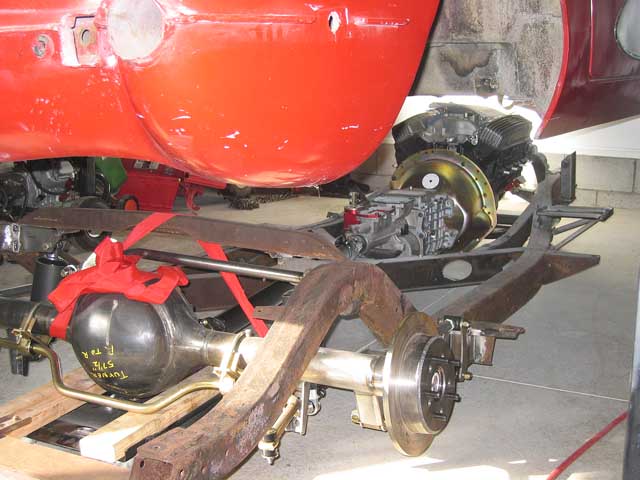
I had the suspension "loaded", meaning I took the normal running height of the springs and took them out and substituted tubes that were cut to the right length. Then because there wasn't any real load ont he car, I took a ratchet strap and wrapped it around the axles and the upper cross memeber, that made sure that as I moved things around and attached things, that the height would be approximately right. If you look at the photo below in the FAR left, you can see the black tube that was cut to the right height, approximately 7.5", which with the compressed spring, 10" free height meant that both springs at this height would be exerting 1250 pounds, that is in the ball park.
IMG_5129s-vi.jpg


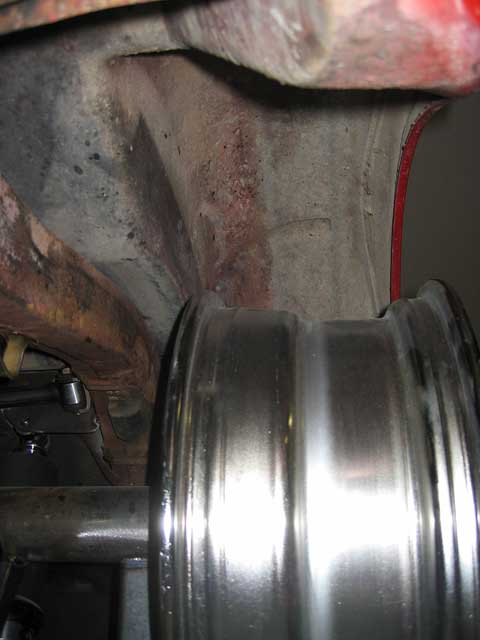
looking in the wheel well, to see how much clearance there was arounf the tire, nothing stuck out to me....but I think the real test will be to sort through the tires and understand how much "bulge" I will get from each size of tire that might be used....
IMG_5114s-vi.jpg


I could have gone with wider tires and narrowed the rear even further, but I didn't want to tub the car and take out the soft top...I know I will be somewhere at sometime and the heavens will open up, while the cars are not known for being all that good anyways for staying leakfree in a down pour, I don't want to take any chances...so no tub...
IMG_5117s-vi.jpg


IMG_5118s-vi.jpg


IMG_5119s-vi.jpg

you can see in the photo above my red strap to keep everything snugged up and the black tub I mentioned earlier that was precut to 7.5"....

There was some question earlier of clearance where the front link bracket attached, no problems as you can see in the two photos below...
IMG_5122s-vi.jpg


IMG_5121s-vi.jpg


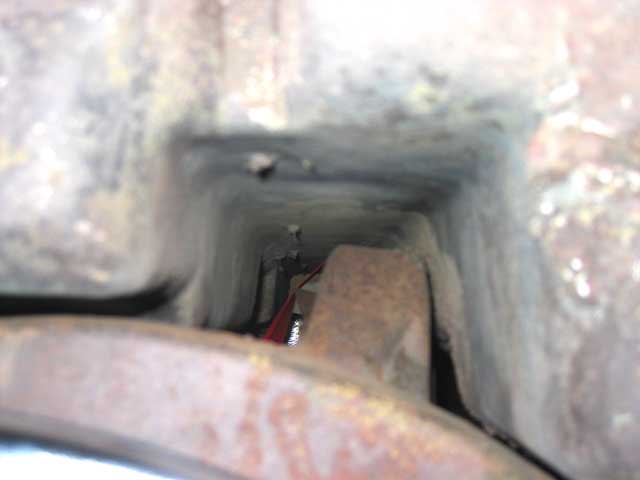
you have to love digital cameras, they get in places that my head is too big to get, never mind be able to see....this is looking across the top of the cross memeber, appears that I have the car slightly too far forward, I noticed that when I pulled the body back off this area of the cross member had grim and dirt on it from the car body....
IMG_5124s-vi.jpg


And so, after everything was checked out....the body was removed once again....my advice for anyone wanting to do a body lift this way, particularly if you don't have the taller unit, remove the windshield, then you have plenty of room to lift and drop between the lift ramps and the top of the windshield....
IMG_5125s-vi.jpg


Body back off and on the dolly, time for the motor to come back off as well as stripping everything else off the frame to get ready to take over for final welding....
IMG_5133s-vi.jpg


IMG_5135s-vi.jpg

so as I write this, the motor is out and back in its cradle....the tranny and bell housing are apart....and I need to get back out there and get the rest of the parts off the frame as well get the rear coilover shocks put back together and return my spring compressor back to Advance Auto Parts....stay tuned...more to come....nothing next weekend as I will be out of town again.....
 
You do awesome work! Keep us posted, I'm staying tuned for this project for sure! :beer
 
groovyjay said:
You do awesome work! Keep us posted, I'm staying tuned for this project for sure! :beer
just remember, the motor hasn't started and the clutch hasn't been engaged and the hammer dropped yet....if that all goes as planned....then for sure :beer , until then.....head down and keep plowing ahead...
 
firstgear said:
just remember, the motor hasn't started and the clutch hasn't been engaged and the hammer dropped yet....if that all goes as planned....then for sure :beer , until then.....head down and keep plowing ahead...

That's the spirit, but in all honesty you've done some amazing stuff there already!:_rock
 
everything is stripped off the frame except those items needing to be welded....I am a mad man with my die grinder.....took off all the "extra" brackets (hoping I didn't take any off I need later)......full speed ahead!!!!
 
Every thing looks great Herb.

Just remember when you re-set the body that you have to center it side to side and front to back, other wise it can hang over sighty to one side.

Now for the bad part

You have to build the entire car car in your mind now to see if your missing any brackets that may need to be welded on the frame. Once its power coated its a major problem.

Good Luck with it

After I had put on every bracket I could every need and had my frame painted I realized my motor was too far foward and had to redo my motor mounts.for an extra 3/8's of an inch clearance for the March perfomance pulley set up.

I dont know if I missed it or not but how did you do with the steering column and the rack match up,I had to add an extra mount to mine to support the steering knuckles
 
thats why you just have to love this place. no matter what you are doing, even something custom, there has already been someone there ahead of you to "watch your back" and make sure you don't forget something important :beer
 
IH2LOSE said:
You have to build the entire car car in your mind now to see if your missing any brackets that may need to be welded on the frame. Once its power coated its a major problem.

Good Luck with it

After I had put on every bracket I could every need and had my frame painted I realized my motor was too far foward and had to redo my motor mounts.for an extra 3/8's of an inch clearance for the March perfomance pulley set up.

I dont know if I missed it or not but how did you do with the steering column and the rack match up,I had to add an extra mount to mine to support the steering knuckles

brackets I need to add, depneding on what it is, I have decided that I will try to bolt them on first, if I can, if not....sigh....it is what it is....

the steering set up is supposed to be good....I believe that there might be a bracket I have to add....again, if so....it is what it is....that is what touch up paint is for.....
 
BarryK said:
thats why you just have to love this place. no matter what you are doing, even something custom, there has already been someone there ahead of you to "watch your back" and make sure you don't forget something important :beer
and I do appreciate everyone watching my back.....Sharon keeps asking me how do I know what I am doing? I keep telling her this is like an engineering project...plan plan plan....and when it comes time to do, then you do what you can and ask for lots of help.....and I do ask for help!

Just putting the pieces in place was easy, when it comes time for the final assy, when it has to be right and torqued properly, etc that will take a lot more time and thought.....next time it goes together, it won't go togehter as fast.....
 
Herb you may want to put it back together now and take care of the steering column as power coating is different then painting. I dont think you can touch up power coating.I always thought it bonded to itself.
The time you spend now, saves you days later on. I am all for moving a project along but the time spent in this phase pay off ten fold later on.
 
Herb
I haver to agree with Larry.
Everyone knows I don't know anything about building cars, but it's always worth spendinng the extra time to do it right from the start rather than having to go make and try to make corrections later on which will end up causing you more problems and additional time in the long run. Not to mention you really don't want to risk messing up a nice powdercoat job because you got impatient now.
Even on the small projects on my car I've had to go back and redo things over again becuase i started rushing out of impatience to get everything put back together.
in fact, I just had to take apart the exhaust again for the THIRD time because of that reason and i'm running out to an exhaust shop now to have them redo my exhaust starter collors. If I had done it right the FIRST time I wouldn't have had to redo it twice after that. Crap like that gets frustrating and imagine the cussing you will be doing if you need to try to weld onto your beautiful newly powdercoated frame!
 
Herb...looks like things are comming along very well. However it looks like the wheels are very close in the pics. Most tires stick out farther than the rims. Looks like it's time to be sure the rubber will clear too. I know you mentioned that when you mount a tire the wheel can't be returned.....so I think I would mount one at least. Then if you had a problem you would only have to eat just one. Even then it wouldn't be a total loss on e-bay etc.. It'll be a real problem it every thing is welded up and then you find a clearance issue. The cost of the rim will be cheap insurance now.
 
IH2LOSE said:
Herb you may want to put it back together now and take care of the steering column as power coating is different then painting. I dont think you can touch up power coating.I always thought it bonded to itself.

The time you spend now, saves you days later on. I am all for moving a project along but the time spent in this phase pay off ten fold later on.
I checked the instructions again, there is a pivot plate that needs to be attached to the frame, however the plate, called a "support bearing bracket bolts on to the outside of the frame where the original steering box bolted". If I had to touch up powder coating (we do it all the time at work) we call out for our parts to be powder coated, but if they get nicked in transit, then a can of touch up spray works wonders.

I had also done a survey of a number of people that put the Myers front end in their cars and all of them reported that the only welding required on the front end was the two tabs that secure the A-Arm column at the top to the frame. Other than that, everything else is fit and bolt......

So that is my plan for now.......
 
Stan's Customs said:
Herb...looks like things are comming along very well. However it looks like the wheels are very close in the pics. Most tires stick out farther than the rims. Looks like it's time to be sure the rubber will clear too. I know you mentioned that when you mount a tire the wheel can't be returned.....so I think I would mount one at least. Then if you had a problem you would only have to eat just one. Even then it wouldn't be a total loss on e-bay etc.. It'll be a real problem it every thing is welded up and then you find a clearance issue. The cost of the rim will be cheap insurance now.
that was and still is my concern.....worse come to worse, I could go with the 7 inch wheels on the rear (going with 7 inch on the front) with a 3.5" offset, which means it is in the middle of the wheel......if I go with the 7 inch wheel on the rear, that gives me about 1" distance from the wheel well opening than with the 8".......I think for sure when I get it back, that I need to fit up the rear and put both axles in, get everything that might cause the wheel flange to move outboard, make sure the rear end is centered on both sides with the panhard rod and then see where I am.....I think you are right, if it is close I might as well mount at least one tire up on a wheel and see whereI am on both sides......I really don't like it when the tires stick out the side.....might also mean that I have to talk with Myers about the wheel fitment and if it is too objectionable perhaps it means I send ti beack for adjustment....I have time, I have an entire body to worry about yet.....but I do want to try and get the rolling chasssis done this summer, that is still a good possibility.....
 
I don't care for the rubber being outside the wheel well either...they rub when you hit a dip etc. Sounds like you've thought it through for most any contingency. To tell you the truth I'm not sure that the 7" rim wouldn't be perfect for all the tire you have room for anyway...sooo it may be just right already.

.....either way... there is some advantage to having all 4 corners alike, should that be what you need to do in the end. No way to know without mounting up though....

Good luck ...Stan
 
Stan's Customs said:
I don't care for the rubber being outside the wheel well either...they rub when you hit a dip etc. Sounds like you've thought it through for most any contingency. To tell you the truth I'm not sure that the 7" rim wouldn't be perfect for all the tire you have room for anyway...sooo it may be just right already.

.....either way... there is some advantage to having all 4 corners alike, should that be what you need to do in the end. No way to know without mounting up though....

Good luck ...Stan
thanks for the thoughts....there are things I know to check and with everyone's help on here I will hopefully cover them....thanks!!!

Herb
 
dropped off the frame this morning at my friendly fabricator.....since I am tied up with other things this weekend, I told them no hurry....next Tuesday would be fine....they will fix me up no problem.....including adding some additional meat in the motor mount area....these are good people and I appreciate the help they are giving me.....
 

Corvette Forums

Not a member of the Corvette Action Center?  Join now!  It's free!

Help support the Corvette Action Center!

Supporting Vendors

Dealers:

MacMulkin Chevrolet - The Second Largest Corvette Dealer in the Country!

Advertise with the Corvette Action Center!

Double Your Chances!

Our Partners

Back
Top Bottom