Welcome to the Corvette Forums at the Corvette Action Center!

fine 59 update

jose

Well-known member
Joined
Jan 26, 2001
Messages
102
Location
Adelaide South Australia
Corvette
onefine59
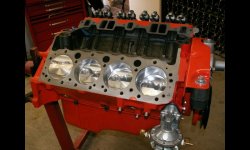
Well had issues for my block numbers not sure now what they were and sould be, cant find any more info from previous owner so have decided not to stamp the block and leave it blank.
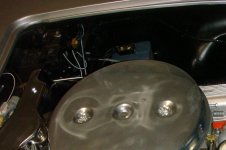
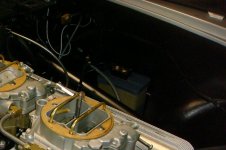
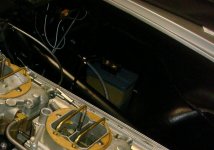
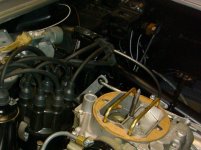
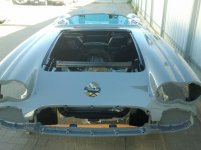
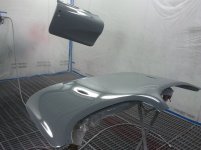
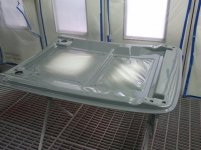
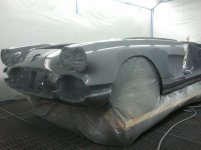
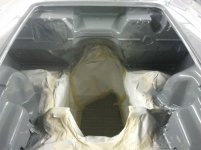
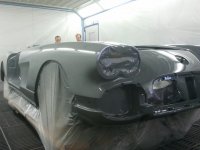
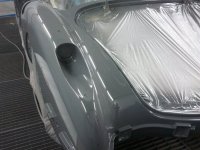
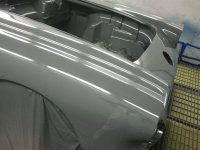
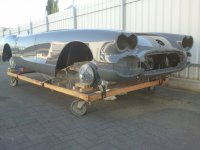
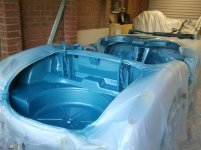
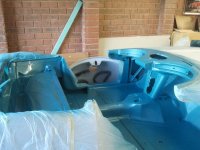
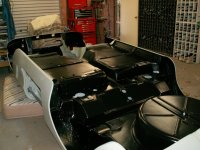
On another matter the trunk and cabin area have finally received 3 coats of Crown Saphire and 2 coats of clear and I must say after 11 years and a small fortune it was great to see some colour. I will post a couple of old photos plus a couple of the new ones for those interested.

Thanks Jose:happyanim:
 

Attachments

  • PICT1698.JPG
    PICT1698.JPG
    88.7 KB · Views: 96
  • 2012-07-14 17.03.31.jpg
    2012-07-14 17.03.31.jpg
    116.7 KB · Views: 104
  • 2012-07-14 17.03.44.jpg
    2012-07-14 17.03.44.jpg
    115.9 KB · Views: 98
  • fittinfg exhaust tubes.JPG
    fittinfg exhaust tubes.JPG
    74.7 KB · Views: 108
  • front fibreglassed on.JPG
    front fibreglassed on.JPG
    87.8 KB · Views: 102
  • IMG_0166.JPG
    IMG_0166.JPG
    100.3 KB · Views: 105
  • instrument cluster.jpg
    instrument cluster.jpg
    64.9 KB · Views: 106
  • PICT0399.JPG
    PICT0399.JPG
    75.5 KB · Views: 99
Looking good.
 
Any new progress reports?

Tom
 
fine 59 first paint

Hi tom
This weekend the body is receiving a couple of coats of 2 pack grey in colour just to seal the undercoat and reduce shrinkage, the engine bay will be in satin black ,:)
This will give me time to put my running gear in and fire the thing up before its painted the original crown saphire.
I will post pictures asap when the body is coated very exciting for me its taken 11 years to get to this stage very excited

Stll looking for engine bay lay out as in regulator position and washer bottle can anyone help:happyanim:

Thank you Jose
 
Last edited:
Looking great! It's cool when things come together... :)

-Mac
 
Hope these photos help with your voltage regulator placement. :w

Roger
 

Attachments

  • 1P1020130.jpg
    1P1020130.jpg
    118.4 KB · Views: 75
  • 1P1020131.jpg
    1P1020131.jpg
    117.6 KB · Views: 86
  • 1P1020133.jpg
    1P1020133.jpg
    119.2 KB · Views: 78
  • 1P1020135.jpg
    1P1020135.jpg
    119.1 KB · Views: 81
  • 1P1020137.jpg
    1P1020137.jpg
    118.6 KB · Views: 80
  • 1P1020139.jpg
    1P1020139.jpg
    118.9 KB · Views: 77
  • 1P1020193.jpg
    1P1020193.jpg
    117.6 KB · Views: 84
  • 1P1020194.jpg
    1P1020194.jpg
    119 KB · Views: 83
These are photos from my 59 that I no longer own.
It should be correct information as it received an NCRS 98.6 score.
 
fine 59

[Thanks for that Roger you cant imagine how long its taken me to get info on such simple things and no one seem to be able to help till now.The windscreen wiper vac bottle bolts to one of the splash shields do you remember if the water bottle was bolted to the wheel arch on the flat section near the vac bottle and I assume the same side. These new inner wheel arches have no location holes for anything.

Many thanks Jose
 
Jose - this is the best I can do to help with placement.
Maybe someone else has better photos and or measurements.
Roger :w
 

Attachments

  • 1.jpg
    1.jpg
    78 KB · Views: 85
  • 2.gif
    2.gif
    25.7 KB · Views: 80
  • 1959 C1 081.jpg
    1959 C1 081.jpg
    119.4 KB · Views: 78
  • DSC08324.jpg
    DSC08324.jpg
    120.3 KB · Views: 85
  • DSC08326.jpg
    DSC08326.jpg
    118.8 KB · Views: 77
  • DSC08327.jpg
    DSC08327.jpg
    120.1 KB · Views: 82
  • DSC08328.jpg
    DSC08328.jpg
    119.3 KB · Views: 82
  • DSC08329.jpg
    DSC08329.jpg
    120.3 KB · Views: 77
fine 59 grey base coat and engine bay

The body has been coated with 2 pack, grey in colour to seal the undercoat and to reduce shrinkage when the top coat gets sprayed, the engine bay is finished in Satin black and now I will put all the running gear in and fire the motor up before it goes back for Crown Saphire that will be its final colour
Here are some picks taken today :)
 

Attachments

  • 2012-10-02 16.30.05.jpg
    2012-10-02 16.30.05.jpg
    117.1 KB · Views: 77
  • 2012-09-29 11.13.28.jpg
    2012-09-29 11.13.28.jpg
    117.5 KB · Views: 77
  • 2012-09-29 11.13.37.jpg
    2012-09-29 11.13.37.jpg
    117.2 KB · Views: 69
  • 2012-09-29 11.17.05.jpg
    2012-09-29 11.17.05.jpg
    114 KB · Views: 68
  • 2012-09-29 11.17.23.jpg
    2012-09-29 11.17.23.jpg
    112.6 KB · Views: 70
  • 2012-09-29 11.17.35.jpg
    2012-09-29 11.17.35.jpg
    114.8 KB · Views: 78
  • 2012-09-29 11.18.17.jpg
    2012-09-29 11.18.17.jpg
    119.1 KB · Views: 70
  • 2012-10-01 08.09.42.jpg
    2012-10-01 08.09.42.jpg
    116.1 KB · Views: 73
Does that sealer have to be sanded before the color coat?
 
fine 59 sealer

Remember that is a 2 pack top coat solid colour for any production car this will need sanding first with 600 grit then finer for the 2 coats of colour and 3 coats of clear followed with a cut and polish to flatten off the paint should look great.
there is already a little shrinkage in the paint very hard to see but this is the reason why this car will be painted twice, it has to be
purfect
 

Attachments

  • 2012-10-02 16.29.22.jpg
    2012-10-02 16.29.22.jpg
    118.4 KB · Views: 67
Last edited:

Corvette Forums

Not a member of the Corvette Action Center?  Join now!  It's free!

Help support the Corvette Action Center!

Supporting Vendors

Dealers:

MacMulkin Chevrolet - The Second Largest Corvette Dealer in the Country!

Advertise with the Corvette Action Center!

Double Your Chances!

Our Partners

Back
Top Bottom