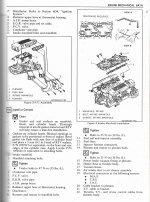
My son and I are in the process of replacing the intake gasket on his 1991 Corvette with the L98 engine. Since the car has 100k miles we have also removed and cleaned the radiator and are replacing the thermostat, EGR valve and valve cover gaskets. We are also refinishing the valve covers. My questions are:
1. What kind of thread locker to use on the intake and plenum bolts?
2. Do I need a sealant around the water ports and if so what kind?
3. Do I need a sealant on the bolts next to the water ports and if so what kind? Also, do I put thread locker and sealant?
4. What is the proper sequence of torquing the intake bolts? Some have suggested not torquing them all the way to 45 ft lbs for fear of bolt failure but that does not seem like a lot of torque to me.
5. When we took the injectors out (Bosch III) we lost one of the little plastic spacers under the o-ring. I saw where some people just put two o-rings instead. Is this ok or should I try to source the spacer? I think I bought the injectors from someone named John that I saw on here about 5 years ago.
6. What is the correct color for the valve covers? I have seen conflicting information. It seems like the early C4s were some sort of nickel color but these definitely looked bronze and it did not appear to be discoloration. Are there any sources for the textured paint with the correct color?
7. Is there anything else we should replace or do while everything is off?
Thanks in advance!


