Welcome to the Corvette Forums at the Corvette Action Center!

Pitted aluminum wheels

Bluemill

Well-known member
Joined
Jul 20, 2005
Messages
107
Location
Scituate, MA
Corvette
2000 Navy targa
Well on my second to last day of vacation I got enough of the "Honey do" list done to to do some detailing on the Vette. I thought that the aparent tar build up on the inside of my wheels should be taken off. To my horror I find it's aluminum corrosion, like rust pitting, but they look like black spots like tar.

Short of machining my wheels is there anyhting I can do on my own to improve matters?

Thanks,
Bluemill
 
Bluemill,

Unfortunately, that seems to be a common problem with the C5's. It's probably compounded by the brake dust sitting on the wheels. I always try to wipe down the inside of the wheels after a drive.

I don't have any solution for you, but I'd like to welcome you to the Corvette Action Center. I'm also from the South Shore...Weymouth!:)

Elaine
 
Can't this pitting be buffed out somehow? Maybe sandpaper to start and ending with a super smooth grade?;shrug
 
wheel pitting

Can't this pitting be buffed out somehow? Maybe sandpaper to start and ending with a super smooth grade?;shrug
Had the same problem on one of my chrome wheels. I removed the wheel, sanded it by hand with coarse emery paper, followed by medium emery paper. I washed it, dried it, then masked off the outer part of the wheel. I then used a spray primer or paint adhesive, let it dry, then sprayed a medium gray Duplicolor paint...It came out pretty well except I think I'll use the silver color paint this weekend to give it a little more luster. Get some mineral spirits to clean up any overspray. Got all the products at Pep Boys..Good luck
 
Had the same problem on one of my chrome wheels. I removed the wheel, sanded it by hand with coarse emery paper, followed by medium emery paper. I washed it, dried it, then masked off the outer part of the wheel. I then used a spray primer or paint adhesive, let it dry, then sprayed a medium gray Duplicolor paint...It came out pretty well except I think I'll use the silver color paint this weekend to give it a little more luster. Get some mineral spirits to clean up any overspray. Got all the products at Pep Boys..Good luck !!!!
 
don't know much about the chrome wheels but I heard if you sand paper it out there are two problems, one is the finish will be lost so it won't be protected and the other is scrapping away the polished layer will leave an unpolished layer. I'm sure there are solutions to both these problems but just be aware before you start sanding
 
As I am sure you are aware the Aluminum Wheels (thin Spoke opition 2000 and 2001) were clear coated after they were hand polished in Mexico. Too
much hasle for our GM boys so they ended up using Chrome. Anyway. Strip
the clear. NAPA cars an aluminum cleaner that is to die for. Come back with your own clear. If you have nicks, etc in the outer rim there is also a place in Dallas that will do it all. Weld it back, and clear it. $100 a wheel. Recently had this done to a set I picked up for my 98 Triple Black.
Tight wad
 
Pitted aluminum wheels.

Dear TW,

The NAPA aluminum cleaner, how well do you think it will do on the pitting? Thanks for the idea.

Bluemill
 
Dear TW,

The NAPA aluminum cleaner, how well do you think it will do on the pitting? Thanks for the idea.

Bluemill

Bluemill,
Sorry I'm so slow coming around. Death in the family.
Aluminum cleaner only. I would not use it on the clear. If you think about
what their original purpose was, i.e. to protect the wheel, the clear wasn't
such a bad idea. I have had regular wheels with no clear. "Never Dull"
until I was about to stoke out. That is when I went to the NAPA boys.
TW
 
Chevrolet replaced mine

I have a 2002 with the polished aluminum 5 spoke wheels that were factory clearcoated. After about twenty thousand miles, I noticed that there were large, patchy areas that were darker than the surrounding. After careful cleaning you could see that the clear coat was degrading & peeling off of the inside surfaces of the wheels.

Went to my purchasing dealer to show them. They had no idea what was going on. They asked about what chemicals I used to clean my wheels-did I use a wire brush-did I live on a gravel road? They even said that these weren't the original wheels. I could see that this was going nowhere.

To make a very long story shorter, I contacted the Zone service rep, Chevrolet Zone Manager, Corvette Action Center (see post "Polished Wheels Peeling" on 5/6/05). All to no avail. When I asked a Chev. Zone man what could I do, he said "not even God could help me at this point."

So I persisted. Then Chevrolet Customer Assistance got tired of me and suggested that I contact the "Better Business Bureau Auto Line" to join in binding arbitration. Once I contacted them and got all of my correspondence and documentation together, including names and titles, phone numbers of all contacts, copies of some pertinent Corvette Action Center forums, repair orders, copy of factory window sticker and purchase order, and a time line of all my attempts, Chevrolet Zone office got very interested.

Long story short---Chev sent a different rep down to see my car and authorized replacement of all four wheels immediately. Dealer ordered wheels and installed them. I am now happy. You have to be extremely persistent and have great documentation of your actions. But if they are wrong---they will come around.

Paul
 
I might have been wrong

Dear TW,

The NAPA aluminum cleaner, how well do you think it will do on the pitting? Thanks for the idea.

Bluemill

Bluemill,
that's about as much of an admission that you will get out of this engineer.
Old factory rep for Chevrolet out of Memphis Zone.
I don't believe the cleaner will remove the clear the more I think about it.
The NAPA CLEANER that is. Once you have the black gone you can go for
an aluminum polish because you know there isn't any more clear there.
The transition from no clear to clear should still be okay. Just a thought.
The same thing that will happen to any set after a number of miles and years.
tightwad
 
Cleaning up pitted rims:

Well on my second to last day of vacation I got enough of the "Honey do" list done to to do some detailing on the Vette. I thought that the aparent tar build up on the inside of my wheels should be taken off. To my horror I find it's aluminum corrosion, like rust pitting, but they look like black spots like tar.

Short of machining my wheels is there anyhting I can do on my own to improve matters?

Thanks,
Bluemill

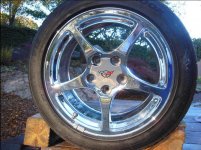
I purchased a 2004 Corvette with polished aluminum rims with the factory clearcoat. The barrels of the rims were a complete mess, pitted, corroded and filthy. There is hope. First, I removed the clearcoat from the rims because I didn't like the "milky" appearance of them, anyway. I used Klean-Strip Aircraft Peeler Clearcoat & Basecoat Remover - EFS459 purchased at Autozone. You can buy an aerosol can or a 1 quart can and apply it with a paintbrush. I would recommend buying the quart and brushing it on. It will save you money. WEAR GLOVES!! The grits on the sandpaper were so smooth, I didn't realize I was slowly sanding the skin off my fingers until they were Ready for grinding.jpgfront with clearcoat removed.jpgFinal result.jpgbleeding. Light cotton gloves worked fine. First, clean all the loose crap off the rim barrel(s). Then apply a coat of the clearcoat remover. This will remove any of the remaining clearcoat so you can get to the bare aluminum. REMEMBER: Once you remove the clearcoat, you will have to polish and wax the rims and barrels to keep them nice. This is a no-brainer to me. For a fairly small investment of time, your rims will look much better than even brand new stock clearcoated rims. Once the clearcoat sets for about 15 minutes, hose it off. Here are the steps I used to turn my disgusting, pitted, filthy barrels back to a mirror-like finish: I bought a wire drill brush and put it on my drill. I bought a 4-inch drill brush at home Home Depot for about $5. I used the wire brush to grind away all the grim. [UPDATE: Be sure to use a wire brush that is not too aggressive (fine bristles). If it's too aggressive, the wire brush marks will be MUCH harder to wet sand out. It still can be done, just LOTS and LOTS more elbow grease. Again, the best method is to start out less aggressively and work your way up until you see the corrosion disappearing. All rims will vary depending on the amount of neglect, so you may be able to jump in at a finer grit and save time.] Take a piece of tape and wrap it around one of the spokes of the mag so you don't do the same area twice. Trust me, if you don't do this, you'll lose your place. Do a small area (approximately 2 inches X 2 inches) at a time, being sure to rinse the area frequently and keep it damp. This is a grueling process that took me over an hour of grinding on each rim. If you think you can get away with it, try using a lesser grit of sandpaper to start and work your way down to the more aggressive grits until you see the corrosion disappear. If your rims are like mine, you'll need the wire drill brush. BEAR IN MIND: If your rims are pitted, you will not be able to remove the pits. Do not despair, though, since they will become hardly noticeable unless you are examining them closely, and the mirror finish will make you smile. Once you finish cleaning all the corrision and black crap from the barrel, rinse well and then use 320 grit wet sandpaper. All these sandpaper grits can be bought at Autozone or probably any good auto store. If there is an area of your rim barrels that looks perfect, then leave them alone and only work on the corroded sections. I ended up doing every inch of my barrels. Wet the rim and take the 320 grit paper (by hand) and sand right-to-left about 100 times (yes, I counted), starting from the inside and working towards the back of the rim. After sanding the first sectioin, move out a little towards the back of the rim and said back-and-forth another 100 times. Repeat this until you have removed all the corrosion in that section of the barrel. If you are insane like me, you can do the outer lip. Then turn the wheel to the next section and repeat. Remember to keep rinsing every 10-15 seconds. You will see the water turning grey or black as you sand and remove the aluminum material. Once you have completed a circle around the entire rim, you are ready for the next grit. Each grit will take approximately 45 to do. This is a VERY labor-intensive job but if you set aside the time and just go for it, you will be happy you did. After the 320 grit, move up to 600 grit and repeat the process all the way around the barrel, rinsing frequently as you go. If you notice that you missed a spot, go back to the more aggressive grit and start over on that small area and work your way back to the grit you are currently working on. After 600 grit, move up to 1500 grit, then 2000 grit, then 3000 grit and finally 5000 grit. I've read that some guys stopped at 1500 grit and polished, but they they mention that you will see scratch marks. If you use all the grits I've mentioned, there will be NOTHING but a mirror-like finish with ZERO sanding marks. Yes, the pitting will remain, but the difference is striking. By the way, the 3000 and 5000 grits are actually a foam-like pad. All the sandpapers I used were made by 3M. Once you reach 2000, you can lessen the elbow grease and just let the paper do the work. Keep an eye out for any imperfections or scratches you've missed, and you can easily go back to the 320, 600, 1500, 2000, 3000 and 5000 to clean them up. Once you are ALL DONE sanding, grab some heavy-duty rubbing compound (any brand) and also a light-duty rubbing compound (any brand). First, apply the heavy duty compound just like you are waxing your car, and once you are done with the heavy duty, move up to the lighter duty compound and do the same. NOW you are ready for the polish. I used Mothers Mag and Aluminum Polish and Wheel polish. You don't need the Billet polish since our wheels are NOT billet and the billet polish is VERY expensive. Once you polish, use some type of year-round wax to finish the rim. There are many products you can use after the polish, and it's personal preference at this point. Now your barrels will look 99% better. The entire job took me approximately 6-7 hours per rim. As far as the small marks on the FRONT of your rims that are near where the spoke attaches to the outer rim, this is simply corrosion also. Again, spray the clearcoat remover all over the front of your rims. If you get any on the tires, simply clean it off. REMEMBER: Once you remove the clearcoat, you will need to polish and wax the rims a couple times a year, but the shine is amazing. When I rinsed off the clearcoat, my rims were like mirrors. Once you have the clearcoat removed from the front, you can take 1500 grit paper and work it into the corners where you probably have little black corrosion that look like small black dots. I was nervous when I did this, but with the 2000, 3000 and 5000 to follow, the mirror finish comes right back after you remove the black dots. I could not tell the sanded area from the factory polished aluminum. It may take about 15-30 minutes for each small area, but you WILL be able to remove the blemishes and make the rim look pristine. REMEMBER to keep rinsing as you sand. Then apply the two rubbing compounds as described earlier and follow up with the aluminum polish. I'm sure if you want, you can get them re-clearcoated somewhere, but after seeing how amazing my rims look, I would never. Hope this helps. I've attached photos. I just joined the forum today, so I hope I did it right. One last update: You will notice in the photo of the front that the center cap is still dull and clearcoated. I have since sprayed the clearcoat remover on it, and it now matches the shine of the rims with logo still intact and looking perfect.
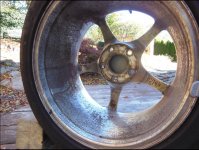
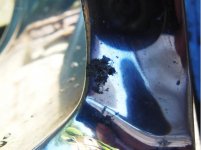
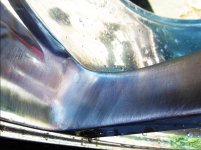
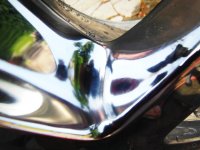
Some Forum members are inquiring about the black oxidation marks that show up on the front parts of the rims. Once the clearcoat breaks down, oxidation will soon follow. The most common oxidation appears as small (or large) black specks or dots, especially in the corners of the mag struts. These cannot be polished away - they must be sanded out. If you follow the same steps outlined above and remove the clearcoat from your rims (as I did) you will be able to remove the black pitting and completely restore a showroom mirror shine. I have attached photos of a nasty corrosion mark that I had on my wheel (about quarter size). Again, AFTER the clearcoat is removed, I used 100 grit sandpaper since this was really nasty area of corrosion. For the smaller specks, you can begin with 180 or 280 and move up through the grits from there - again, following the above steps. If you look closely, you can see hairline scratches on the rim. These were caused by scrubbing the rims with a nylon brush (my bad). These lines were also completely removed once I finished the sanding and polishing. Obviously I use a soft sponge to wash the rims now! Good luck.Corrosion before sanding.jpg#1 after 100 grit sanding.jpg#1 after final polish.jpg
 
Last edited:
Pitted Rims

Yes, I left the old weights on them and just cleaned around them. When I eventually replace the tires, I'll clean those sections. I might also add, that this is the second rim that I cleaned, and I didn't go nuts on the outer lip on this one, but the third one I did, I really cleaned them up nicely. I'm actually finishing the last of the four rims this weekend.
 
BTW - Welcome to the :CAC

:beer
I'll definitely look into the tape weights - thanks! I'll post before-and-after pics of my rear tire which I'll be doing this weekend, and the pic will show the center hubs all stripped and polished too. And thanks for the welcome! This is actually my second Corvette. When I was 18 years old, I bought a 1969 L-46 coupe (Daytona yellow) 4-speed for $3,500 (in 1974). Had to get rid of it within a year (sad) so 40 years later, I kept a promise to myself to get another Vette:). Another update: On the sanding process, I actually made 200 passes with the sandpaper grits for each section of the rim. There may be an easier way but I simply know that the way I did it produces stunning results. I considered REALLY grinding deep with the drill brush into the rims to remove the pitting but I didn't want to mess up the structure of the rim. It's possible that you can go deeper with no harm -- I just didn't want to take the chance.
 
I'll definitely look into the tape weights - thanks! I'll post before-and-after pics of my rear tire which I'll be doing this weekend, and the pic will show the center hubs all stripped and polished too. And thanks for the welcome! This is actually my second Corvette. When I was 18 years old, I bought a 1969 L-46 coupe (Daytona yellow) 4-speed for $3,500 (in 1974). Had to get rid of it within a year (sad) so 40 years later, I kept a promise to myself to get another Vette:). Another update: On the sanding process, I actually made 200 passes with the sandpaper grits for each section of the rim. There may be an easier way but I simply know that the way I did it produces stunning results. I considered REALLY grinding deep with the drill brush into the rims to remove the pitting but I didn't want to mess up the structure of the rim. It's possible that you can go deeper with no harm -- I just didn't want to take the chance.

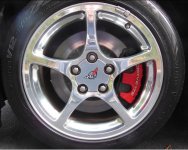
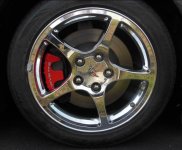
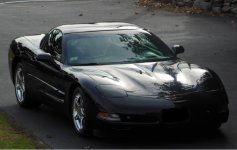
There's been some debate about clear coat versus no clear coat, so I thought I'd show a quick comparison. Recognizing that the non-clearcoated wheels will require more maintenance, it's up to you to decide whether the extra work is worth it. Being old school and fondly remembering (and loving) the chrome Cragar SS wheels, I lean towards a chrome look, so I love the "naked" wheels (as some refer to them). I also stuck a pic of my 2004 C-5 with the wheels after the clearcoat was removed.

Here are the pics.Rim clear.jpgRim without clear.jpgVette .jpg
 
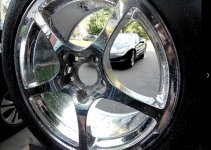
Did a little polishing and cleaning up of my rims this weekend. Thought I'd post a pic. I still have the wheel weights on the outside - new tires next spring and they will be removed (finally).

Here are the pics.Polished Aluminum Rim.jpg
 

Corvette Forums

Not a member of the Corvette Action Center?  Join now!  It's free!

Help support the Corvette Action Center!

Supporting Vendors

Dealers:

MacMulkin Chevrolet - The Second Largest Corvette Dealer in the Country!

Advertise with the Corvette Action Center!

Double Your Chances!

Our Partners

Back
Top Bottom