- Moderator
- #1
Toms007
Moderator
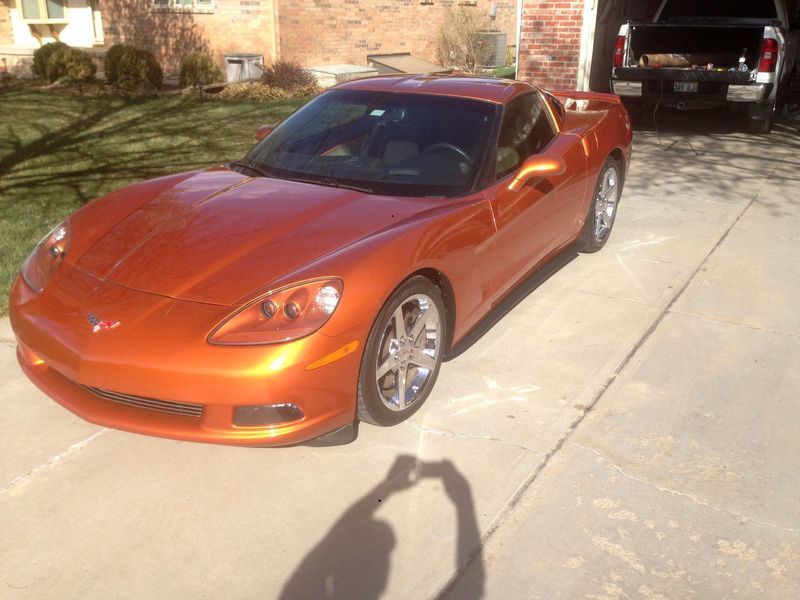
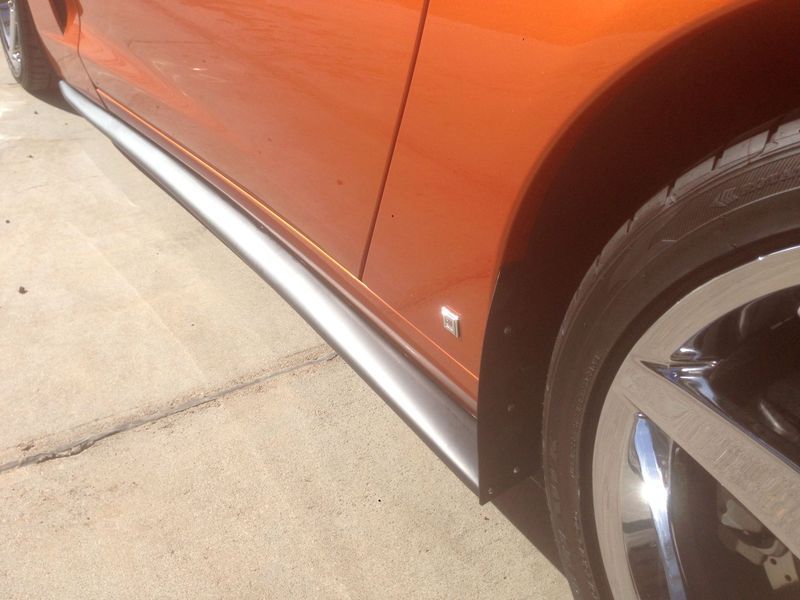
Well, I've been noticing on that "on-line auction" place, that there are several places offering the ZR1 style side skirts. Some are in fiberglass and some in ABS plastic. The fiberglass ones are a little bit cheaper, but I was concerned that the fiberglass ones might be a bit more ridgid, so I went with the ABS versions.
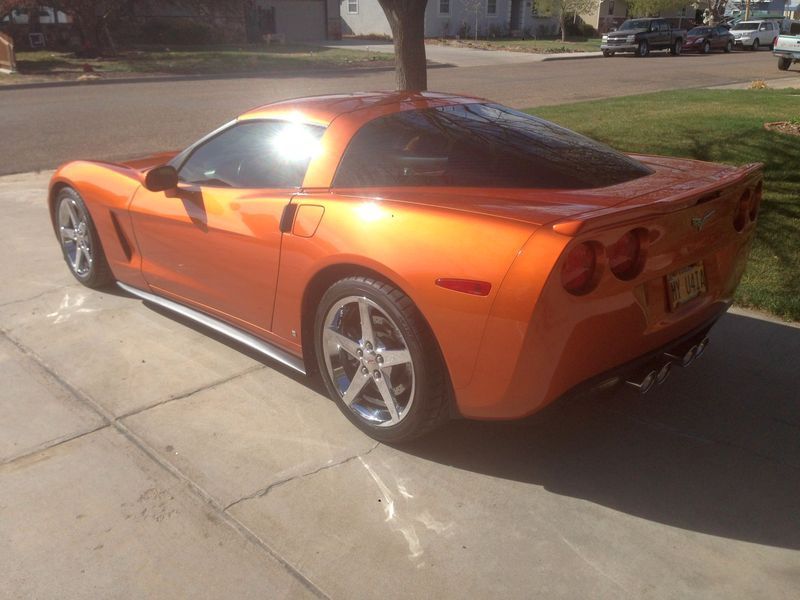
Some people will say, that they don't belong on the narrow body cars....here's my thinking and justification; I am noticing that the lower rockers are taking some heat from the rocks and debris kicked up by the front tires. My reasoning is that these 'skirts' will eliminate quite a bit of that damage. And I like the looks of them.
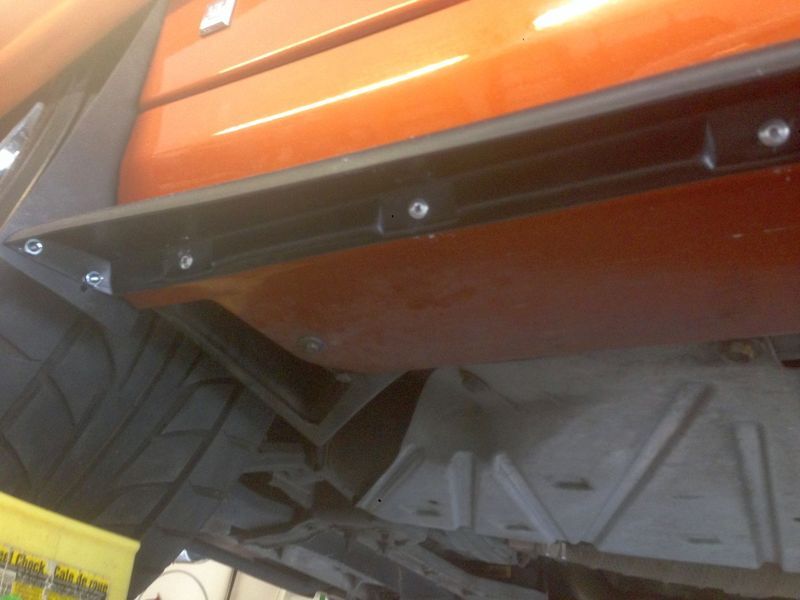
The ads say "no instructions or hardware included", so I was a little leery about what I would find when they arrived. What I found was, a very high quality product, but like they promised, no instructions and no hardware. The skirts were manufactured with multiple holes in them. I've heard some people have used "self tapping screws" to attach them. I decided to use aluminum pop rivets. Once I looked at the skirts, I figured out that 3/16" D x 1/2" L rivets would be tough enough to hold them .
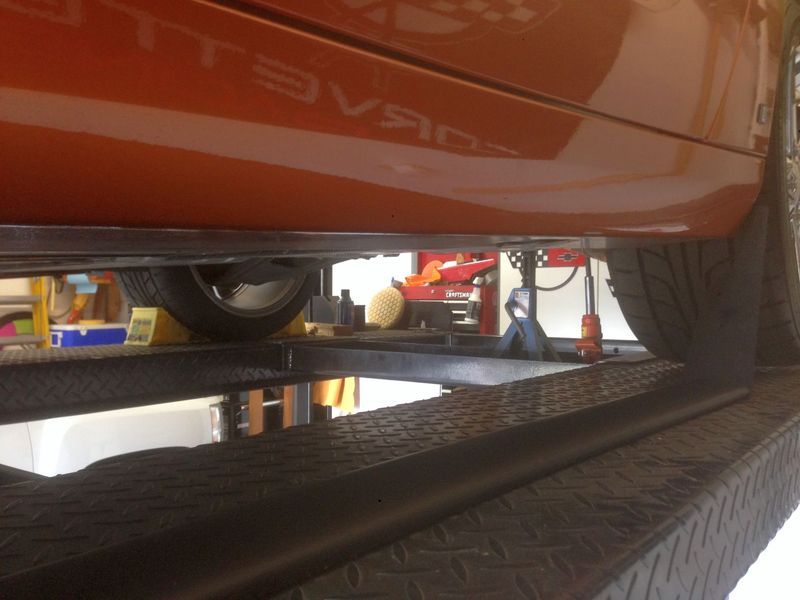
If you are the least bit squeamish about drilling holes into your car, this project probably is NOT for you. I found some rivets at the local parts store and some stainless steel #8 x 1/2" machine screws and nuts used to attach the rear supports to the back of the skirts. The skirts also use two existing screws in the body panels. In order to get to two of them the, rear wheels/tires have to be removed. So I jacked up the rear and put jack stands under it as well.
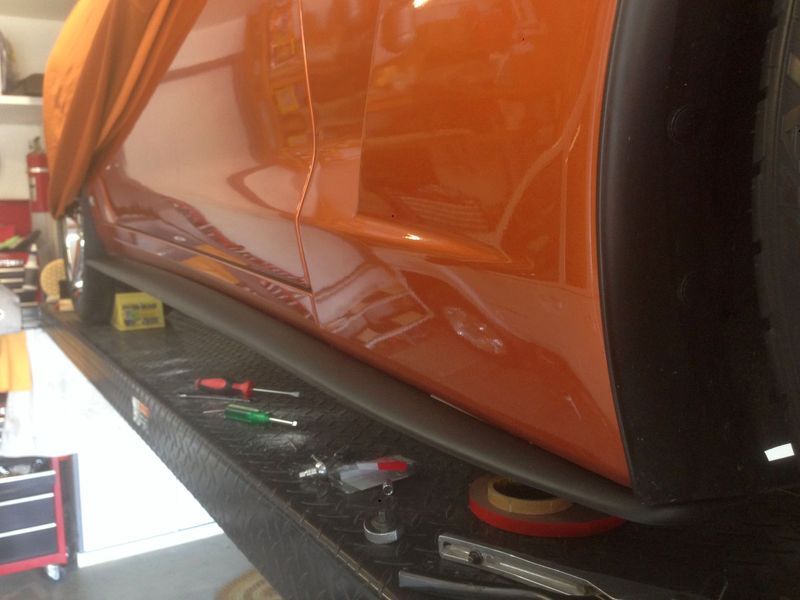
I pulled the existing screw out and loosely reinstalled them with the rear bracket attached. I also used one of the machine screws to loosely attach the bracket and rear of the skirt. I then took the existing screw out at the front and loosely attached the front of the skirt. With things loosely in place, I was able to figure out how and where the skirt needs to sit. I held it in place while I drilled the first 3/16" hole for a rivet. I stuck it in place and then snugged up the existing screws and installed the first rivet. Then spacing out the holes and installing the rest if the rivets.
After I got all the rivets installed on the under side, I went to the wheelwell and drilled a couple holes through the brace into the body to add support to the one existing screw. I took the machine screws out and put a little thread locker on the threads and put them back in, tightening them down.
While they were off I cleaned the wheel barrels and the inside tire wall. After letting the rear down I moved the jack to the front and raised it up some so I could get to the last two holes (on each side) to put rivets in the front of the skirt. I used 15 rivets on each side, a total of 30, and 4 stainless machine screws.
I really like the looks of the skirts, but a concern in putting them on was 'would I be able to get out of my driveway' with them on. So the first thing I did once they were installed, I slowly pulled out toward the street and when I came to the spot where I was concerned, I stopped and opened the door to watch.....it was close, but no scrapping.
Is this something I would recommend a DIYer to attempt? Sure, just pay attention, and check and double check before you drill that first hole.
Some people will say, that they don't belong on the narrow body cars....here's my thinking and justification; I am noticing that the lower rockers are taking some heat from the rocks and debris kicked up by the front tires. My reasoning is that these 'skirts' will eliminate quite a bit of that damage. And I like the looks of them.
The ads say "no instructions or hardware included", so I was a little leery about what I would find when they arrived. What I found was, a very high quality product, but like they promised, no instructions and no hardware. The skirts were manufactured with multiple holes in them. I've heard some people have used "self tapping screws" to attach them. I decided to use aluminum pop rivets. Once I looked at the skirts, I figured out that 3/16" D x 1/2" L rivets would be tough enough to hold them .
If you are the least bit squeamish about drilling holes into your car, this project probably is NOT for you. I found some rivets at the local parts store and some stainless steel #8 x 1/2" machine screws and nuts used to attach the rear supports to the back of the skirts. The skirts also use two existing screws in the body panels. In order to get to two of them the, rear wheels/tires have to be removed. So I jacked up the rear and put jack stands under it as well.
I pulled the existing screw out and loosely reinstalled them with the rear bracket attached. I also used one of the machine screws to loosely attach the bracket and rear of the skirt. I then took the existing screw out at the front and loosely attached the front of the skirt. With things loosely in place, I was able to figure out how and where the skirt needs to sit. I held it in place while I drilled the first 3/16" hole for a rivet. I stuck it in place and then snugged up the existing screws and installed the first rivet. Then spacing out the holes and installing the rest if the rivets.
After I got all the rivets installed on the under side, I went to the wheelwell and drilled a couple holes through the brace into the body to add support to the one existing screw. I took the machine screws out and put a little thread locker on the threads and put them back in, tightening them down.
While they were off I cleaned the wheel barrels and the inside tire wall. After letting the rear down I moved the jack to the front and raised it up some so I could get to the last two holes (on each side) to put rivets in the front of the skirt. I used 15 rivets on each side, a total of 30, and 4 stainless machine screws.
I really like the looks of the skirts, but a concern in putting them on was 'would I be able to get out of my driveway' with them on. So the first thing I did once they were installed, I slowly pulled out toward the street and when I came to the spot where I was concerned, I stopped and opened the door to watch.....it was close, but no scrapping.


Is this something I would recommend a DIYer to attempt? Sure, just pay attention, and check and double check before you drill that first hole.


 Great explanation


