Welcome to the Corvette Forums at the Corvette Action Center!

Questions for 4 post lift owners

  • Thread starter Thread starter RAO-3
  • Start date Start date
R

RAO-3

Guest
Considering getting a 4 post lift and have been reading the many posts on them, but still have a few questions that hopefully the owners can answer...

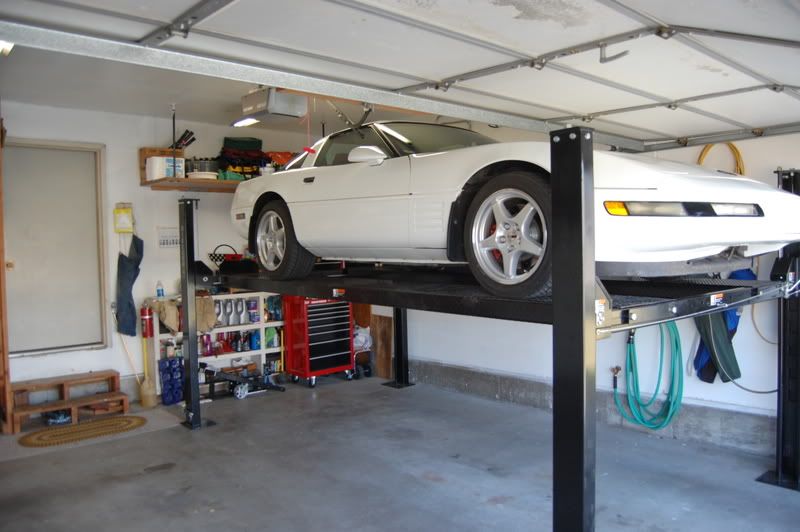
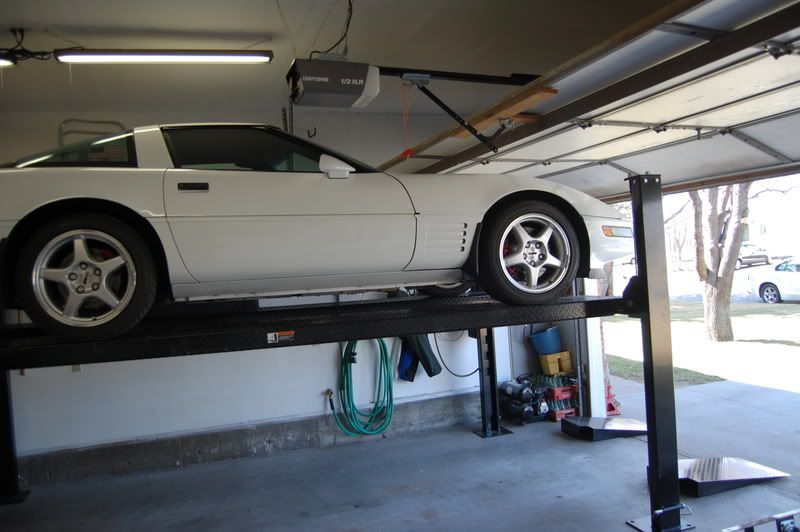
Which lift did you ultimately purchase and why?

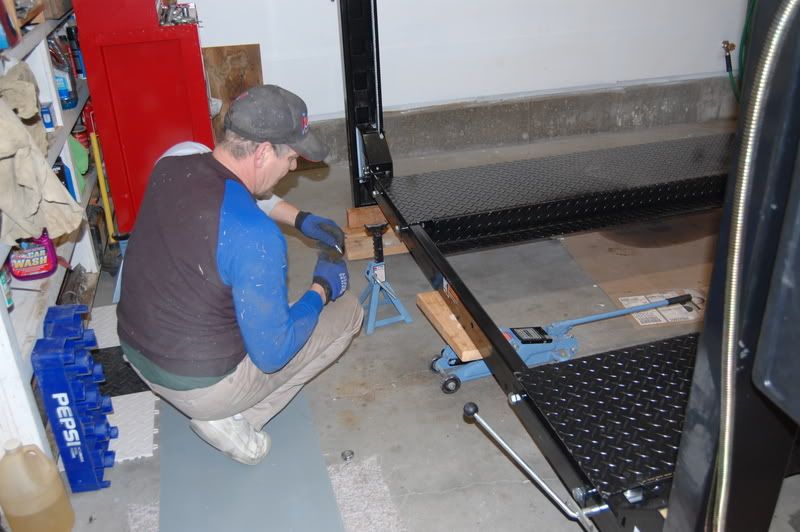
For those with a sloping garage floor, how did you level your lift? My garage has a drainage slope and note that all require the lift to be level.

How close do your tires come to the edge of the ramps? I have a Z06 and find that several of the lifts out there would have my rear tires right at the edge of the ramps!

Did you do the install yourself, and if so, how did you take delivery of the lift, given it's size and weight?

Most that did the install themselves seem to have gotten by with an engine hoist and floor jacks. Is that enough or did you also need something else? How many of you worked on the assembly?

Any other special tools?

Was there anything else that you needed to purchase that you didn't expect or were unaware of that made you stop assembly and run out and get?

If you had any follow-up dealings with the supplier, for any reason, please elaborate.

Anything you would have done differently if you had to do it all over again?

Thanks for taking the time to answer!

Ray
 
Hi Ray
I too went through this so I'll give you my story. I see you're in NJ so this could work for you. I bought a Direct Lift Pro Park 7 from Greg Smith Equipment in Newark Delaware. The deciding factor was price. Also, I looked at many and many seemed the same. I would have liked to buy American made but couldn't justify the cost. A friend and I bought at the same time and picked 2 up with his car trailer. There is no sales tax in Delaware, so if you pick it up, the lift price is the price.
My garage floor is slightly tapered to a drain in the center of each bay which was no problem.
When my 86 is on the lift I think I have 3 to 4 inches to the edge of the ramps. I'm sure you can get dimensions on line.
I unpacked it on the trailer and lifted it off piece by piece. I also assembled it and only needed a second person for about an hour to help position the heavy parts. I may have spent 4 - 6 hrs. on assembly but was taking my good old time being careful and doing it right. The ramps are pretty heavy so 1 or 2 more people would have been nice just for a couple minutes.
No special tools at all.
The only additional thing I remember was the oil which I was aware of and Advance Auto had it in a 5 gal. bucket.
No follow up deealings have been necessary.
I have been very happy with my purchase. I store a car on top and do not raise and lower it very often. If you pay attention and use it carefully as any lift should be I see no problems.
If I had it to do all over again? I would have bought 2 at the time, one to store cars and one to work on. I do plan on getting another when another trip with the trailer can be arranged.
There are many posts about lifts on CAC from people who know more than me. You will get a lot of valuable information by checking them out.
Please understand this is just my 2 cents worth. I hope it helps you.

Mike
 
Hi Mike,

Thanks for your thoughts.

Actually I was strongly considering the very same lift, but after measuring it, found that my rear wheels would be right at the edges of the ramps. Am looking at one of their larger lifts, but then that becomes a space issue.

Ray
 
Mike, I am going to order my lift from Greg Smith tomorrow. The Pro-Park 7 has been discontinued in favor of the Pro-Park 8s, basically the same but has 8K weight capacity, and the posts are little shorter. I am glad to hear of your experience with the assembly of the lift and that you like it enough to purchase another one. I can only assume that the instructions for assembly are complete and thorough. Any additional thoughts? Thanks for your time.
 
Hi Toms94,
I recently found out that the pro park 7 had been replaced. The 8s is now the standard lift. It is rated for 8000 lbs. It also has an adjustable type of locking stops in the posts and they claim an improved locking mechanism. This makes locking heights infinately adjustable. This can be a plus if your ceiling is low and you need a stop as close to the ceiling as you can get instead of having to accept the closest fixed lock available as on the pp7. Also if you have a sloped floor for drainage you can adjust the stops to be perfectly level. On the 7 you can adjust the cables to lift level on a sloped floor, but it is not the proper way to adjust them because they will not then line up equally with the fixed position locking tabs. The lock tabs on the 7 are all at the same point on each post. Since you never let the weight hang on the cables, your ramps are at the same slope as your floor when parked. I really don't need the adjustable locks and sometimes more adjustable or moving parts are possible problem points. So I will look at the 8s before buying one, but I have no reason to doubt them.
I think the instructions with mine were fine. It all really makes a lot of common sense if you are mechanically inclined at all. I only suggest that you are not in a hurry and "perfect" your assembly. I think I have mine about 2 years now, but may only have raised and lowered it 20 or 25 times. But in that time I haven't had to even re-adjust anything and it is working fine. My 68 is on top of it now and the 74 underneath. Be sure you use your drip trays, or cover the bottom car to prevent paint damage from leaks.
Let me know if I can help you at all. I wish we lived closer so I could give you a hand.

Mike
 
Mike, thanks for the reply, I may be picking your brain as i get into this. I am pretty mechanically inclined, so I am not anticipating any problems, just trying to get a first hand view of things.

Tom
 
Spend the money for the optional aluminum drive-on ramps; the standard steel ramps are a bear to manhandle around. :)
 
Spend the money for the optional aluminum drive-on ramps; the standard steel ramps are a bear to manhandle around. :)

Yea, yea, yea...now you tell me, I ordered it this morning and is being shipped out already. I'll have to do the aluminum ramps later, I guess. Actually I'm thinking I can have them built for less than buying/shipping them. (It helps that the Welding shop is just across the hall from me. :D)
 
I think I have narrowed my list to the all american lifts or the revolution by rotary lift. Both seem to have the proper width for the Z06 and either one fits properly in my garage.

The pro park ramps were too narrow for me.

I do plan on getting the extended ramps!

Ray
 
Yea, yea, yea...now you tell me, I ordered it this morning and is being shipped out already. I'll have to do the aluminum ramps later, I guess. Actually I'm thinking I can have them built for less than buying/shipping them. (It helps that the Welding shop is just across the hall from me. :D)
I too considered the aluminum ramps. I don't remember how much extra they were but it seemed like a lot at the time. When I unpacked the steel ones I was very satisfied with my purchase. I'm sure the aluminum is lighter but I don't find the steel ones to be a problem at all. Please let me know what you think when you get it.

Mike

I'll do that Mike. According to Greg (owner of Greg Smith Equipment), my lift should be here Friday (Yea). Maybe I'll have a chance to get it put together this weekend.
 
Placed my order today for the Rotary Revolution XLT today. As I understand it, it will take 3 - 4 weeks before I see it.

Thanks to all for the help!

Ray
 
My Greg Smith lift arrived today just like they said it would. I am pumped, I can't wait to get home and start acquainting myself with the instructions on putting it together. Hopefully by tomorrow evening I'll have it assembled and working.
 
Good for you Tom, just as they promised. Take your time. Especially on the lock release linkage and cable installation and adjustment. Your future satisfaction depends mostly on your attention to detail during assembly.

Mike
 
Ok here's the deal.....like always I get involved with doing the work and I get sidetracked about taking the pictures. I do want to say this about my new lift, it is assembled and it works, but it took me longer than most. I did all the work by myself except for a couple of times I had Rosie come out and hold something (never did I have her do much heavy work).

The instructions that come with the lift are a little bit lacking, good thing I'm mechanically inclined and could decipher the crude drawings. Even after reading the instructions and checking out the drawings, I had to back track a couple of times as I put a couple of things in wrong the first time...like one of the main tracks (my fault completely on this one) as I had it set in right but upside down and after flipping it over, I then had the inside out, no biggy it only weighs 300 lbs. (I used my floor jack to lift it up and swing it around). Then I moved on along and started to run the cables and find that I have one whole end on reversed (pulleys go to the inside, not out, my stupid mistake again), so I unbolt the main tracks....again and swap end for end, then re-bolt it together. I run the cables, this is where the instructions are really weak, I had to figure out which cable went where, not too much to figure that one out, but even routing of the cables is not real clear. I had to change them out once I figured which cables had to be on top and which had to be on the bottom. Mount the pump/motor hook up the hydraulic line, fill with oil plug it in and up she went......but it wouldn't come down, checked all the release linkage and adjusted, still wouldn't come down, she'd go up. I was getting pretty frustrated, so I called the Tech Support line......they are closed on Saturdays.....cr@p. I go back out and start over looking at the way things worked and figure out that the secondary safety locks are the culprit and then I figure out I have the cable routed wrong. So I loosen the cables and remove them and then restring them and hook everything back up and down she came. following the last of the adjustments it goes up and down effortlessly. Now the only thing I am waiting on is the garage door guy to come and make the door a "high lift" and I will be able to lift the Corvette all the way up with the door open.

This is the beginning of installing the main runners to the cross frame and post.
garageremodel-fourpostliftassembly0.jpg

garageremodel-fourpostliftassemb-1.jpg


Here's the one that I put on backwards, it's upside down here and when I flipped it over it made it inside out (DUH)
garageremodel-fourpostliftassemb-2.jpg

My floor jacks came in real handy during the assembly.
garageremodel-fourpostliftassemb-3.jpg

garageremodel-fourpostliftassemb-5.jpg

This is right after I get the far main runner turned around correctly. but they are installed.
garageremodel-fourpostliftassemb-4.jpg

Ready for the cables
garageremodel-fourpostliftassemb-5.jpg

Power unit installed (cables are on for the first time)
garageremodel-fourpostliftassemb-7.jpg

Here I am putting the lock release linkage together. If you look real close you can see the cable is routed wrong in this picture, the little white pulley should not be seen the cable should be on this side of it.
garageremodel-fourpostliftassemb-8.jpg

These are the wheels that allow the lift to lift itself so it can be moved around, good thing as I decided to turn it end for end.
garageremodel-fourpostliftassemb-9.jpg

Here is a picture of the lift up, but at this point it wouldn't go down as I had the cable routed wrong.
garageremodel-fourpostliftassemb-10.jpg

Ok, I've got the cables re-routed and the lift has been tested without anything on it, and now I have the Vette up on the lift, it's as high as it will go until I get the high lift kit installed.
garageremodel-fourpostliftassemb-11.jpg

garageremodel-fourpostliftassemb-12.jpg

garageremodel-fourpostliftassemb-13.jpg

garageremodel-fourpostliftassemb-14.jpg


Total cost of the lift as you see it there was $1990 delivered to my door plus $35 for the hydraulic oil. Total time I spent putting it together was 8 1/2 hours (of course I had about 2 hours of backtracking and redoing that I could have eliminated). Doing it myself PRICELESS!
 
Looks great! Now you'll wonder why you didn't get one sooner - there's nothing like working on the bottom of your car STANDING UP! :)
 
Tom,

What a great job! Looks fantabulous! :upthumbs

Was wondering if I could stop by. I need to drain & refill my differential fluid. Would Sunday after Church be OK with you? ;LOL

SAVE THE :w
 
Tom,

What a great job! Looks fantabulous! :upthumbs

Was wondering if I could stop by. I need to drain & refill my differential fluid. Would Sunday after Church be OK with you? ;LOL

SAVE THE :w

Gregory, you bet drop on by I'll give you a hand. I'm guessing about a 15 hour drive for you, I'll be waiting give me a call when you get to Garden City, I have the lift ready for you.:chuckle
 
Great looking lift!

Thanks for the pictures showing you putting it together.

Do you have a slope to your garage floor? If so, how did you deal with it?

Ray


Ok here's the deal.....like always I get involved with doing the work and I get sidetracked about taking the pictures. I do want to say this about my new lift, it is assembled and it works, but it took me longer than most. I did all the work by myself except for a couple of times I had Rosie come out and hold something (never did I have her do much heavy work).

The instructions that come with the lift are a little bit lacking, good thing I'm mechanically inclined and could decipher the crude drawings. Even after reading the instructions and checking out the drawings, I had to back track a couple of times as I put a couple of things in wrong the first time...like one of the main tracks (my fault completely on this one) as I had it set in right but upside down and after flipping it over, I then had the inside out, no biggy it only weighs 300 lbs. (I used my floor jack to lift it up and swing it around). Then I moved on along and started to run the cables and find that I have one whole end on reversed (pulleys go to the inside, not out, my stupid mistake again), so I unbolt the main tracks....again and swap end for end, then re-bolt it together. I run the cables, this is where the instructions are really weak, I had to figure out which cable went where, not too much to figure that one out, but even routing of the cables is not real clear. I had to change them out once I figured which cables had to be on top and which had to be on the bottom. Mount the pump/motor hook up the hydraulic line, fill with oil plug it in and up she went......but it wouldn't come down, checked all the release linkage and adjusted, still wouldn't come down, she'd go up. I was getting pretty frustrated, so I called the Tech Support line......they are closed on Saturdays.....cr@p. I go back out and start over looking at the way things worked and figure out that the secondary safety locks are the culprit and then I figure out I have the cable routed wrong. So I loosen the cables and remove them and then restring them and hook everything back up and down she came. following the last of the adjustments it goes up and down effortlessly. Now the only thing I am waiting on is the garage door guy to come and make the door a "high lift" and I will be able to lift the Corvette all the way up with the door open.

This is the beginning of installing the main runners to the cross frame and post.
garageremodel-fourpostliftassembly0.jpg

garageremodel-fourpostliftassemb-1.jpg


Here's the one that I put on backwards, it's upside down here and when I flipped it over it made it inside out (DUH)
garageremodel-fourpostliftassemb-2.jpg

My floor jacks came in real handy during the assembly.
garageremodel-fourpostliftassemb-3.jpg

garageremodel-fourpostliftassemb-5.jpg

This is right after I get the far main runner turned around correctly. but they are installed.
garageremodel-fourpostliftassemb-4.jpg

Ready for the cables
garageremodel-fourpostliftassemb-5.jpg

Power unit installed (cables are on for the first time)
garageremodel-fourpostliftassemb-7.jpg

Here I am putting the lock release linkage together. If you look real close you can see the cable is routed wrong in this picture, the little white pulley should not be seen the cable should be on this side of it.
garageremodel-fourpostliftassemb-8.jpg

These are the wheels that allow the lift to lift itself so it can be moved around, good thing as I decided to turn it end for end.
garageremodel-fourpostliftassemb-9.jpg

Here is a picture of the lift up, but at this point it wouldn't go down as I had the cable routed wrong.
garageremodel-fourpostliftassemb-10.jpg

Ok, I've got the cables re-routed and the lift has been tested without anything on it, and now I have the Vette up on the lift, it's as high as it will go until I get the high lift kit installed.
garageremodel-fourpostliftassemb-11.jpg

garageremodel-fourpostliftassemb-12.jpg

garageremodel-fourpostliftassemb-13.jpg

garageremodel-fourpostliftassemb-14.jpg


Total cost of the lift as you see it there was $1990 delivered to my door plus $35 for the hydraulic oil. Total time I spent putting it together was 8 1/2 hours (of course I had about 2 hours of backtracking and redoing that I could have eliminated). Doing it myself PRICELESS!
 

Corvette Forums

Not a member of the Corvette Action Center?  Join now!  It's free!

Help support the Corvette Action Center!

Supporting Vendors

Dealers:

MacMulkin Chevrolet - The Second Largest Corvette Dealer in the Country!

Advertise with the Corvette Action Center!

Double Your Chances!

Our Partners

Back
Top Bottom