Welcome to the Corvette Forums at the Corvette Action Center!

72 Coupe - 28 Years and Counting

I was messing around with the brake lines and noticed that my power steering box was pretty dirty. A memory floated up of a steering system that was in need of work. I remembered driving my '87 for the first time and feeling like there was something wrong. You moved the steering wheel a tiny fraction of an inch and the car moved. My '72 did that but there was a comfortable lag -- like you could start to turn and change your mind because the car was still going in the same direction.

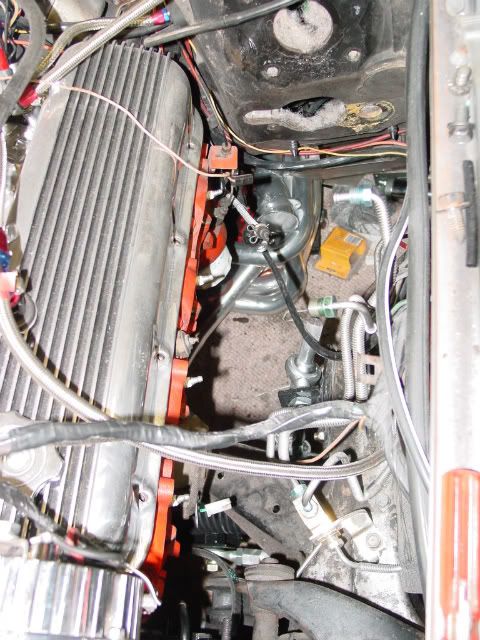
I confirmed the play in the steering box and logged on to several Corvette sites. It was very clear that I had to do something. There was a thread on a Jeep steering box that only required a couple of new holes in the frame and some gentle dimpling of the header.... OK, I might have gone with a Jeep solution but hammering on a brand new set of Jet-Hot coated Hookers just didn't make sense. Then I found a Borgeson thread and it looked better but still mentioned the possibility of header adjustments. The option I chose was the Steeroids rack & pinion conversion.

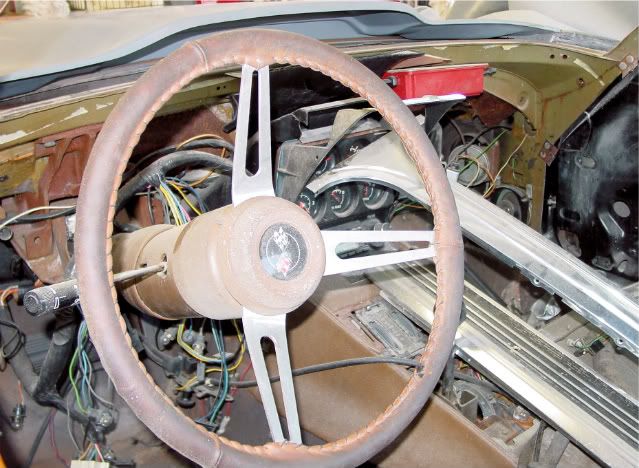
Steeroids isn't a perfect solution but I've owned both recirculating ball and rack & pinion cars. My brand new '68 GTO had the former and my used '87 Corvette had the latter -- decision is easy. Almost everything on the Steeroids conversion was a piece of cake. The only difficulty I encountered was the coupling at the end of the column. I couldn't get it on. You're working on a raised (jackstand height) fender with a master cylinder in the way and trying to line up two non-obvious angled pieces. Obvious solution is to pull the steering column. Dash was already out of the car so it was no big deal.
Interior.jpg


Once it's out I can easily clean the splines on the shaft and dress the edges with a jeweler's file. The coupling goes on with no problem. That's when I should have just put the steering column back in the car and hooked it up. Instead, I noticed that the four bolts holding the power brake booster were visible and relatively easy to remove. This would be a perfect opportunity to paint the booster. Maybe even buy a chrome booster and master cylinder setup. Boy, does that ever open up the driver side of the engine compartment.
DSC00883.jpg


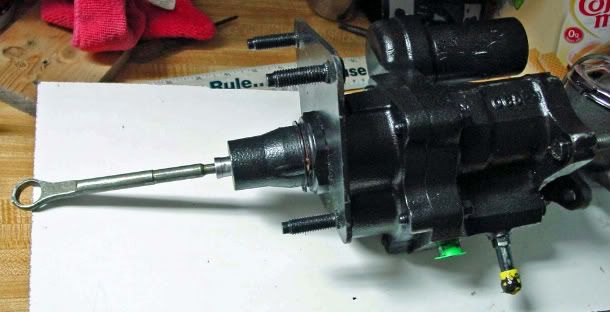
Another visit to a Corvette website and the only possible solution to my brake problem is hydroboost. Actually, the problem was that the DOT-5 fluid had leaked out of all the rebuilt stainless calipers and there was an oily look to the master cylinder. OK, hydroboost it is. Ordered a ready-to-install system and waited. When it didn't show up (actually it showed up on my credit card account the day I ordered it) for four weeks, I called. The UPS status hadn't changed for four weeks (info entered) so I was told it was shipping the next day. A week later I called the manufacturer and he had no order from the dealer I used. The reasons why this happened are all reasonable and very sad -- so I cancelled the order and looked up a rebuilt hydroboost unit on Rock Auto's website. Decided on a 1993 Chevrolet 1500 diesel pickup unit (only because the core charge was $20).
20100430_Brakes_0049_edited-1.jpg


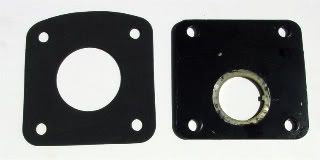
A chrome master cylinder cover and foam gasket for the original booster so the new one would seal up against the firewall also came off the UPS truck. Removed the firewall mounting plate from the hydroboost so I could cut off that ring on the end of the pushrod and cut some threads to match the stock clevis and jamb-nut. Knocked the mounting bolts out of the plate and noticed the flange and gasket were not a perfect match.
20100501_Brakes_0045.jpg


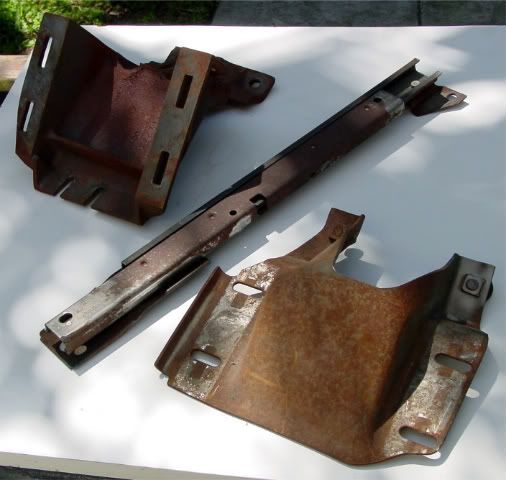
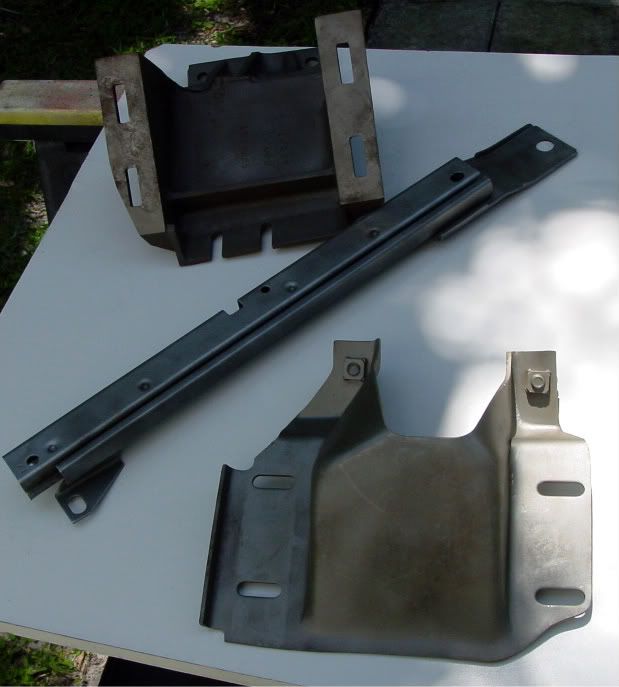
There are a couple of places on the car that have superficial rust but the steering column and brake mounting bracket rust rust wasn't a big worry. I should just leave them alone.... OK, they came out, and got bead blasted along with the seat tracks.
DSC00837.jpg

DSC00838.jpg


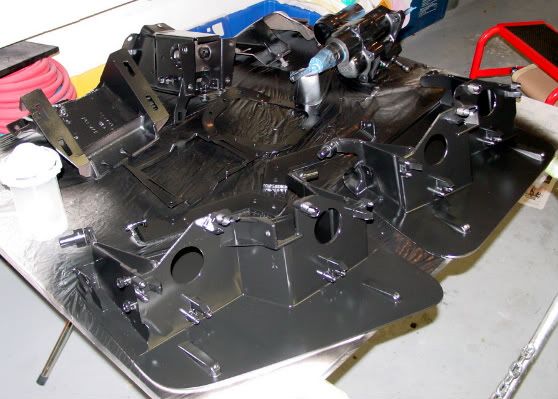
That hydroboost unit didn't look that great and as long as I have to wait for the mounting plate and a few other parts, might as well wire-brush the paint of and give the accumulator a little polish. All those blasted parts need a coat of epoxy primer....
DSC00873.jpg


Before I put the steering column back in the car, a remark in one of the threads is nagging. They said to check the lower bearing for play. I give mine a jiggle and things start moving. Oh-oh -- this looks like an opportunity. "While I have it out" becomes a complete dis-assembly and an order for some parts, including the critical Key Buzzer Switch. Mine was intermittent so when I got to the point of removing it, it fell apart. Next batch of parts that need epoxy primer will include some of these....
IMG_0184.jpg
 
Have you wondered where the convertible might have gotten to?
:)
Actually, I know where it ended up. Sold the wreck to a friend in the Corvette club and he parted it out. I got $600 and he -- well, he did OK. It was a good deal for both of us -- I didn't have to look at it every day and try to figure out what was salvageable. I broke a lot of stuff that night, including a bent frame, trailing arm and even a cracked differential.
 
This might be Off Topic but it might help explain why it has taken 28 years to get to this point.

Left for work as usual on 9/9/65. Somewhere along the way I lost my left arm. Never did find it but I did learn to be more careful. Re-learned driving a manual, with Triumph, Vega and Fiat. Might have been smart to stick with wimpy 4-speeds but I chose a big-block Corvette.

When I finished replacing the u-joints on the '69 convertible one Saturday night, I took it out for a test drive. It was raining but I didn't think it was a problem -- until I shifted and hit the gas. The car went right and into the grass shoulder. Slid sideways into two cars parked in front of a restaurant. They were brand new and the valet had parked them facing the street -- a Coupe DeVille and a Mark V. Not a lot of damage to them but the Corvette wasn't as lucky.

Driver side window shattered and when I pushed the door open with my left side, a piece of glass nicked the end of my stump. The teenage valet was running toward my car when I got out. The rain and a drop or two of blood made my stump look much worse than it was. When I tell the kid I'm fine he passes out.

My Corvettes are both automatics.
 
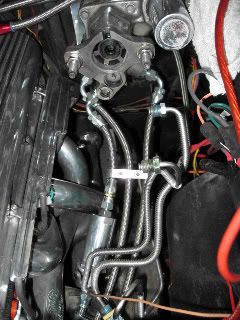
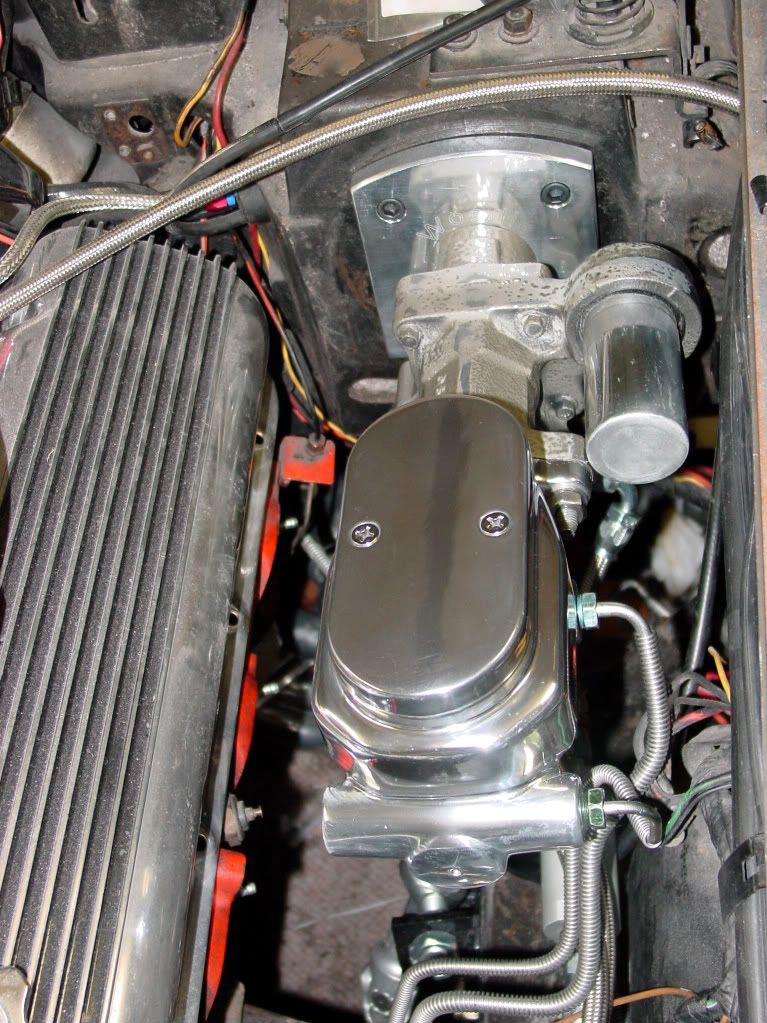
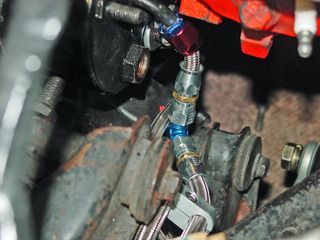
Because I didn’t have a core hydroboost, I also had to order the return spring and a custom master cylinder pushrod (4-3/4 inch long). Decided to plumb the hydroboost and Steeroids with braided stainless Teflon lines so I also placed orders for AN-6 line and steel fittings. Turns out the hydroboost is only a small part of the cost. The rebuilt unit was just over $200 but the rest of the pieces were another $580. A fancy filter with two AN adapters, along with new master cylinder was $240 so it adds up quick. The aluminum wire looms showed up around the same time and seemed cheap at the time. Got to stop looking at Corvette threads...
HydroboostHoses.jpg


Thought about painting the master cylinder but it has had DOT-5 silicone fluid in in for decades. Decided a little more polished aluminum would look better so Summit supplied the Tuff-Stuff 2028NA master cylinder.
20100517_BrakeBooster_0077.jpg


Most of the hydroboost installs use a tee fitting to connect the return lines from the stock power steering valve (or Steeroids or Borgeson) to the power steering fluid reservoir. I tried that design but it bothered me to have all those AN fittings ending up connected to the pump with a hose clamp.
20100520_brake_0083_edited-1.jpg


At first I thought about using the power steering reservoir from a 1993 Chevy C1500 diesel pickup. It has two return lines, one for the steering and one for the hydroboost.
getimage.php


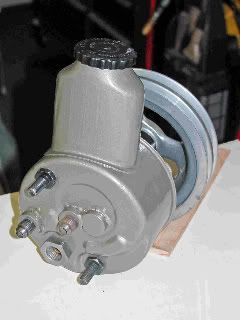
Probably would have been the smart solution and I could have adapted the hard lines to -6AN fittings. Instead, I chose to weld two -6AN fittings to the reservoir on the Corvette. Against the advice of really knowledgeable people, I welded them where I thought they belonged. When a trial fit showed me why they are called "Experts" I had to cut one of the bungs off and thread/weld it closed. The third bung got welded in the Expert location and everything lines up fine. I still have some of that Eastwood stainless steel epoxy paint so most of the hidden parts of the pump are that color.
PumpFittings-Final.jpg


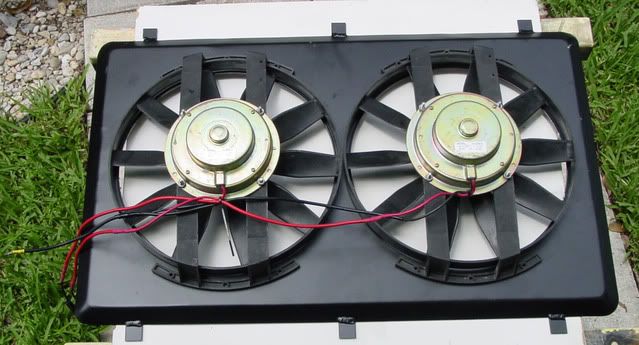
Every thread describing happy big block owners mentions their cooling system problems and solutions. Some just restore the seals, shrouds and clutch fans on their stock setups. Others upgrade to an aluminum radiator. The happiest seem to be the ones who upgrade to the aluminum radiator and dual electric fans, I hung a pair of electric fans near my brass radiator and only had a problem when stopped or driving slow with the A/C on. Almost everyone with similar problems fixed it with a home-made shroud to seal the electric fans. I started trying to fabricate something but it/they were ugly, heavy, or just plain worthless. Found a place that custom fabricates shrouds. I gave them the measurements, number and size of fans ( 2-12") and the position (centered). You could specify raw aluminum, painted or polished (extra), I chose painted and the shroud arrived soon after I ordered it.
20100715_Shroud_0128_edited-1.jpg


This is gonna be great! I test-fit the fans to the shroud and then test fit the shroud to the radiator. So far, so good. When I go to install the shroud with fans mounted, there's a problem. The driver side fan hits the upper control arm mount. I coulda, shoulda, woulda told the shroud fabricator to locate the fan openings offset one inch to the right. Because I've already drilled all the mounting holes, I do the only logical thing.

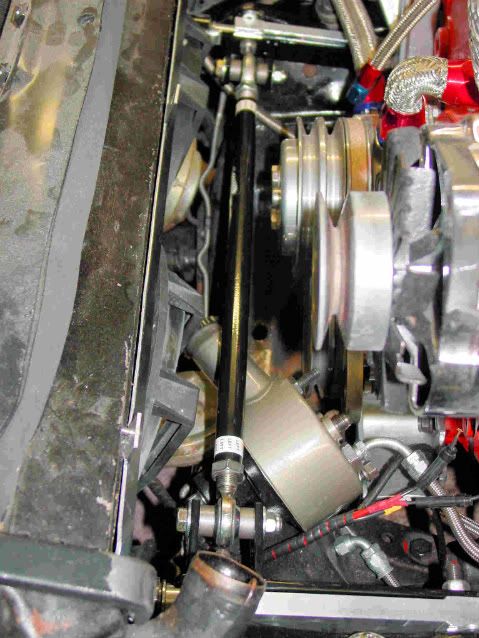
I order new upper control arms. It's logical because the Steeroids instructions suggest offset arms to gain additional caster adjustment. VB&P has their lightweight tubular arms on sale so logic and frugality combine to make this solution just right. When the arms arrive, I try to remove the driver side upper control arm but the power steering pump is in the way. No problem, just remove the pump again. I could have just beaten the staked bolts out of the mount but I have a poor track record with swinging hammers around polished and painted parts.

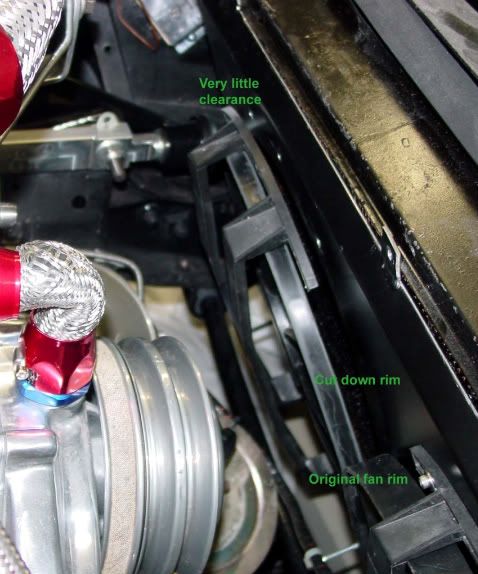
Arm is in and voila! The fan still hits. The little gain gives me another brilliant(?) idea. I set up my router table to remove about 3/16 inch from each edge of the outer ring of the fan. It should give me the space I need. Surprisingly it works and I re-mount the fan on the motor shaft. I hook up a battery charger/booster and test the fan and it seems to work but I'm pretty sure the setscrew is pretty close to the end of the shaft and might let the fan blade come loose. You can see the shaved down fan in this picture. Not happy but also not ready to spring $920 for the Dewitts setup.
Cutdownfan.jpg


When I go to install the passenger side upper control arm, the fuel pump is in the way. I know I could jack the engine up to gain clearance but the pump is looking kind of crummy.... When I go looking for a new pump, worms start slithering out of the can. I find lots of mechanical pumps but none of them have a return. A visit to another Corvette thread tells me I should get a regulator with a return line and gauge and I'm looking at another money pit. My pump works fine -- just needs to be cleaned up and the cracked rubber hoses replaced. Already have that fuel line installed. Well, not any more.

If you have the way cleared for the upper control arms, wouldn't this be the perfect time to install one of those spreader bars for the upper control arms. After all, the electric fan pre-requisite has already been taken care of.
Brace.jpg

 
Great write up, I enjoyed this very much, reminds me of my simular circumstances.. Love the car, keep up the good work.:cool!:
 
Get R' Done

Good stuff for sure but it wears me out just reading it; in fact I could use a nap and I could go for a donut too ;LOLGet R' Done

I think I would like to start a project like this but just NOT sure I have enough energy to complete it :confused

Bill :w
 
Good stuff for sure but it wears me out just reading it; in fact I could use a nap and I could go for a donut too ;LOLGet R' Done

I think I would like to start a project like this but just NOT sure I have enough energy to complete it :confused

Bill :w
I hear ya!

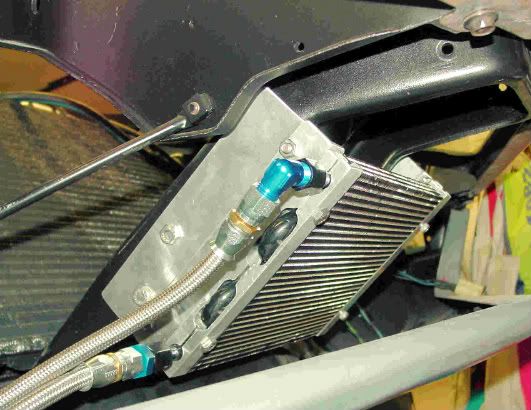
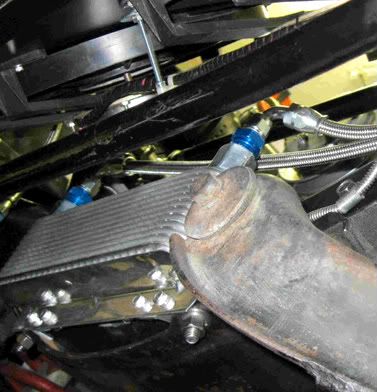
While I was doing all this work on the cooling system, decided to add some insurance. All it would take to add an oil cooler to the return side of the power steering pump was some braided line and a small aluminum cooler. B&M makes some nice ones that have pipe thread fittings, which are easy to adapt to the AN stuff. I was resting under the car and noticed the tabs on the front cross-member, where the stock fan shroud used to mount. A couple of scrap pieces of aluminum angle from Home depot was the starting point and now I have a cooler solidly mounted to the frame. It's behind the radiator but I think I have a way to route some cool(er) air.
PowerSteeringCooler-1.jpg


When I installed the custom front grille, I had to make a new fiberglass center section. In the process, the center section doesn't have the flange to attach the sealing flap at the base of the radiator. I think I can form a low-profile scoop that diverts cool air below the radiator right into the power steering cooler.
20110213_0530-1.jpg


As long as I'm diverting air, might as well increase the transmission cooling capacity. With the grille center section gone, the captured nuts in the sides of the bumper support are no longer used. Some jury-rigged angle aluminum and the TCI cooler (with pipe thread fittings) can be used, along with the leftover pieces of braided Teflon hose. Another cooler mounted to a pretty solid frame member.
TransmissionCooler.jpg


Aeroquip makes fittings to connect the transmission cooler in the radiator with braided Teflon lines. The stock hole for the A/C lines is big enough to fit the two braided lines through to the front side of the radiator. Line comes out of the radiator, through the bulkhead to the cooler and back through the bulkhead and down to the return line (with the stainless hard line adapted to -6AN). Not a very good picture but the camera has no idea what to focus on.
IMG_0162.jpg
 
72 LT-1 of my own to work on. . . . . Heard about one less than 100 miles away!

Looking good, wish I had half your energy and I would start the hunt for a 72 LT-1 of my own to work on, getting the fever again I tell ya :happyanim: Might be looking @ one 100 miles away from me I may look at this week-end :confused

Bill :w
 
Looking good, wish I had half your energy and I would start the hunt for a 72 LT-1 of my own to work on, getting the fever again I tell ya :happyanim: Might be looking @ one 100 miles away from me I may look at this week-end :confused

Bill :w
Bill,

I start working on some aspect of the car and figure it will take a few hours to finish what I want to do. About the third day I realize it isn't going to be easy. After a week I usually take a break and do something else, like change a lightbulb in the house. Then at least I feel like I've accomplished something.

Here's an example.

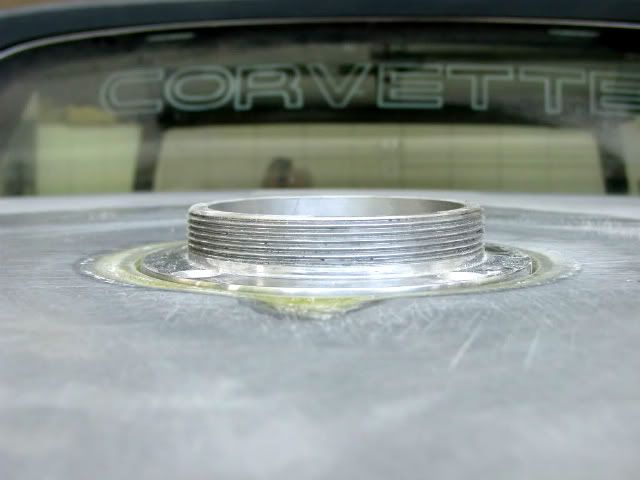
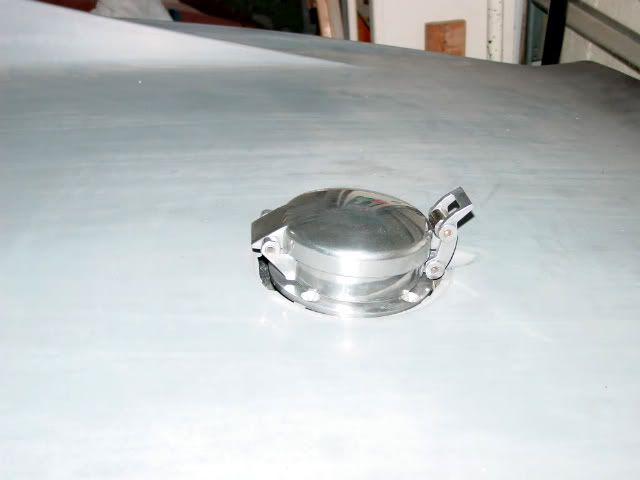
I bought an aluminum gas cap because I always liked the Baldwin-Motion Corvettes and a lot of them had these caps on them. Came across an article that described how to install one as non-functional decoration on a 75 Corvette so I figured why not. Their installation looked nice but not exactly what I wanted to do. With a little work mine would not just fit but look like it belongs there.


The kit made to bolt on a 68-77 Corvette ran several hundred bucks. I found one for around $100 meant for a Mustang.

20100106_GasCap_0031.jpg


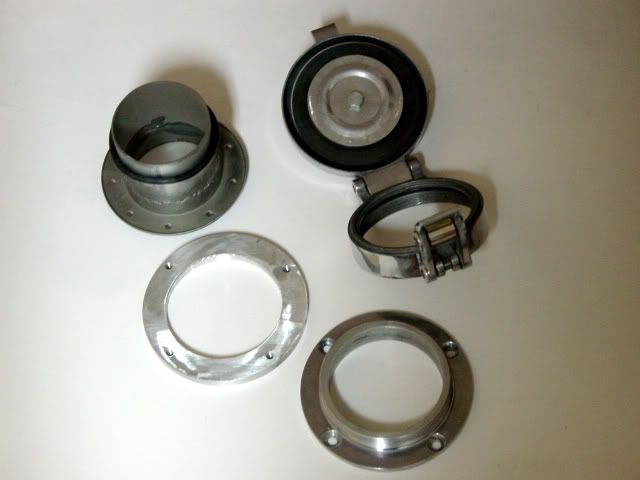
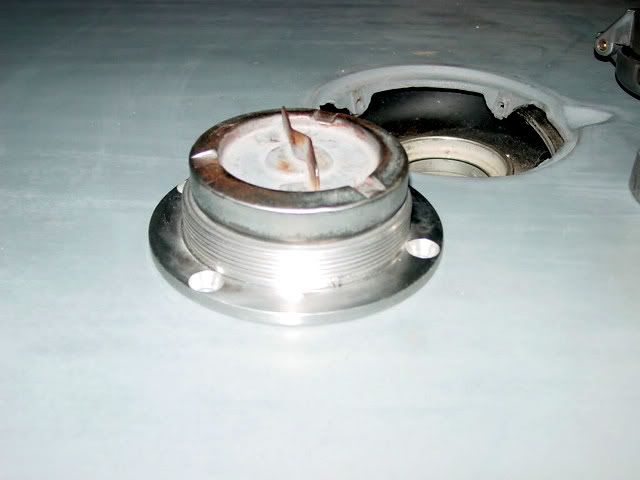
The article I read showed how the gas cap came off by reaching through the new opening. Unfortunately the gas cap on a 72 is huge because it could use leaded gasoline. No way you can remove the cap....
20100106_GasCap_0033.jpg


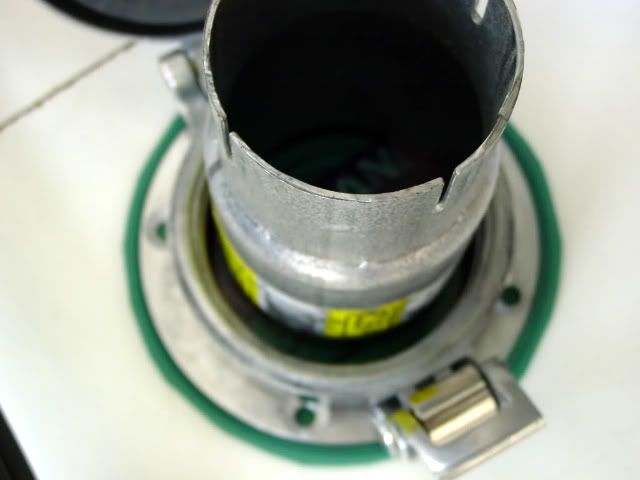
The filler neck is three inches in diameter so I picked up a short piece of exhaust tubing and ordered a new flange for the gas tank. A little cutting and welding and I have an extended filler neck that fits inside the new gas cap mounting flange. A couple of O-rings will seal the space between the two.
20100119_GasCap_0030.jpg


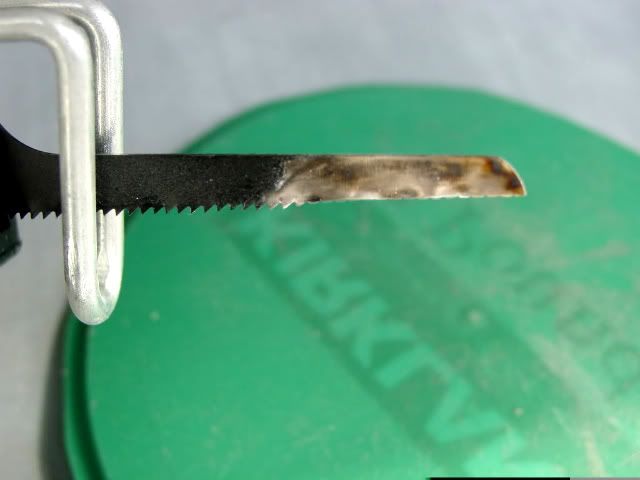
I need to make a better fitting opening in the rear deck fiberglass so I cut the flange for the stock gas door. I used an air saw with a hacksaw blade. I had used the saw to cut some 1/4" plate steel so I figured a new blade would cut through the fiberglass like butter. Quite the opposite. A fifteen-inch circumference cut destroyed the blade.
20100119_GasCap_0024.jpg


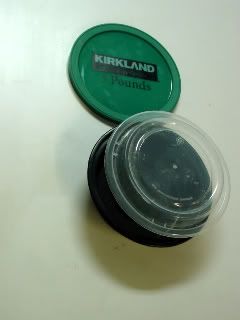
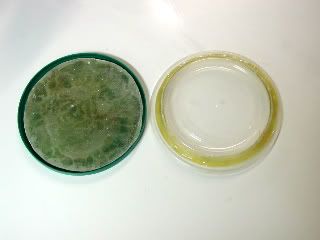
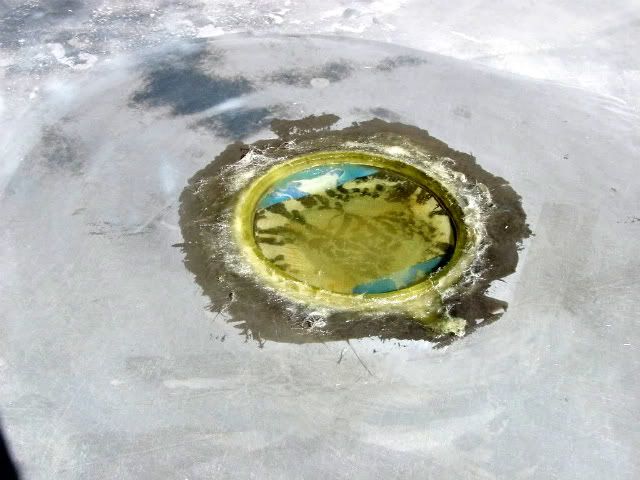
I wanted a flat base and ring to sink the aluminum flange into the deck. The mold for the flat base was a coffee can lid and the mold for the beveled ring was a Chinese take-out lid.
20100401_GasCap_0013.jpg


Flatten the base and ring on a belt sander...
20100330_GasCap_0018.jpg


Glass them into the deck and I have the start of a solid mount.
20100330_GasCap_0021.jpg


The mounting flange is nested in the deck and there will be a drain of some kind built in to the depression.
20100331_GasCap_0016.jpg


I didn't want to bolt the gas cap in place so I needed something under the deck to screw into. McMaster-Carr has 5-inch diameter 1/4-inch thick aluminum disks so I used a hole saw to turn the disk into a ring. Aluminum is pretty soft but the first hole saw I used was from Harbor Fright set. It put some nasty scratches in the aluminum but I had to buy a $24 hole saw to actually cut through. Line up the rings, drill four holes and tap them. Next step will be to mount the ring under the deck.
20100510_GasCap_0062.jpg


Like everything I do to this Vette, this little modification took many days stretched out over several months. I had to wait for the cap, then the new gas tank flange, then the aluminum disk and O-rings. Luckily there were lots of other things to do between UPS deliveries. The delays were actually helpful because the solutions evolved -- I don't seem to be able to plan each project accurately.

My air compressor plumbing project started out as a single trip to pick up all the pipe and fittings. A dozen trips and four weeks later the job was done. Ten days ago, my compressor exploded so a major modification of that plumbing is underway...:ugh
 
Bill,

I start working on some aspect of the car and figure it will take a few hours to finish what I want to do. About the third day I realize it isn't going to be easy. After a week I usually take a break and do something else, like change a lightbulb in the house. Then at least I feel like I've accomplished something.
This reminder me of a number of those projects I wish I never even started ;LOL

Bill :w
 
Compressor Saga

About 14 years ago I moved and replaced an old, reliable 2hp 220v compressor with a new and noisy 5hp 110v compressor. I was too busy at the time to add a 220v outlet to the garage so it seemed like a good idea. Unfortunately it was like living at the end of an airport runway but I learned to live with it.

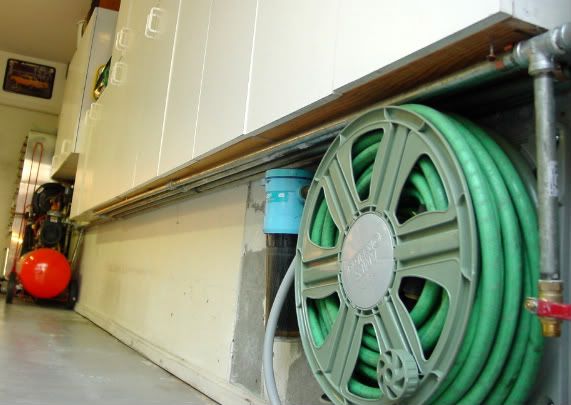
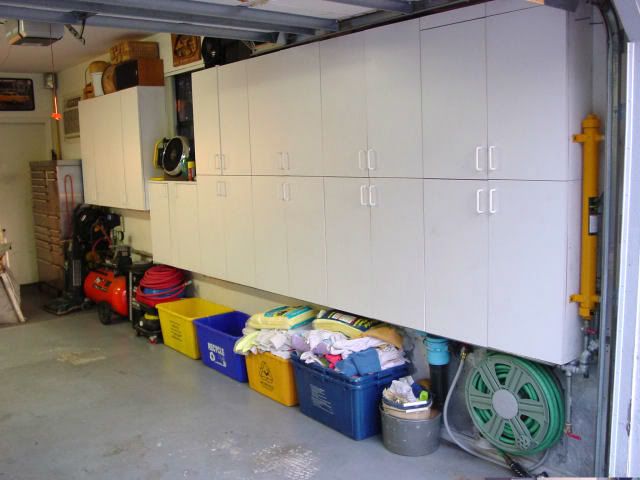
Along the way I added some home-made cabinets to store oil, polishes, catalogs and all the other stuff that was sitting on open shelves. To give me space for a future upgrade to a larger horizontal compressor, some of the cabinets are a different size to leave more open space below -- about 42.5-inches.
GarageWall.jpg


A couple of years ago I decided to get serious with the Corvette and ran into a problem with air tools and spray guns. I was getting a lot of water coming out of the air lines so I upgraded the system -- but not the compressor. That yellow thing on the end of the wall of cabinets is a cheap desiccant dryer. To make it work effectively, I plumbed 40-feet of 1/2" galvanized pipe between the dryer and the compressor. Another 15 feet of the same pipe returns to the compressor all dry as a bone.
AirSupply_0005.jpg


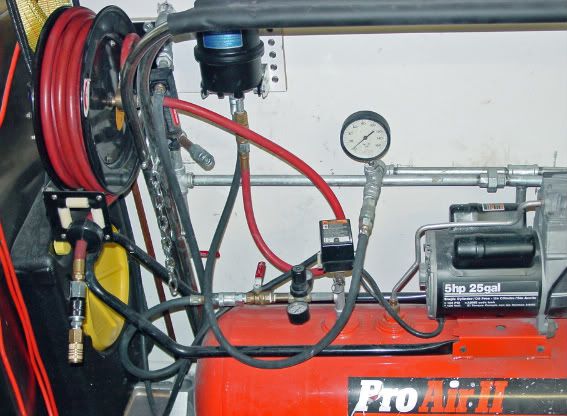
At the compressor there are several other items, including an oil trapping filter and a hose reel.
20100604_0115_edited-1.jpg


It was working great until the beginning of May 2011, when the compressor died.
 
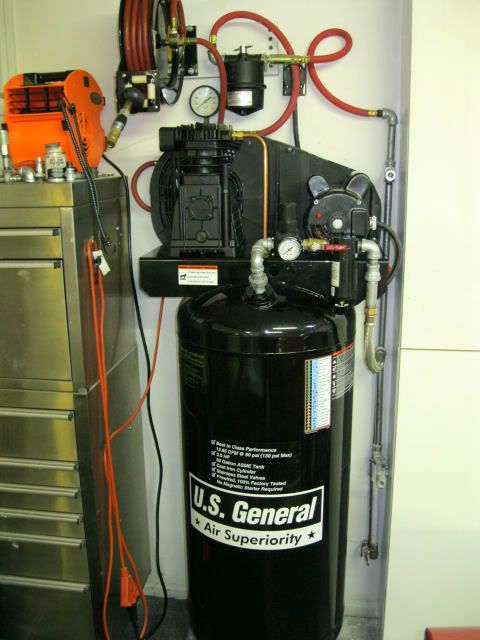
I had planned to buy an Eaton 5hp 220v compressor with a horizontal 60-gallon tank. About a year ago they were selling for $999 with free shipping. When I checked the price this month it was $1,399 plus shipping (650 lbs). I'll probably be sorry but I went for the $399 US General 3.5hp 220v with a vertical 60-gallon tank. The Eaton would have given me 17.0 CFM at 175 PSI instead of 12.85 CFM at 90 PSI for the US General. I just couldn't justify more than triple the price for five CFM. I'm 66 years old and I don't plan to start a business. I just want to do the body work and paint my Corvette.

My neighbor helped get the new compressor home in his pickup after I re-arranged the cabinets a little. The two 42-inch tall, ten-inch deep cabinets that were side-by-side are now stacked. I lose some shelf space where the lines to and from the desiccant dryer pass through. I also had to move the air filter and hose reel higher on the wall above the new compressor. I started the re-plumbing job with the final air connections on the left and the beginning of the dryer run on the right. The line on the left also feeds air outside, where I connect the small blast cabinet and do some painting of small parts.
IMG_0188.jpg


I upgraded the Motor Guard coalescing filter from the 3/8" connection model to the larger 1/2" inch model. The red lines have G-Type quick disconnects so I can bypass the filter when I'm sandblasting. There is also a quick-connect near the top that gives me dry but unfiltered air inside the garage. The lowest connection on the right side takes air right from the compressor, when I don't care about dry or filtered air. This is handy when I just want to blow the dust out of the garage or blow-dry the engine compartment after pressure washing.
NewCompressor.jpg


The last piece of the puzzle is the 220v outlet. I cut a hole in the wall near the ceiling and fed a 10-2 cable up into the attic. It will connect to the main breaker box on the other side of the garage. I bought a 30A 220v breaker but also needed a double 15A breaker to give me the needed space. Turns out the new double breakers are meant for a newer model Siemens panel than what I have. Had to order the right one online so it's going to be a few more days before I can finish the power. The outlet just above the compressor will allow me to upgrade to a 220v MIG welder one day. The 110v flux wire welder I have now is more of a slag spraying machine than an actual welder.
 
Looks awesome for sure Bob :happyanim:

Bill :w
 
Wow Bob- what an interesting saga you and your Vette have had!


I'm really enjoying this thread- keep the story coming!!! :cool!:
 
Bill and Kane,
Thanks -- I'll keep it coming.

I'm still alive after opening the main breaker panel. Ran the last few feet of cable in the attic this morning before it warmed up. When my wife went out to work on the gardens I was able to shut off the main breaker at the meter.

I was able to swap one double breaker for two singles and shift the rest of the breakers down one single-breaker position. Removed a 60-amp 220-volt paired breaker that was just a dummy. The 30-amp paired that was originally in that spot overheated and fried one leg of the bus. I couldn't just swap my paired 30-amp in its place. One of the 15-amp breakers removed earlier now fills the dead spot. Just have to make a label for it to indicate it's dead. It's all back together looking like it hasn't been touched -- oh yeah, except for the strip of sheet-rock I removed to get to the top of the panel. I didn't want to try to fish the wire through the 1/2-inch hole from up in the attic with just a flashlight.

Fired up the compressor with all the valves open so it warms up the first time with no load. If my car sounded that bad, I'd have the oil pan off already. Once I shut the valves and it built up some pressure in the tank, the rod knocks went away. I hope it's just loose clearances on the rod bearings but I'll take the advice given on another site and change the oil in a week or two. At least I invested in an extended warranty on this one (just a premonition).
 
Sounds like you have it on the run Bob :cool!: Wish I had half your energy, seems as I am going to have to retire to get anything done here lately, just get a good start and time to go back to work :ugh, retirement is on my horizon though :happyanim:

Bill :w
 
I stumbled on your thread a couple of days ago, and my hat's off to ya! As someone who has always viewed a malfunction in any device as an excuse to take it apart, I can very much appreciate the trials and tribulations you have been encountering.

On the air comp, getting the service plan was a good idea. If your experience with that particular type of equipment turns out to be anything like mine, I would suggest mounting it on a small trailer so as to make it more convenient to return for exchange periodically.

On the vette, you're starting to make me feel bad. I own a '71 roadster that I bought in '88 showing 121k miles (it now has 132k). About 10 yrs ago I decided to stop fighting the regularly scheduled breakage of parts and just fix it all at one time -and planned to start in the next few days.

I finally got around to beginning the process a few months ago. For the last 6 yrs prior to that it sat on jackstands waiting for me to replace a popped power steering cylinder - with the new replacement sitting in it's shipping container on a nearby workbench for most of that time. It was just hard to get motivated since it also needed sooo many other "little" things. It's currently waiting on the sand-blast fairy to visit my shop and shoot the frame.

Now, to somewhat redeem myself, there have been a few other project vehicles that have moved thru the picture since the late '80s, some of which helped develop the fine skills of procrastination that I now posses.

One of those was a '72 coupe. Bought it out of the weeds (no joke) behind a ranshackle garage in 1987 where it had been resting with the windows rolled down and the hood off for 2yrs. Some would say it was a bit rough.... After 2 yrs of pondering it's future, I decided to build it into an autocross racer. I went thru pretty much the same process that you have been describing, so I won't spoil the fun by telling you what you still haven't found yet. I completed it in a few months and had a lot of fun with it for several years, during which time I never had to fix anything on it. I never bothered to put any color on the outside, as I knew someday primer paint jobs would be back in style.

Anyway, after 12 yrs as an engineer and 25 as a building contractor, I've come to the following conclusions which actually apply to most mechanical devices but seem to cling to corvettes more than any other critter:
- Anything that can rust, crack, warp or get worn out of shape - will do so shortly after it's no longer available over the parts counter.
- These parts talk to each other, and when one decides it's had enough, word gets around and several of his close buddies will decide to join in....
- You usually discover these late in the evening on weekends and holidays, or during the last few minutes you have to work on it before you're supposed to take your wife out to dinner.
- There is no such thing as buying a better quality tool than you think you actually need.

After reading your posts, I think you're just joshin' us about only having one arm....from what you've gotten done I'm thinkin you've got at least 3... keep it and keep posting. Reading yours is a lot more fun than working on mine.
 
- Anything that can rust, crack, warp or get worn out of shape - will do so shortly after it's no longer available over the parts counter.
- These parts talk to each other, and when one decides it's had enough, word gets around and several of his close buddies will decide to join in....
- You usually discover these late in the evening on weekends and holidays, or during the last few minutes you have to work on it before you're supposed to take your wife out to dinner.
- There is no such thing as buying a better quality tool than you think you actually need.

:thumb

Those observations are soooo true!!
 
:thumb

Those observations are soooo true!!
I agree.

DP,

I've also found the stress of a weekend event involving the Vette always caused one of the Corvette-unique parts to break ten minutes after the parts counter at the dealer closed Friday evening.

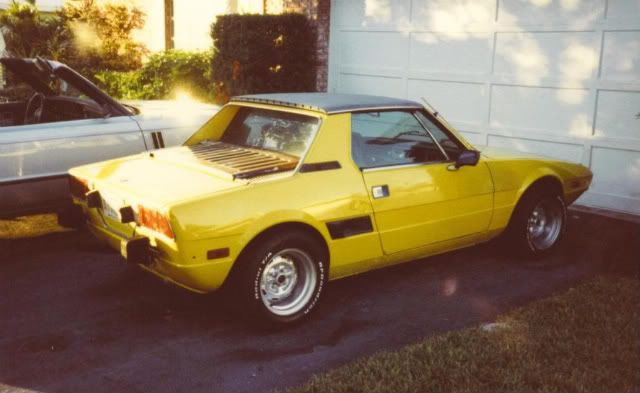
When I stripped the paint off the Vette, I convinced my wife that I needed an economical car to drive to work and chase parts. Guy at work had the perfect car -- a 1974 Fiat X1/9. My Corvette club friends laughed until the first parking-lot autocross. My little Fiat took first in the open class. It was so much fun I had to make few modifications to the engine (dual Webers, headers and a cam), suspension (sway bars) and traction (widened stock rims and wider tires). I had to quit because I was losing friends -- they didn't mind losing to a one-armed guy but doing it with a Fiat was unforgivable.
1974FiatX19after87.jpg


Technically I've got three arms. My right arm is stock and my two left arms are modified. The 45-year old one is a body-powered mechanical model and the 3-year old one is a Utah Arm 3 myoelectric model. Here's a tampon-style commercial for the Utah Arm:
YouTube - ‪Utah Arm 3 Plus by Utah Arm / Motion Control Myoelectric Pro‬‏

Most of the work I do on the car is easier to do with one arm. Saves me a lot of emergency room visits (I've avoided an unbelievable number of cuts and scrapes to my real left arm). I used the body powered arm for construction work around the house (digging dry wells or holding lumber).

I wanted to work with some of the kids returning from Iraq and Afghanistan who were missing an arm but they are all being fitted with the latest technology. My health insurance covered the myoelectric arm so I had one fitted. Once I learned to use it, I contacted the VA but they never responded. Instead, I work with physical therapists and prosthetic specialists doing demos and giving them insight into the issues amputees deal with.

I probably should have done more research on the myoelectric arm but there isn't that much information available. Turns out you can't get it wet, have to turn it off when driving (cell phone interference) and it doesn't like rough handling or dusty and dirty conditions. I didn't bother checking on it's use around MIG welders or die grinders.
 

Corvette Forums

Not a member of the Corvette Action Center?  Join now!  It's free!

Help support the Corvette Action Center!

Supporting Vendors

Dealers:

MacMulkin Chevrolet - The Second Largest Corvette Dealer in the Country!

Advertise with the Corvette Action Center!

Double Your Chances!

Our Partners

Back
Top Bottom