Welcome to the Corvette Forums at the Corvette Action Center!

Question: At 1/3 the cost are they any good????

Dangerous Dan

Member
Joined
Aug 7, 2017
Messages
24
Location
Simsbury, CT.
Corvette
2000 convertible bowling green metallic
Ok you guys with aftermarket exhaust,
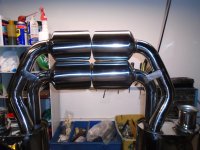
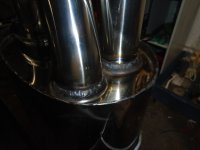
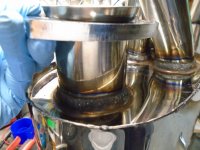
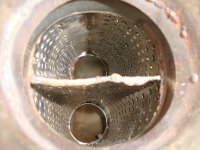
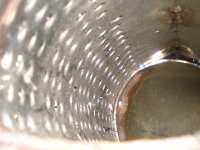
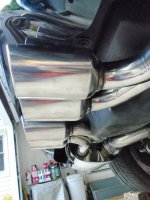
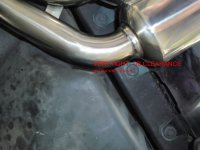
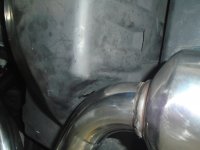
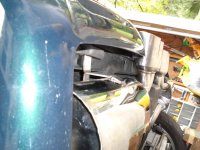
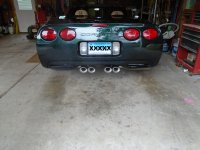
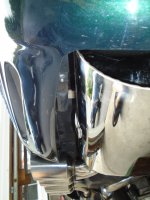
The Borla cat back systems are around 1200 dollars and the Corsa systems are about the same. EBay has multiple vendors selling cat back systems at around 385 dollars. They are obviously all from China with names like Jungle Jungle, Mirage, BeYondR, Parts GoGo and Wan.9. They claim to be 304 SS and all look identical with 4 oval tips each around 4 1/2 inches wide. Has anyone installed one of these? What do they sound like, do the tips line up correctly or do they look stupid? I have sent requests for information to 4 of the importers regarding exactly what is the construction of the mufflers. I only got one response, they had no idea what is inside the mufflers. Does anybody know? Like baffles or diffusers (perforated tubing) or fiberglass packing. My concern is that they are just hollow cans that will sound very loud with no real tone at all.
Thanks, Dangerous Dan
 
If the level of customer is such that in four queries, you only get one response which said they didn't know anything, is telling. It is possible that the quality of product mirrors the quality of customer service.

You want a great aftermarket exhaust for a late C4?

Take a look at the Flowmaster cat back. I had that on my 95 and loved the sound, the performance increase and the price.
 
Ok you guys with aftermarket exhaust,
I have sent requests for information to 4 of the importers regarding exactly what is the construction of the mufflers. I only got one response, they had no idea what is inside the mufflers.


There in lies your answer. :)
 
I guess we will find out!!

It seems like no one on this forum has installed these mufflers so, I sprung for one of the 380 dollar systems on EBay. I should have it by September 5th. I will report on the install, appearance, and sound by mid-month.
Dangerous Dan
 
It arrived 3 days early, in bad shape!

The box really took a beating on the 3000 mile trip from California to Connecticut. See the 4 attached pictures: 290 thru 293. When I got the parts out I was amazed there was very little damage. I did a bench check to see if either muffler had bent pipes, the symmetry seems OK, see #298. The weld quality is very good, probably robotic. See #299 and #305.
That's my 8 allowed pictures for now, I will post again shortly.
Dangerous dan
 

Attachments

  • DSC00290.JPG
    DSC00290.JPG
    4 MB · Views: 252
  • DSC00291.JPG
    DSC00291.JPG
    3.9 MB · Views: 250
  • DSC00292.JPG
    DSC00292.JPG
    4 MB · Views: 252
  • DSC00293.JPG
    DSC00293.JPG
    3.9 MB · Views: 239
  • DSC00298.JPG
    DSC00298.JPG
    3.7 MB · Views: 249
  • DSC00299.JPG
    DSC00299.JPG
    3.2 MB · Views: 264
  • DSC00305.JPG
    DSC00305.JPG
    4 MB · Views: 262
  • DSC00310_1.JPG
    DSC00310_1.JPG
    1.6 MB · Views: 257
Those welds don't look robotic to me.

Hopefully they are made out of a high quality stainless steel.
 
More pictures from my previous post!

The muffler construction seems normal, the inlet branches into two perforated tubes that are attached to the exhaust tip pipes. The perforated tube is either surrounded by a stainless steel wool packing or the whole muffler canister is filled with it. No way to tell without cutting it open. See 310-1 and 310-2. If you can blow the view of the inside up you will see the SS wool poking out of the perfs. The exhaust pipes are nicely done. The flanges are very thick, the bellmouth ball ends are perfectly formed and the bellmouths on the mufflers are right on for fit. See #311 and 312. The four major parts are polished to perfection, way too nice for under a car, thats 313!
Now the not so good issues so far. The supplied hardware is junk! The four supplied exhaust flange bolts that attach to the H pipe are 4.8 grade metric, that's dead soft grade 2 in our system. They should be grade 8.8 in metric to match grade 5 heat treated american hardware. The supplied serrated flange nuts are tapped so crooked they have to be thrown away along with the bolts. See pics 14 and 18. No hardware was supplied for the bell mouth couplings at all. You need to purchase six grade 5 plated bolts, 3/8-16 x 2 1/4 and 6 serrated flange lock nuts ( or some other type of all metal lock nut). See #322.
Dangerous Dan
 

Attachments

  • DSC00310_1.JPG
    DSC00310_1.JPG
    212.2 KB · Views: 249
  • DSC00310-2.JPG
    DSC00310-2.JPG
    3.3 MB · Views: 250
  • DSC00311.JPG
    DSC00311.JPG
    3.5 MB · Views: 256
  • DSC00312.JPG
    DSC00312.JPG
    3.8 MB · Views: 242
  • DSC00313.JPG
    DSC00313.JPG
    3.6 MB · Views: 248
  • DSC00314.JPG
    DSC00314.JPG
    3.3 MB · Views: 250
  • DSC00318.JPG
    DSC00318.JPG
    4 MB · Views: 243
  • DSC00322.JPG
    DSC00322.JPG
    3.8 MB · Views: 233
It's install time

To get your old system off your Corvette is not easy at home. As you can see in #335, you have to get way up off the garage floor to twist the old system out. My big jack stands have an inch of air above them and my long reach high lift floor jack is maxed out. It was just enough! The drivers side is easy there is plenty of room to maneuver. The passengers side is very difficult, the space between the trans and the gas tank shroud is really tight on the flange. I was happy to get it out with just scratches and a small dent on the gas tank protector. There is lots of room to install the drivers side exhaust. I used the original flange bolts from GM. They happen to be grade 10.9 metric, not the 4.8 junk I mentioned previously. The muffler is another story, see# 336, does that look like 90 degrees to you? I bent it closer until I was afraid of tearing the skin then I reduced the width to help the fit. See #338, without this adjustment the outer tailpipe would have had me grinding a hole in the drivers side of the center trunk well. I finally got the muffler level and the tips about where I wanted them.
Now the passengers side wanted to give me a bad time. Again it was hard to twist the exhaust pipe into position and when I bolted it up to the H pipe it was pushing hard on the transmission and the Getrag differential case. See 343 and 346. I was already twisted as far clockwise as I could be in the slotted flange on the exhaust pipe. I needed more so I elongated lower left and upper right to get some more clearance. See #48 and #50. The results next time I post.
 

Attachments

  • DSC00335.JPG
    DSC00335.JPG
    3.6 MB · Views: 222
  • DSC00336.JPG
    DSC00336.JPG
    3.6 MB · Views: 222
  • DSC00338.JPG
    DSC00338.JPG
    3.8 MB · Views: 220
  • DSC00343_1.JPG
    DSC00343_1.JPG
    1.5 MB · Views: 214
  • DSC00346_1.JPG
    DSC00346_1.JPG
    3.6 MB · Views: 212
  • DSC00348.JPG
    DSC00348.JPG
    3.6 MB · Views: 215
  • DSC00350.JPG
    DSC00350.JPG
    3.7 MB · Views: 211
From viewing the pictures your showing, the exhaust is too close to the transmission, and you should be using some sort of washer or metal plate on the bolts as they don't cover the holes very well.
 
Now the results!!

I only used the cheap 10mm bolts to mock up the assembly, I used the original bolts for final assembly with SS flat washers and lock washers.
Ok, lets talk about appearance first. The stainless shows thru the rear vents and looks neat. It also shows below the rear bumper cover. The four tips were difficult to get lined up in a perfect row but I got them so they look ok. See #54 and #59. The difficulty in lining the tips is due to the length of the provided exhaust pipes. The drivers side is 1 1/2 to 2 inches shorter than the passenger side. The drivers side muffler clears the tire by about 2 inches and the passenger side muffler is way back, almost touching the bumper cover. See #62 and #63. The inner tip pipes just clear the center well in the trunk, see #60 and 61. My last picture is a view on the ground. See #371 I like the look! Now it's time for a ride!
Dangerous Dan
 

Attachments

  • DSC00354.JPG
    DSC00354.JPG
    3.4 MB · Views: 219
  • DSC00359.JPG
    DSC00359.JPG
    2.8 MB · Views: 206
  • DSC00360_1.JPG
    DSC00360_1.JPG
    3 MB · Views: 207
  • DSC00361.JPG
    DSC00361.JPG
    3.5 MB · Views: 212
  • DSC00362.JPG
    DSC00362.JPG
    3.7 MB · Views: 205
  • DSC00371_1.JPG
    DSC00371_1.JPG
    3.2 MB · Views: 221
  • DSC00363 (2).JPG
    DSC00363 (2).JPG
    1.2 MB · Views: 207
Those welds don't look robotic to me.

Hopefully they are made out of a high quality stainless steel.

They aren't uniform enough to be robotic welds.

"Pure" stainless steel is difficult to machine, form or bend so a ferritic alloy stainless is used..
 
Those are some very shiny mufflers! I hope they sound as good as they look. :thumb
 
On the road again!

"Pure" stainless steel is difficult to machine, form or bend so a ferritic alloy stainless is used..

[FONT=Verdana, Tahoma, Calibri, Geneva, sans-serif] Regarding the previous post above, I checked the entire system with a magnet. All the sheet metal and tubing are non-magnetic. The manufacturer claims it's 304SS. Those heavy flanges are carbon steel chrome plated not SS. The perfed tubes inside the muffler are also mild steel and magnetic.[/FONT]

[FONT=Verdana, Tahoma, Calibri, Geneva, sans-serif] Now for the road test! When I bought the system my major concern was just how loud it would be. I was afraid it would be just two hollow muffler cans and they would do very little to quiet the straight pipe level of sound. Surprise, at low RPM'S and light loads the system is as quiet as the stock system. Even under high power levels the sound is only slightly louder than stock. On down shifts and deceleration it crackles just a little. For a straight thru exhaust system with no baffles at all, I am amazed at how well the perforated tubes surrounded by stainless steel wool work. The power level feels slightly stronger than before.
My final recommendation to all prospective buyers, (IF YOU WANT TO WAKE UP THE DEAD THIS IS NOT THE SYSTEM FOR YOU!!!)
Dangerous Dan
[/FONT]
 
304 SS: ASM Material Data Sheet

You'll notice the high percentage of Fe (iron):

Component Wt. %


C Max 0.08
Cr 18 - 20
Fe 66.345 - 74
Mn Max 2
Ni 8 - 10.5
P Max 0.045
S Max 0.03
Si Max 1


Add the statement:

Material Notes:
Austenitic Cr-Ni stainless steel. Better corrosion resistance than Type 302. High ductility, excellent drawing, forming, and spinning properties. Essentially non-magnetic, becomes slightly magnetic when cold worked. Low carbon content means less carbide precipitation in the heat-affected zone during welding and a lower susceptibility to intergranular corrosion.


[FONT=&quot]Your magnet test won't work. [/FONT]

As I said pure stainless is a stinker to work with so they alloy it with iron. Which makes it more co-operative..


Clarifying my statement on the welding!


I agree.. Robotic welds look boringly alike.

I agree the welds on the muffler were done by hand. The exhaust pipe flanges were the boring robotic type!
Dangerous Dan
 

Attachments

  • DSC00348.JPG
    DSC00348.JPG
    3.6 MB · Views: 181
  • DSC00346_1.JPG
    DSC00346_1.JPG
    3.6 MB · Views: 183
Those welds look good!! The fixtures and tooling for robotics are expensive but the quality is as good as it gets..
 

Corvette Forums

Not a member of the Corvette Action Center?  Join now!  It's free!

Help support the Corvette Action Center!

Supporting Vendors

Dealers:

MacMulkin Chevrolet - The Second Largest Corvette Dealer in the Country!

Advertise with the Corvette Action Center!

Double Your Chances!

Our Partners

Back
Top Bottom