Navigation
Install the app
How to install the app on iOS
Follow along with the video below to see how to install our site as a web app on your home screen.
Note: This feature may not be available in some browsers.
More options
Style variation
You are using an out of date browser. It may not display this or other websites correctly.
You should upgrade or use an alternative browser.
You should upgrade or use an alternative browser.
Custom headliner (snappics)...
- Thread starter Schrade
- Start date
WhalePirot
Well-known member
I like the idea. but only have/use the glass top... and that one sparsely.
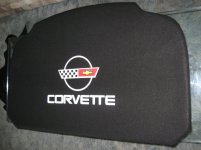
Any issues with Chevy on using their logo?
Any issues with Chevy on using their logo?

92vetterob
Member
Pm'd you!!
Rob
Sent from my iPhone using Tapatalk
Rob
Sent from my iPhone using Tapatalk
92vetterob
Member
Any update?
- Thread starter
- #5
Schrade
Well-known member
Finish up here...
This was pad removal:
Butterknife, to not scratch...
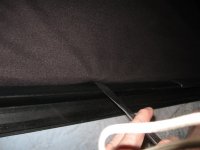
Then you can get a hand in.
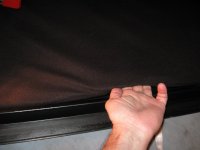
Once you get under the edge, ya' gotta' pull the fabric off of the panel with your fingers. Don't try to pull it by the edge of the foam board - it will break up.
Wear long sleeves!
Go all the way around the edge, then work toward the center.
(at this point, the edge DID break, and I had to go around the other way)
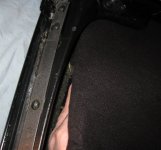
This was pad removal:
Butterknife, to not scratch...

Then you can get a hand in.

Once you get under the edge, ya' gotta' pull the fabric off of the panel with your fingers. Don't try to pull it by the edge of the foam board - it will break up.
Wear long sleeves!
Go all the way around the edge, then work toward the center.
(at this point, the edge DID break, and I had to go around the other way)

- Thread starter
- #6
Schrade
Well-known member
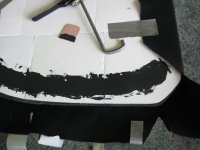
Once the old felt is removed, I painted the pad to stop pad dust from coming through the felt. I just used Acrylic Black latex, rolled on. You could probably go with a rattle can, Clear Poly, Black, anything you have laying around unused, that wont show through the new felt.
Glue new headliner to the foam pad.
Adhesive:
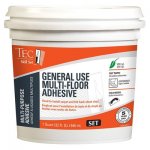
Headliner in place, then flip it halfway back. Glue onto the bottom half with a putty knife:
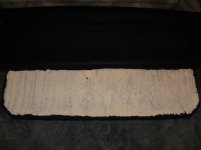
Then the top half:
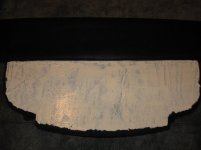
(DO NOT PRESS DOWN TOO HARD - THE ADHESIVE WILL COME THROUGH THE FELT. You could see that in the 'Skully' '94 top... )
Glue new headliner to the foam pad.
Adhesive:

Headliner in place, then flip it halfway back. Glue onto the bottom half with a putty knife:

Then the top half:

(DO NOT PRESS DOWN TOO HARD - THE ADHESIVE WILL COME THROUGH THE FELT. You could see that in the 'Skully' '94 top... )
- Thread starter
- #7
Schrade
Well-known member
- Thread starter
- #8
Schrade
Well-known member
- Thread starter
- #9
Schrade
Well-known member
Done.
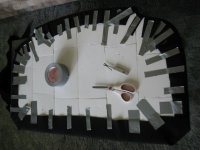
Felt glue onto the roof panel:

and set into place:

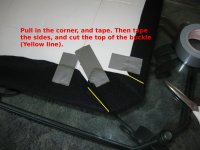
I did not cut the overlap deep enough into the front corner concave curves, and I got an ugly buckle on the D side.
And I placed a 3/16" styrofoam board glued onto the panel side of the pad, for extra exhaust drone kill. I have a glass top too, so I can measure interior sound with that top, and then again with the insulated Black top (when the rain stops)...
Felt glue onto the roof panel:
and set into place:
I did not cut the overlap deep enough into the front corner concave curves, and I got an ugly buckle on the D side.
And I placed a 3/16" styrofoam board glued onto the panel side of the pad, for extra exhaust drone kill. I have a glass top too, so I can measure interior sound with that top, and then again with the insulated Black top (when the rain stops)...
- Joined
- Feb 13, 2003
- Messages
- 5,475
- Location
- Ottawa, Canuckistan
- Corvette
- 1973 coupe L82 (gone as casualty of divorce)
Schrade, that looks amazing!! Well done!! 
Mac

Mac
- Thread starter
- #11
Schrade
Well-known member
Thanks!
I'm just hopin' that nasty buckle doesn't jam my ET's too bad...
I'm just hopin' that nasty buckle doesn't jam my ET's too bad...
92vetterob
Member
Looks great!
- Thread starter
- #13
Schrade
Well-known member
Thanks there Rob; post up some snappics of yours if you get a chance, to see how yours comes out there.
And note where I messed up on the front corners, from not cuttin' deep enough into the front corners ad
ad
And note where I messed up on the front corners, from not cuttin' deep enough into the front corners
 ad
adSimilar threads
- Replies
- 0
- Views
- 36
- Replies
- 3
- Views
- 113
- Replies
- 3
- Views
- 2K

