Welcome to the Corvette Forums at the Corvette Action Center!

Help! Installing Targa Top After Replacing all Weatherstripping?

91-Vetteman

Well-known member
Joined
Dec 26, 2002
Messages
105
Location
Richmond, VA
Corvette
1991 Blue Coupe
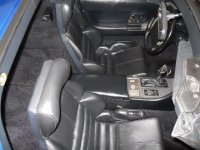
I just finished my 2012 winter project of replacing all interior carpet and weatherstripping. Has anyone had difficulty installing their targa top after replacing weatherstripping? The weatherstripping is installed correctly, I think it is very stiff and inflexible. I need about a 1/2 inch to an inch movement backward to toward the rear to engage the rear bolts and align the front 2 bolts.

So, I went to the auto store and picked up two 3 inch 8 mm bolts and washers including some rubber ones to insert in the rear 2 holes and hopefully pull the targa top into place. I may add a little WD-40 to helps the top slide back without any friction or tearing. Once the top is pulled back enough into place, the front bolt holes should align, I can insert those, and then replace the rear ones with the correct length bolt.

So how does this plan sound? Any other suggestions? I would appreciate any help you can provide.
 

Attachments

  • DSCN0446smlr.jpg
    DSCN0446smlr.jpg
    84.3 KB · Views: 131
  • DSCN0427sm.jpg
    DSCN0427sm.jpg
    95.4 KB · Views: 128
Thats normal. have someone help to push it down. Ive done this work three times and it will fit.
 
Thats normal. have someone help to push it down. Ive done this work three times and it will fit.

Hey PLRX, wow it is tough! I have one rear bolt (extended one, not original) in, have neighbor coming over tonight to help me with last rear bolt. I am afraid of breaking the damn glass!!
 
Sounds to me like you may not have the panel side sections fully seated....a common fault with weatherstrip replacement.
That causes the top to ride too high and off the alignment points. A pillar is easy...so is B pillar rubber. The top panel sides are the easiest of all to make a mistake in seating.
Never use glue on the whole piece because of the need to remove and re-seat these side sections...
In fact, don;t use glue at all on panel sides.
After I totally scrub out the rubber tracks/guides with a dremmel and wire wheel, I will use a 5 to 6" plastic bondo spreader to press the weather strip edges down into the track so they seat. You'd be surprized at how easy it is for the rubber to NOT want to slip in the very bottom of the track... You cannot pull on it and stretch, you then have leftovers at the ends. You have to press straight down inch by inch and use the spreader to tuck the edges in without cutting.

Even then the new rubber has to compress and can be difficult. Drawing up the rears as you plan and then having someone on top pressing down right on the bolt position will allow you to get the fronts started. Start one side then start the other before running ANY bolt down more than 1.5 turns. If one side fails to start try the other side. There will be a pattern....LR then RR then RF or LF...maybe LR then LF then RR and so on. One thing is to be darn certain the car is on level ground and has not been jacked. It has to be flat and level at the normal ride height. Even sitting in it can tweak the chassis enough to misalign the top bolts.

If you get the 2 fronts close but they refuse to "start" you may have to loosen the receiver and let it move around so you can "find" the hole with the bolt. Once its been secured it gets easier. Get it on then leave it for a few days to seat itself after some driving.
BTW...save the WD for your nuts, use silicone grease on the weather strip. There is a economical type available at pool supply stores for pool & hot-tub seals. Petroleum base products will harden the rubber and make things worse long before its time. Rubber of this type likes silicone grease. A 2nd choice is armour-all gel.

Good job on the interior...looks like new :thumb
 
Sounds to me like you may not have the panel side sections fully seated....a common fault with weatherstrip replacement.
That causes the top to ride too high and off the alignment points. A pillar is easy...so is B pillar rubber. The top panel sides are the easiest of all to make a mistake in seating.
Never use glue on the whole piece because of the need to remove and re-seat these side sections...

Good job on the interior...looks like new :thumb


Thanx Boomdriver! I appreciate your comments.

1st, the top is bolted in!! I got help getting the rear two bolts (extended bolts) engaged first. I tightened them up frailly snug. The front two bolts holes were aligned and I was able to pull down on the roof myself and engage and tighten down the front 2 bolts with little effort. The rear 2 bolts were the bear to align. I am going to allow it sit for a couple of days and pull out the extended bolts and then insert the original bolts.

The weatherstripping looks like it is seated to me. I was pretty anal about cleaning out the old seal. I scraped, chiseled, used a rubber dis-solvent, and wire brush the groves that hold in the weather stripping. When installing, I used a 2 inch plastic spackle blade to insert the new weatherstripping. I was checking for any areas preventing me from installing the top and I did not see any.

Like I said, I am going to let the window set for a 24 - 48 hours before changing out the rear 2 bolts. Then I will pull off and reinspect my rear weatherstripping seating.

Any other tips or suggestions to look at will be appreciated! Thanks again!
 
Good to see the top is finally fitting correctly!

New weatherstrip always takes up more room until it can take a set. Warmer temperatures help a lot.

What brand did you buy? Are they all from the same vendor?

Keep on SAVING the WAVE! :w
 
C4 Weatherstripping

Good to see the top is finally fitting correctly!

New weatherstrip always takes up more room until it can take a set. Warmer temperatures help a lot.

What brand did you buy? Are they all from the same vendor?

Keep on SAVING the WAVE! :w

The targa top has settled in nicely, no problems today!! I bought all of the weatherstripping from Zip Corvette. I got a great deal on Cyber Monday following last Thanksgiving!!
 
Well I had some suggestions but they have already been suggested, and you have solved your problem, so that just leaves me to say nice job on the interior it looks great.
 

Corvette Forums

Not a member of the Corvette Action Center?  Join now!  It's free!

Help support the Corvette Action Center!

Supporting Vendors

Dealers:

MacMulkin Chevrolet - The Second Largest Corvette Dealer in the Country!

Advertise with the Corvette Action Center!

Double Your Chances!

Our Partners

Back
Top Bottom