Welcome to the Corvette Forums at the Corvette Action Center!

Interior replacement in our 75 coupe

White75

Well-known member
Joined
Sep 21, 2007
Messages
496
Location
Kingwood (Houston) TX
Corvette
'75 L48 Auto White, '78 L82 4-spd SA
Well I was going to do this once I was done but I'm more likely to forget what all I did so I'll just make a thread of it. I'm about 3/4 done so I hope I haven't forgotten too much already.
Enough of the jabber.
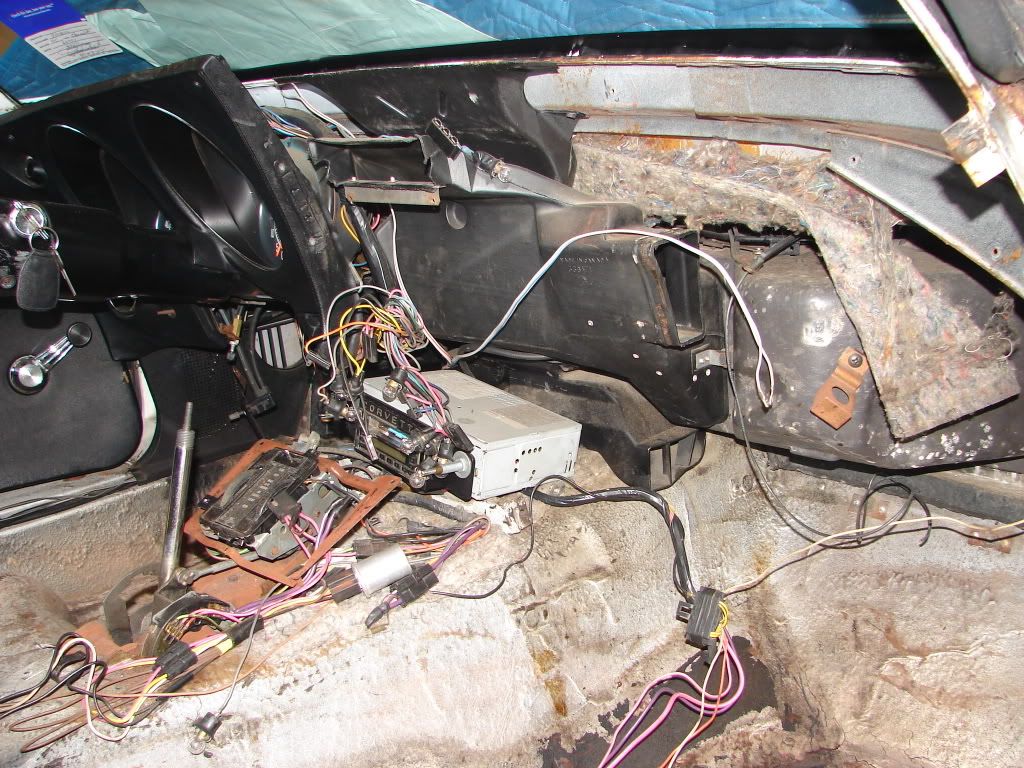
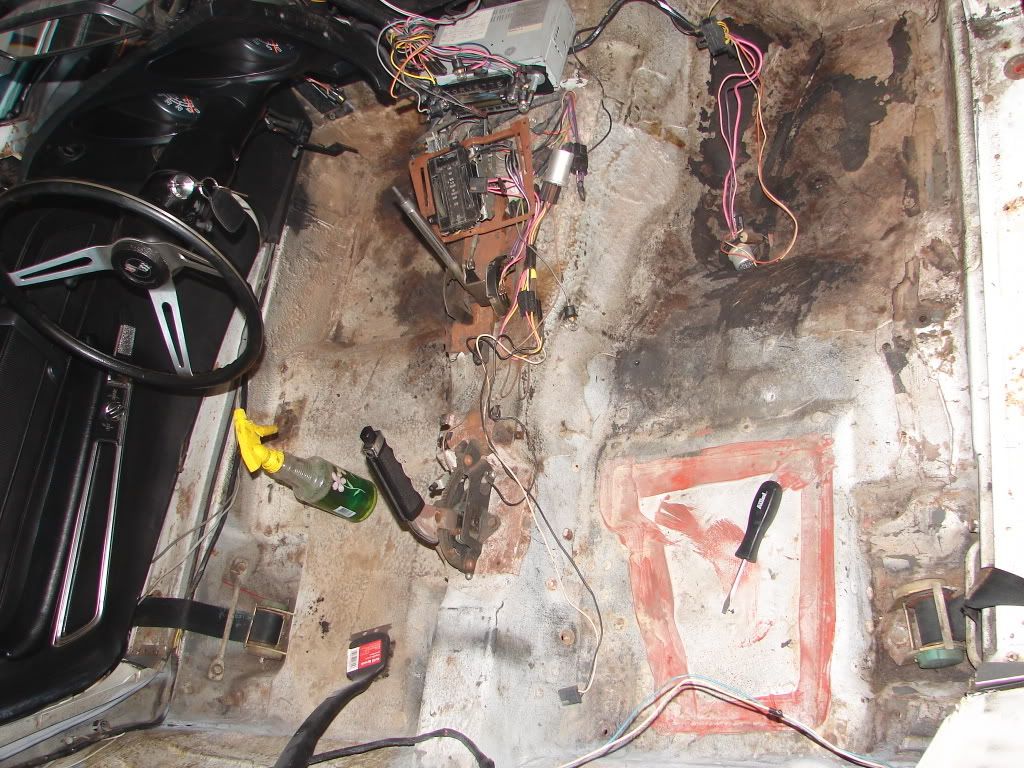
First step was the interior removal, time to remove all the interior pieces. I started with the A-pillars, header, B-pillars, window trim, etc. Then I went into the dash and got all that removed as well as the center console ( a total pain in the ass with all the wires). Then I ripped out all the carpet, underlayment and seatbelts. I gave everything a good cleaning and degreasing.
Only problem was that I got carried away and completely forgot to take pictures (ADD kicking in)
Well off to grab the camera and here's the result:
corvetteinterior018.jpg

corvetteinterior016.jpg

corvetteinterior023.jpg


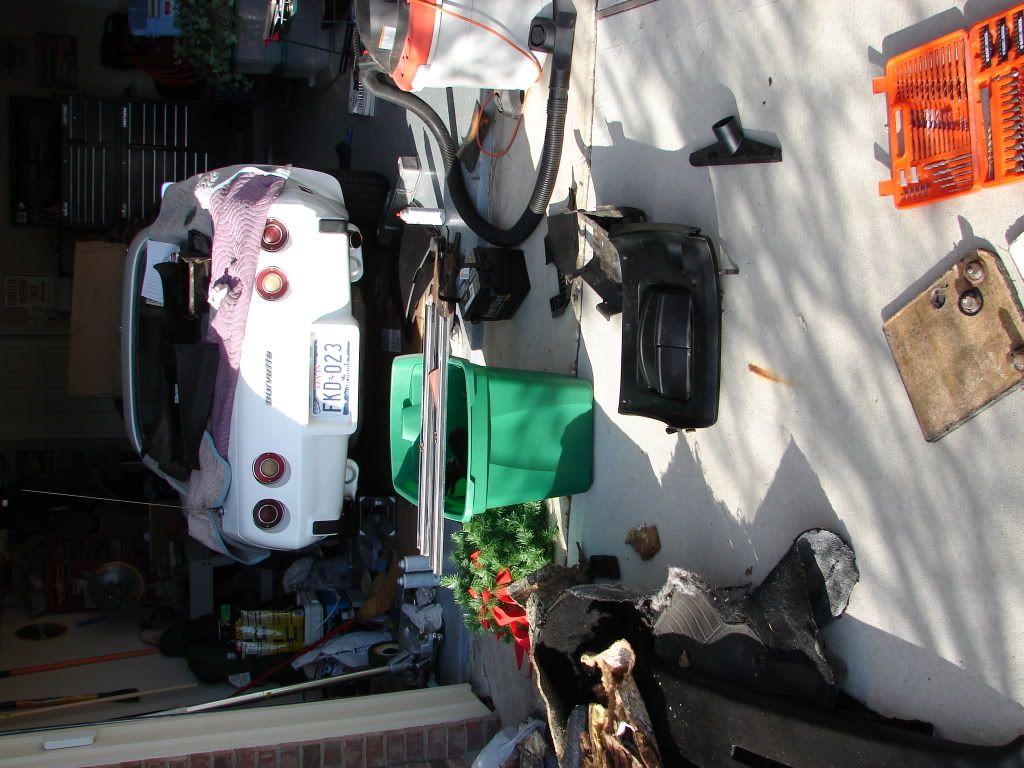
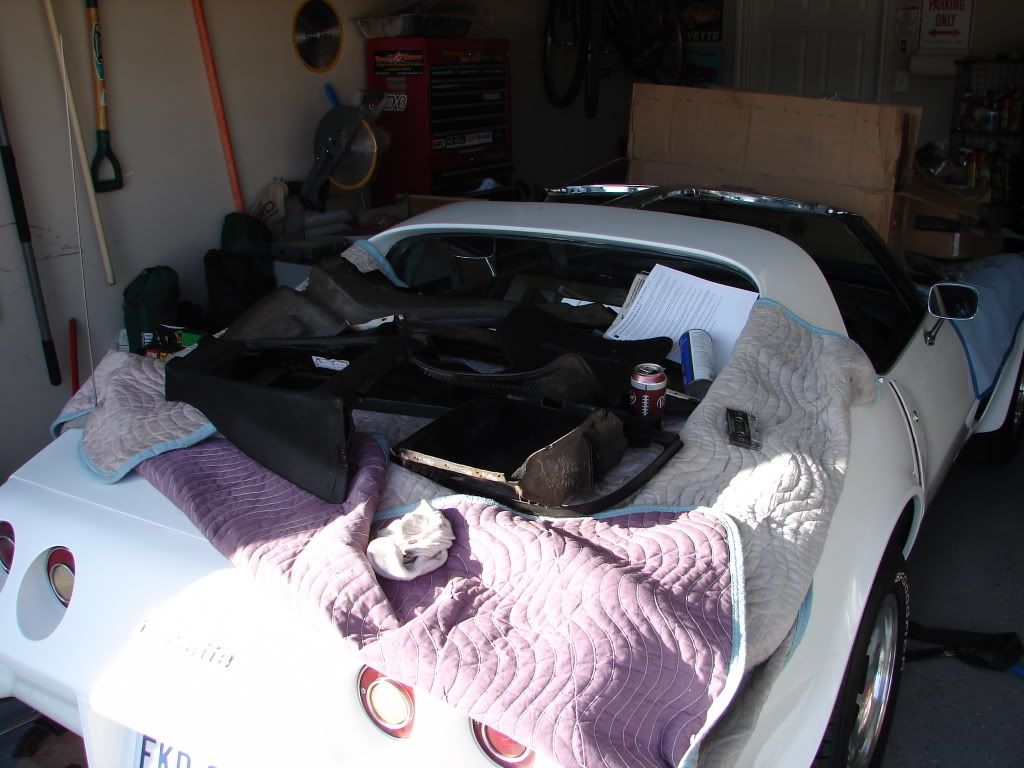
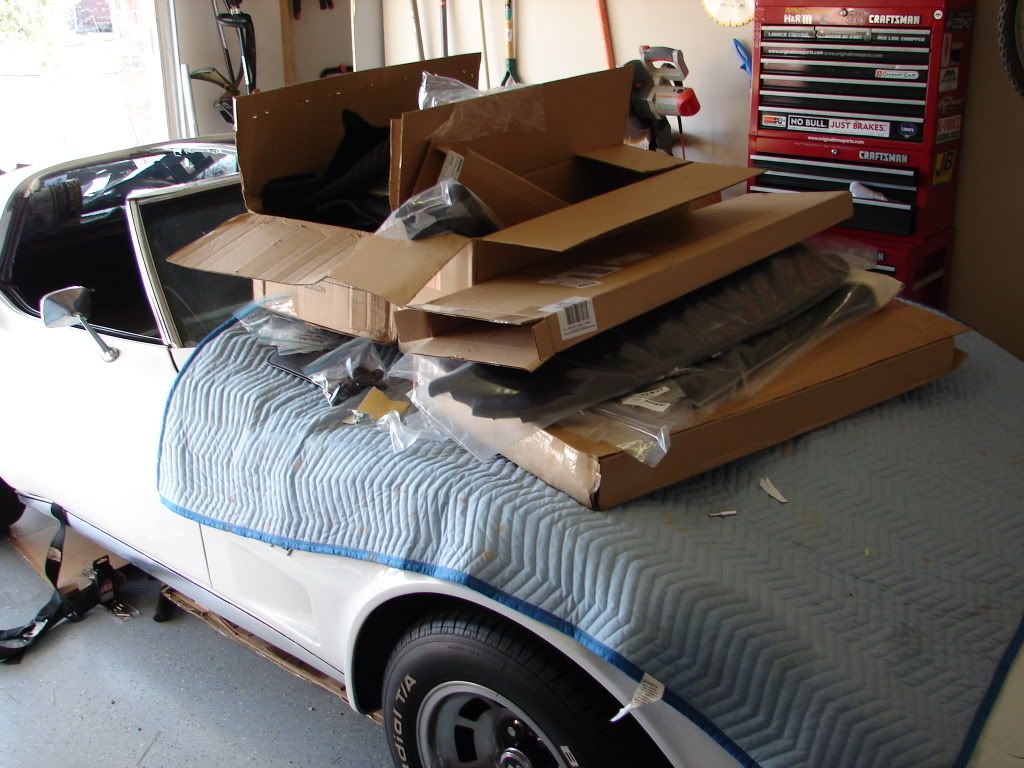
I also took inventory of all the new parts and all the parts I would be reusing after a good cleaning. I was able to reuse the lower dash pieces with a little bit of repair (more on that later) the center console and gauge cluster, all the rear trim and various other little pieces. I also kept all the screws and bolts I was removing which came in handy because the interior screw kit I got from Corvette America is not all inclusive as I found out.
A few packing blankets and a storage bin provided enough storage room for everything new and old.
corvetteinterior024.jpg

corvetteinterior026.jpg

corvetteinterior027.jpg
 
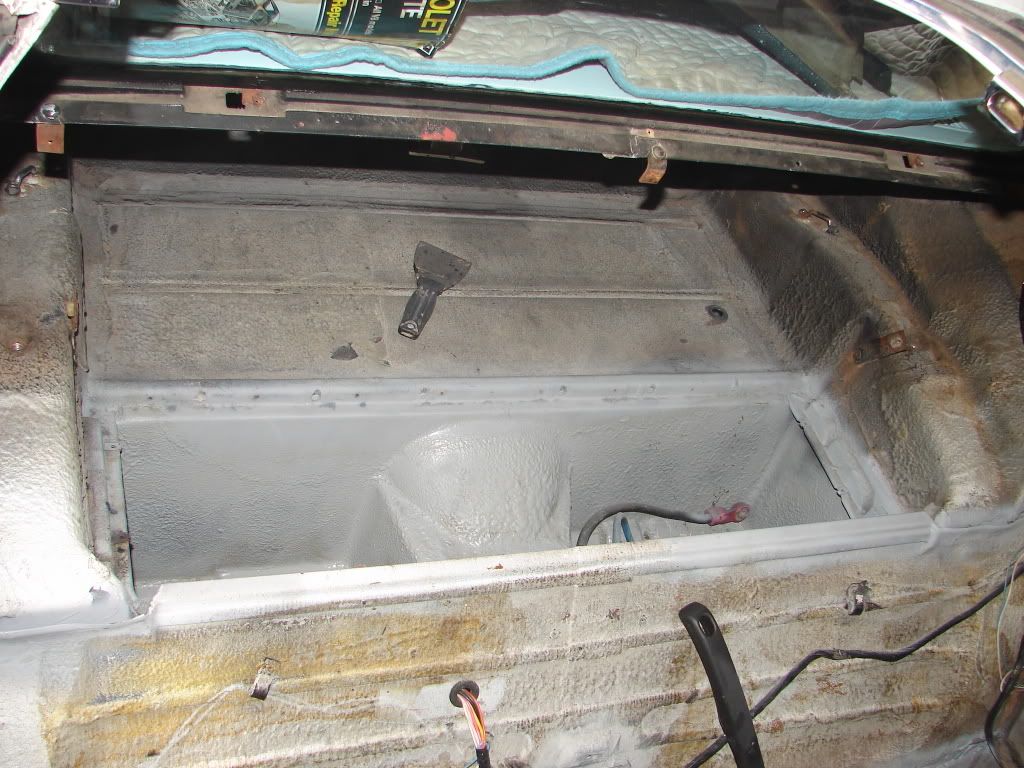
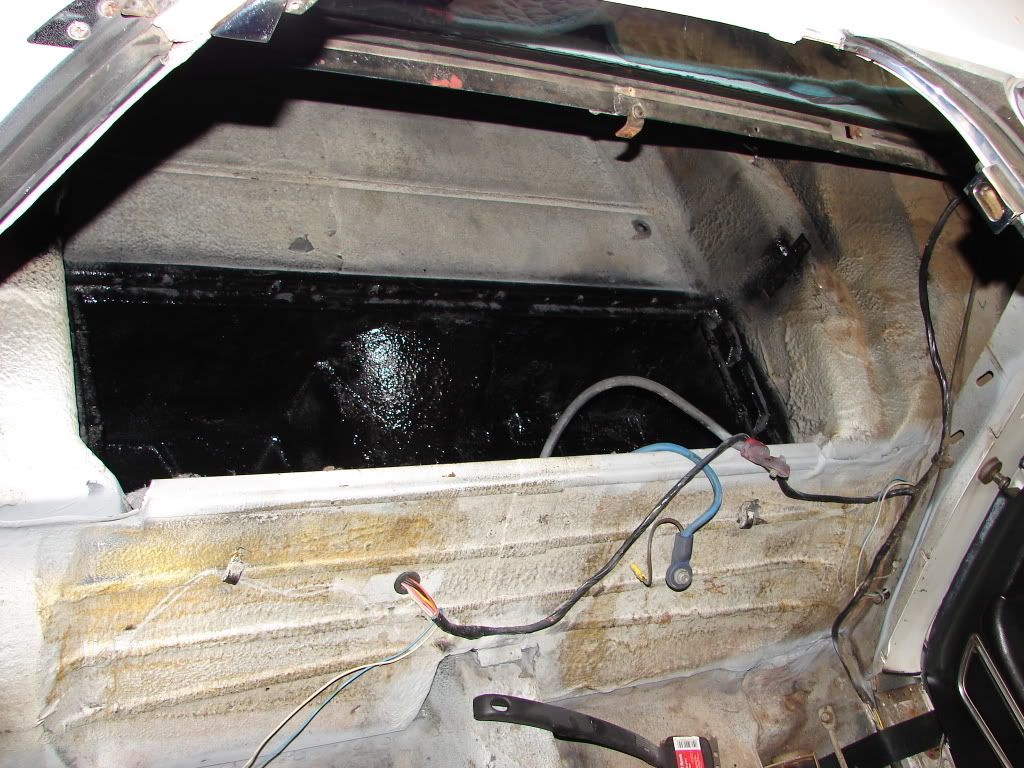
Next, areas that needed extra TLC were taken care of. This included the rear compartments that were filled with grease and other crud.
corvetteinterior023.jpg

A lot of baking soda (just in case of battery acid) and degreaser got it good and clean. A coat of primer and some black paint made it almost good as new
corvetteinterior020.jpg

corvetteinterior028.jpg
 
Time to take care of the floorboards:
Several cans of rubberized underlayment paint were sprayed on:
001.jpg

Next I got a roll of Reflectix from Lowes and layed that down with the help of 3M General adhesive
008.jpg
. it went in surprisingly well and conformed to all the curves well.
 
Next began the carpet. It really was quite difficult. I started with the floorboards, then the back behind the seats. I left the fenders to almost last because that really was a pain.
010.jpg

009-1.jpg

The final piece was the compartment covers along with new frames and hinges
005-1.jpg

That's it for tonight.
 
The next step was getting in the dashboard,pillars and T-frame. There is an order to this as I found out due to the overlaps.
Start with the upper dash. It's a tight fit but I got it in. I was able to transfer the speakers and defrost trim from the old dash to the new one with no difficulty. Remember to go ahead and plug the speakers in at this time. Make sure the new dash clips slide into the lip of the firewall and tighten the 1 brace that holds the dash to the firewall.
Now the part that drove me crazy, the pillar and header trim. The fit on these is really good but you have to drill holes through them that line up with the holes in the car. Easier said than done. I managed to break 3 drill bits, don't know if they were just bad bits or just lack of talent but in either case, it was very frustrating. plus figuring out where the holes are supposed to line up was a task in itself. So far this was the longest and most frustrating part so far, moreso than the carpet. The results are good though.

007-1.jpg

003-1.jpg
 
At this point I decided that with all the new stuff going into the car that the used stuff I had needed a freshening up, starting with the console.
I took the whole thing apart, separating the gauges from the console (be careful not to lose the clock adjustment pin)
Some Simple Green and some Palmolive (yes dishwashing soap, great for degreasing) I got all the crud off. I also used a scotchbrite pad to scuff the paint up a little bit and taped off all the chrome areas. After another cleaning to get rid of any grease, I painted it with Duplicolor Black Trim paint. It was a good match and just the right amount of gloss. Plus it went on very well and even. For the lettering I sanded the black paint off but wasn't thrilled with the result so I painted it with some bright silver paint that closely matched the chrome trim. I'm very happy with the results:
002.jpg


I then cleaned the lenses and dusted out the gauges to be reassembled later:
003.jpg


Once I was ready, I put it all back together. However I lost the little set screw that holds the clock adjustment knob. Luckily I found my cat playing with it and took it away from him and installed the set screw. Here is the freshened up console:
005-2.jpg
 
Not finished yet.
I also took apart the vent register and wiper control assembly for cleaning and repainting. Same process as above. There are no instructions for disassembly but it is relatively straightforward with a few screws to remove.
Back together after its freshening and I'm happy with the results:
004.jpg
 
While I had the lower passenger side dash panel out I decided to take it apart and clean it. The inital plan was to replace the lower dash due to a small tear and crack but at $250 it was cost prohibitive at this point.
To repair the tear I used JB weld to fill in the missing fiberglass/plastic backing and pressed the vinyl into place and it worked perfectly. It's hard to tell that there was any tear (it was along a seam line so that helped too). I took apart the vent assembly and map pocket and cleaned everything good with Simple Green and Pamolive. Then I rubbed in a vinyl protectant and the result made it look brand new. Yay! No need to buy a new panel! I'll have to remember that for the rest of the used parts.
006-1.jpg
 
Now I'm ready to work on the center console area. After some trial and error (I started by putting in the E-brake console in first which is not right and made it more difficult because I had already put in the rear bolt that's under the rear compartment assembly. GRR!!!)
Getting everything lined up with the HVAC controls as well as the shifter was a pain in the butt. A hint here is that the shift gate has a little lip that has to fit under the HVAC control and required a bit of prodding to get settled in right. Plus the rear of the console has a lip that has to fit under the vinyl console piece. I actually had to step away from this for a day out of frustration but I finally figured out that if you assemble this off to the side and then slip it over the shift lever, then reattach all the lines and bulbs it fits so much better. I have not buttoned everything down to the supports yet because I want to make sure that center console lines up with the dash properly. There is a small bit of play that seems to allow for proper alignment. We'll soon see if if does :)
008-1.jpg

009-2.jpg

010-1.jpg


As you can see, things are still messy in the car. I'll clean it eventually :) LOL!
 
One thing I forgot to mention. There is no real easy way to clean and repair the HVAC control but ours was very scratched up and looks like it had some water damage as well.
I made it a goal to try and figure out how to take it apart. Sadly the camera was not available at this time and since I was just tinkering, not really knowing what I was doing I just started taking it apart. Do this at your own risk, it's not really for the faint of heart.
First thing to do is disconnect all the wires and a rod that controls a vent assembly by removing a screw. Next remove the 2 screws that hold the vacuum line assembly to the unit (You DO NOT have to remove the lines themselves.) I made an alignment mark on it to make sure I got the assembly done correctly. The unit should come out of the car now.
There are several 1/4 inch bolts to remove, including 2 that hold the string pullies. Remove them all.
Next there are 2 pressure nuts that hold the wheels on. Pry these off with a small screwdriver and needle-nose pliers. Try not to destroy them.
Once those are off, spread the metal frame a little to free the wheel axles and the rest of the assembly. you can pull the wheels off now if they are still attached to the unit.
Basically you should be left with the guts of the unit. Now the fun part.
To free the face from the rest of the guts, you will need to straighten the parts of the frame lip that have been centerpunched to hold the assembly together. There are 3 places that this was done and a pair of pliers do this with no problem at all.
The unit comes apart and time for cleaning and painting.

Reassembly is basically backwords of disassambly (duh! :)).
A hint I have is to put the needles at the very bottom of the slide and then align the wheels there too when you restring the unit which in my opinion was the hardest part.

(If there is interest in this process I am willing to help create a FAQ or thread of this if I have a donor unit )
 
And that's where I stand as of today.
My goal over the next few days time permitting is to get the passenger dash panel in, finish the center console and the rest of the rear trim around the window. There are some more pieces that need some minor repair work back there and I will document the fixes for them. Future updates will include door panel replacement as well as the installation of new leather wrapped seats!
I also want to note, this is not an NCRS restoration, it's a restoral on a budget for a driver car. I was tired of going to car shows and getting business cards for restoration shops, I got the hint that the vette was in bad shape and wanted to do this project myself. I hope this helps others out there that want to redo their vette on their own. I also could not do this without the Assembly Instruction Manual. Although sometimes hard to find what I'm looking for, it has been a big help and is necessary to make sure I don't screw things up.
Enjoy and comments are welcome!
 
White 75,

You're a better man than me !!! I would love to do this to my '71 auto coupe, I just don't think I have the stones (and sometimes the patience) for it.

It looks great !

Do you hire out (cheaply) ?

GOOD JOB,

Bernie O.
 
White 75,

You're a better man than me !!! I would love to do this to my '71 auto coupe, I just don't think I have the stones (and sometimes the patience) for it.

It looks great !

Do you hire out (cheaply) ?

GOOD JOB,

Bernie O.
Thanks!
It's actually kind of fun as long as you aren't tied to a schedule. My only goal is to get it back on the streets before spring (which the temperature is about there now here in TX) and before the baby comes in May.
Whenever I get frustrated with part of it (center console and pillars) I just step away for a while or work on something else. I would often bring assemblies inside (console and gauge clusters) and work on them while watching TV.
I would recommend taking lots of pictures during disassembly. I didn't and I kinda regret it now when trying to find how some things went back together but the AIM is very helpful.
I also recommend mechanics gloves when working aroudn the fiberglass. I still feel shards of it in my hands several weeks later :(

Seeing it coming together is more motivation than anything and it's good relaxation for me to tinker with it after work with a beer.

If you were local I would be more than willing to help but it's just too cold in DE. :chuckle
 
One thing I would suggest is getting a handfull of bulbs for the dash and console lights. Don't know about you, but I'd be "miffed" (really more than just miffed) if bulbs quit right after I'd gotten it all back together.
 
One thing I would suggest is getting a handfull of bulbs for the dash and console lights. Don't know about you, but I'd be "miffed" (really more than just miffed) if bulbs quit right after I'd gotten it all back together.
Thats a great idea. nice job White75!:thumb
 
Half the bulbs were blown when I took it apart so I went to autozone and picked up 6 packs of bulbs. As I put everything together, I hooked up the battery and tested all the lights. Sadly the battery had discharged enough that it wouldn't start but so far all the lights are functioning.
I've learned from other automotive projects to test fire things before buttoning everything up. Sucks to spend 5 hours working on something and then realizing that it won't start (intake, fuel injector and ECU modding on my M3 only to find out that I put the chip in backwards and another 1.5 hours spend pulling the ECU back out of the firewall)

One thing I would suggest is getting a handfull of bulbs for the dash and console lights. Don't know about you, but I'd be "miffed" (really more than just miffed) if bulbs quit right after I'd gotten it all back together.
 
More progress

Got a little more done and got the center gauge cluster installed as well as the passenger side lower dash.
This involved a lot of trial an error and got rather frustrating at points. I initally tried to install the gauge cluster before doing the lower dash in an effort to keep it clear to make sure all the bulbs stayed connected. However getting it all aligned was not easy so I had to install the passenger lower dash first, making sure the wires (don't know exactly what they were for) were out of the way. I also learned the hard way that the air duct has to be installed before screwing in the dash :bash. So after getting the dash put in, I then proceeded to the cluster. I hooked up all the wires, double checking with a wiring diagram in the Hayes manual since the AIM didn't have the wiring color chart, it just had the list of wires and where they went to by name. A few were easy to figure out because of the plug but some :confused .

Then came the radio. Getting it all lined up and the knobs all put together was pretty straightforward. I scratched my head about the plug thing that fills the and covers the adjustment knob holes but I got that figured out.

Next, tip the cluster into the opening and line up the holes in the side that go into the dash panels. Make sure the bottom pins line up with the slots in the center console/shifter. There is also 2 nuts that will tighten that up, that's a pain in the butt too. I started these just to keep everything in line but loose for adjustments.
002-1.jpg

003-2.jpg


Now take the upper vent and wiper control unit and after plugging in the electronics, put it into the opening at the top of the console making sure you align the duct with the vents (I used an awl to help with that). Put the 2 screws into the duct first, it makes it alot easier. then put the screw in that attaches to the upper dash (make sure you get the alignment of the entire gauge cluster right). Proceed to screw everything together and tighten up all the screws while checking alignment.
Here's everything put together. There is still some tightening and adjustment that I need to do to get rid of some of the panel gaps so don't mind the gaps so much where the cluster meets the console. Overall I'm quite happy with the look and progress so far.
001-2.jpg

003-3.jpg
 
Now all I have to do is the rear pillar trim and rear window trim. For the most part this is in decent condition, a few cracks but the vinyl covers are intact. I epoxied the cracks with some QuickSteel (JB Weld knock off) and looks perfect from the visible side. I use this technique to fix the holes that are a bit too big and it has worked well so far.

For the most part, all these parts just need a good cleaning so this post is the steps I go through to do that. Sorry the pictures aren't as good as I thought they would be. I may try and do some more to show the true effect.
Before:
013-1.jpg


1st step is to use Simple Green or other good cleaner to get most of the dirt and grime. Don't be afraid of using a scrub brush to get in all the nook, crannies and grain of the vinyl. This should be a step in any cleanup, especially if you have to paint your trim.
I followed this up with some dish detergent. If it's good enough for your dishes, it's good enough for your vette, right? In actuality, it's a very good degreaser and gets the years of Armor All off the plastic. Depending on the dirt factor you may want to rinse and repeat several times. I am doing the lower half the part in this case to demonstrate the difference this makes.
014-1.jpg

Dry off the part and marvel at the cleanliness:
015.jpg


At this point, if you are painting the part, you will want to do an Alcohol rub to get rid of any other residue from cleaning and handling. then proceed to prepping, priming, and painting.

However, the parts I'm dealing with are already black and don't really need a painting. So pull out your favorite protectant (Armor All, Meguiars, etc. ) I used this stuff that we picked up at a car show years ago called TKO that is like Armor All X2. It looks and smells like Armor All but goes on much better and shinier. I use either a spray bottle or a soaked rag to apply the protectant, then wait a while before going back over it and then a final wipedown to get rid of the excess.
And the results:
017.jpg

Sadly the sun was going down but you can still see the difference a little time and effort can make.
Once I get everything back together, I will go over all the new and old trim again with the protectant to get rid of fingerprints and to match everything up (the new panels aren't protected yet so they are duller than the rest of the old trim)
 
Wow, I can't believe I haven't updated this since March. Then again, I had a few setbacks, other house work and nursery preparation, and finally a new addition to my clan so work on the vette came to a standstill for a while. However I am happy to report that the work is 99% complete.
First of all, the setbacks:
I wasn't originally planning on replacing the seatbelts due to the high cost. Even getting them rewebbed was costly. Once I got them remounted after the replacing the carpet, they really looked out of place, definitely faded and dirty (they matched the old carpet though :) ).
009-1.jpg

It was something I was going to eventually replace further down the road.
But after I got them all mounted up, I tested the retractor on the passenger side and heard a pop and saw the belt did not want to retract at all. After a smattering of four letter words in rapid succession, I decided that I needed to replace the belts now.
After searching far and wide for a good set of used belts and weighing my options as far as new replacements, I jumped on eBay and found an auction for a set from Seatbelt Solutions. After losing 2 auctions, I finally won a set and $300 later, I had a set to install with dual retractors (they also have a set with single retractors that are considerably cheaper that would work but I went with the duals like the originals. They also came with new latches (generic starburst versus the "mark of excellence") and hardware
020.jpg


Time for removal of the old ones. I started with the driver side and unbolted the retractor from the fender and the one under the seat. There is also a guide bar that needs to be removed as well from under the seat. The new one bolts right up. Do the 2 tensioners first, the shoulder extension should be done when you put the B-pillar trim back into place Don't remove the clip that is holding out some slack until everything is bolted up properly, this keeps the slack from tightening up in the retractor and making it difficult or impossible to let back out.
I then went over to the passenger side, where the next setback occurred. the fender tensioner came off without a hitch but the lower tensioner bolt was rusted solidly in place. No problem right? A lot of PB blaster and an impact wrench did nothing more than release all the rust at the mount, except for the rust holding the seatbelt bolt in place. I thoroughly rounded off the bolt head (Its a very low profile bolt so there isn't a whole lot to grab onto. Admitting defeat I gave up before doing any more damage. :(
 
However there was a bright side, my recovered seats came in! I had also cleaned, primed, repainted and relubed the seat tracks in the mean time. Now that I had the seatbelts for the most part in place I could unpack and put the seats together. The wife was getting very tired of 2 big boxes sitting in the dining room and I learned, never piss off a pregnant woman, especially one trying to get the house ready for visitors once the baby comes.
So, I grabbed the rails and brought them inside where the rest of the seat parts were (It's hot outside in Houston :) ) and proceeded to put the seats together. I remembered a few important tricks to this from when I took them apart.
1.There are holes that when lined up, allow easy access to the bolts to attach the rails to the seat bottoms:
013-2.jpg

2. when attaching the adjustment rail, slip the curved guide piece over the rod prior to bolting down the rail or the guide piece, you can't slip the rail over a mounted guide piece and vice versa.

Next it was time to mount the seat back to the lower seat. I started by extending out the metal strip by pushing the button on the back of the seat. I then mounted that to the lower seat.
015-1.jpg


Then I lined up the chrome brackets on either side of the seat backs to the lower seat mounting points and screwed them in place. Don't forget the plastic spacers either.
017-1.jpg


Repeat the process and you'll have 2 brand new seats. These are 100% leather and feel fabulous.
018.jpg


Now the wife has 2 seats in the dining room. I hope she's happy I got rid of the boxes.
 

Corvette Forums

Not a member of the Corvette Action Center?  Join now!  It's free!

Help support the Corvette Action Center!

Supporting Vendors

Dealers:

MacMulkin Chevrolet - The Second Largest Corvette Dealer in the Country!

Advertise with the Corvette Action Center!

Double Your Chances!

Our Partners

Back
Top Bottom