Welcome to the Corvette Forums at the Corvette Action Center!

Interior replacement in our 75 coupe

Now that I got the seats together, I wanted to get them in place. However I still needed to get a few more things done before I did that. Tthat blasted seatbelt bolt needed to be removed and the rest of the B-pillar trim and rear window trim needed to be put back in place.
First the easy stuff, rear window and pillar trim. Start with the rear window frame, 5 screws hold that in place. Then the vertical B-pillar pieces. These slide into place and are held by 4 screws sandwiching a lip of the body's door opening between a piece of metal trim and the pillar. The shoulder locater for the seatbelt is next (don't forget the rubber cover over the webbing and finally a small screw near the front of the panel
005-3.jpg

Repeat for the other side:
006-3.jpg

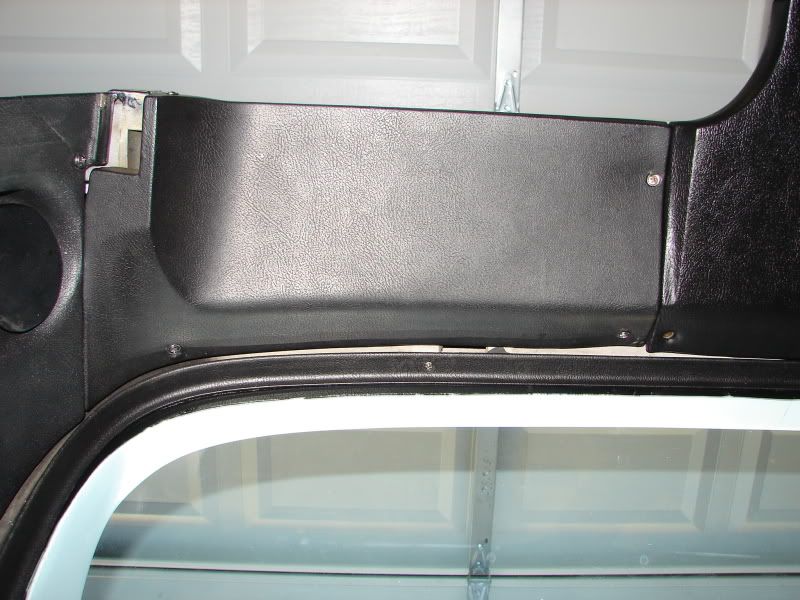
Next, screw in the upper pillar panels.
013-3.jpg

014-2.jpg

and finally, the lower window trim bar
023.jpg

And that's all there is to that. And I badly need to clean out all the tools and debris that has collected all over the car.
 
Judging by the pictures, I really need to clean a lot of the panels over again. 3 months of dust and pollen have added up. However, I'm on the home stretch and can't wait to get done. I need to get at least the driver seat in now so I can take the vette to a local shop to get the passenger side seatbelt bolt removed (I haven't forgotten about that bastard yet)
I proceed to vacuum all the crap out of the interior to get it ready for the seats. Looks sooooo much better now.
027.jpg

Passenger side still has stuff in there though
028.jpg

Now the driver seat is ready to go in. As I was putting in the carpet, I installed the seat mounting bolts in so that I could locate the holes through the carpet. This helped a lot in locating where the seats should be mounted. I grabbed a seat nd brought it out to see the light of day for the first time.
029.jpg

I put it in place using 2 screwdrivers to locate the holes. I started with the rear ones as they were easier to get to. Push the rails all the way backwards or forwards to make sure that everything lines up evenly.
030.jpg

Going to the front bolts I realized I had a problem. The rail holes did not line up with the floor holes. Turns out the rails are different size between the driver and passenger side.
Well I just had to grab the other seat and put it in instead. Perfect fit.
I couldn't resist getting in and sitting behind the wheel for the first time in a few months.
A neighbor dropped by for a beer and a chat and snapped a picture of me behind the wheel.
031.jpg

Now, as other people have noticed, new seats seem to sit a little bit higher because of the new foam. This will be a good thing for my wife as she could barely see over the dashboard in the old seats and had to use pillows to sit on to be able to drive it (hence I was relegated to being the chauffer (poor me :) ))
For us tall people, this poses a problem if I ever drove it with the T-tops on. Since I don't plan on that occuring unless it decides to rain while we're out cruising I'll be fine. If the vette comes out to play, it's because the weather is nice. (plus the way they tope leak, it's almost like they're off anyways.
 
Now all that stands in my way is that seat belt bolt. I drove down to a local shop that does a lot of work on classics and they have a pretty nice stable there.
They were initially hesitant to take a torch to a fiberglass car but after much beating and banging with a BFH and chisel they decided too that a torch was the only way to go. After lots of heat and more chiseling the bolt finally broke free of its 34 year rust cocoon. Much jubilation was had by all. However I neglected to bring my camera and missed out on documenting this most important step of the rebuild process.

Thank you Sisney Automotive in Porter TX!! I recommend them to anyone in the Northern Houston area.

With that done, I was able to install the lower retractor on the seatbelt and proceeded to install the passenger side seat.

The last major endeavor can now proceed: The door panels.
 
I saved the door panels for last since I didn't want to tear them up when I put the seats in but now that the seats are in place I wanted to put them on.
First, I removed the inside handle by removing the retaining screw behind the handle and then popped off the window handle and lock knob with a window handle removal tool. It was easy to do once I found the sweet spot to release the retainer clip. I ended up cleaning and repainted the black trim on the handle and lock knob
019.jpg

020-1.jpg

Next, remove the 2 screws holding the pull handle on and the 2 screws on the lower sides holding the door clips in place. There are also 2 screws near the door felt that should be removed. With that, the door panel should fall off.
 
reinstalling interior

Man, you have done a truly fantastic job. It looks great. And as TimAT suggested I'd replace all the bulbs while you can get to them easily. Great job, I hope you enjoy it ! :w
 
The new door panels need a bit of prep work prior to installation. The back of the panel has a premarked hole for the window crank. Using an exacto blade, cut out the backing material and foam from the hole. Install the crank spacer and fold the tabs over to hold it in place
048.jpg

Flip it over and it should look like this:
049.jpg

(I didn't realize how bad that spacer looks. Guess I'll be replacing those sometime if it bothers me that much.)

Next are the 2 clips at the bottom of the door. Slide the tab into the opening. It might need a bit of coersion but the tighter fit the better.
051.jpg

052.jpg


Next are the holes for the handle. the panel has a good guide hole. Use an exacto knife to cut out the vinyl and foam down to the plastic base.
050.jpg

I then put the door handle onto the panel and used that as a guide to drill 2 holes through the plastic of the door panel. I used a bit slightly smaller than the hole in the metal reinforcement of the handle assembly (3/16ths?). This is big enough to provide a little wiggle room for aligning the hole yet keep a tight fit and provide support for the handle.
054.jpg


Now it's ready to install.

I recommend at this point to lubricate the window rails, door handle assembly and any other things that look like they may need some grease. Also take a look at your door handle assembly and make sure the groove that the handle slides into is intact. I realized after I put the panel on that my handle assembly has no tab left and the only thing that would hold the handle is the set screw. The problem there is that the hole got stripped out at some point prior to my disassembly and won't accept anything. Guess I need a new handle assembly :(
Anyway, enough lamenting.

Now, ready to install... really this time.
Take the door panel and slip it over the top of the door. There is a metal lip that will slide over the edge on the top of the door. Then position the door enough to where you can insert the door pull handle bolts through and get them started in their respective holes. I had the door panel pulled out about an inch or so, just enough to see the end of the bolt and used that to line up the bolt with the holes in the door frame they go into. I started them about 3 or 4 revolutions and kept them loose for adjustment as I tightened and aligned everything else.
I then screwed the clips to the door frame to close up the bottom and then proceeded to tighten up the door pull bolts fully. If you are lucky the pads that look like a building block set I had growing up will line up and by pressing the door panel to the frame they will miraculously stick, sealing the panel to the door. No such luck in my case :( but I did get a few of them to stick good enough. I then attached the window crank and lock button (don't forget to add the plastic spacer). The final item is the door handle, slip the handle onto the assembly and use the set screw to hold it in place.

The AIM and the instructions that came with the door panel show 2 screw that go into the top corners of the panel and into the door frame. However, I kinda like the look of the panel without them. It looks cleaner and seems like it is pretty secure without them so I'm going to leave them off for the time being until I see that there may be a problem. There are little guide holes on the back of the panel that you can drill through that will align with the holes in the door frame if you want to go that route. I also note that my interior screw kit did not come with those particular screws and I didn't want to reuse the old ones as they were pretty much trash.
And here is the driver's side panel (minus the handle :( )
033.jpg
 
Man, you have done a truly fantastic job. It looks great. And as TimAT suggested I'd replace all the bulbs while you can get to them easily. Great job, I hope you enjoy it ! :w
Thanks. I replaced every bulb while I could (5 packs if memory serves me right)
The good thing is that once I got the battery charged up, everything seems to be working fine, all the gauges are functioning as they were before this and the bulbs are lighting up everything
 
The final part of assembly is the door sills. Ours were in rough shape with most of the paint gone and overspray from previous paintint attempts. I stripped off the old paint, masked off the ribs and resprayed them. Turned out pretty good in my opinion.

First though, there are panels that cover up the body mounts under the dash. The panels slip over an edge on the body in the door jamb. You'll want to trim back some of the excess carpet for it to fit right but not enough to where the carpet can come out from under the panel.
With that turn your attention to the door sill plates. I trimmed off the excess carpet so about an inch would stay pinned under the sill plate once installed. Screw the plate down with the 4 screws. The ones I got in my interior kit were too big so I had to reuse my old ones. I'm going to repaint them because they stick out like sore thumbs.

And that is all there is to replacing everything in your Corvette's interior. :)
 
I'll post up more after shots once I get rid of all the grimey fingerprints, blood, and sweat spots left behind. She'll get a good cleaning and rub down with some leather cleaner/conditioner and some vinyl protectant.

I hope your enjoyed this as much (or more than) I had doing it (actually I really hope you enjoyed it more because sometimes it really sucked)
Please let me know if you have any questions about anything I did because I'm pretty sure I glanced over a few things pretty quickly.
 
Also I wanted to thank a lot of folks that made this possible:

Willcox Corvettes for almost all the replacement parts. Their package deal and CAC forum pricing saved me a lot of money.

Corvette America (through Willcox) that recovered the seats and probably saved a lot of noise pollution from me swearing at trying to do it myself. They turned out great! (A footnote, all the parts orderedwere CA parts except the carpet which was ACC)

Seatbelt Solutions (yan02 on eBay) that made the replacement seatbelts and stood behind their product when I had a slight issue with one retractor, they fixed it.

Gulf Coast Corvettes in Humble TX who provided much needed new and used parts when I didn't have time to order them.

Sisney Automotive in Porter TX for breaking loose the most stubborn bolt I have ever dealt with.

Scott Preston, one of my neighbors that provided beer support and a helping hand when needed.

My wife who allowed me to spend the time and money to fix up her 'vette, that allowed me to store seats in the dining room, lived with a cluttered garage, heard me bitch and moan whenever something wasn't going together right or something else broke, all while carrying my spawn for 9 months in the process. Now to find a babysitter so we can go for a drive. :)
 
Very nice job. I just did my seats, carpet and door panels. Have to wait on cash for everything else. What I have is in good shape, I just changes from blue to black. I can use your pics to know what I'm getting into now. Thanks for the post.
 
Very nice job. I just did my seats, carpet and door panels. Have to wait on cash for everything else. What I have is in good shape, I just changes from blue to black. I can use your pics to know what I'm getting into now. Thanks for the post.

thanks. I was able to reuse a lot of the other panels after cleaning them up, you may want to consider getting the interior paint and repainting your usable panels to save money. And if you don't like the results, get new ones :)
Good luck with your build and post up pics as well!!
 

Corvette Forums

Not a member of the Corvette Action Center?  Join now!  It's free!

Help support the Corvette Action Center!

Supporting Vendors

Dealers:

MacMulkin Chevrolet - The Second Largest Corvette Dealer in the Country!

Advertise with the Corvette Action Center!

Double Your Chances!

Our Partners

Back
Top Bottom