Welcome to the Corvette Forums at the Corvette Action Center!

Pictures needed from bolts etc.

Peer81

Well-known member
Joined
May 21, 2003
Messages
2,497
Location
Netherlands
Corvette
'81 Black
Hello everybody,

The resto is comming along just find but I have some open places and don't know which bolts I need to put there. I hope somebody is willing to look under there vette and snap some pictures so I can see which bolts to take out of my collection :)

First.
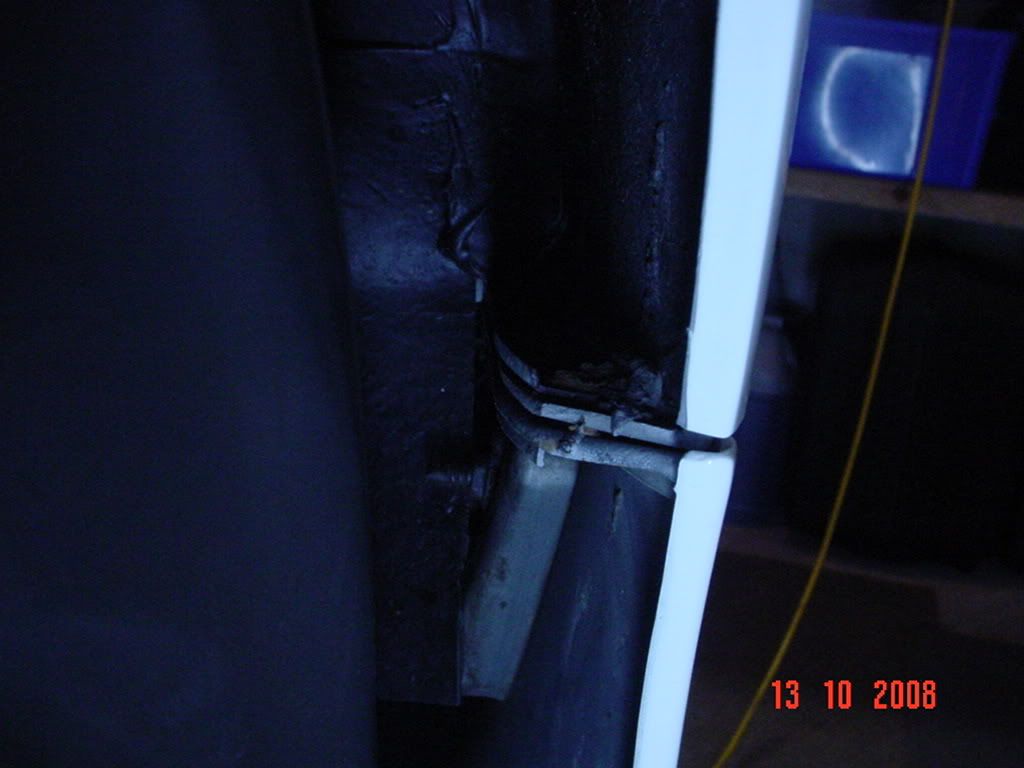
The last bolt that holts the front bumper to the side fender. You can see it if you look in the wheelwell right infront of the wheel.

IMG_4699.JPG


Second.
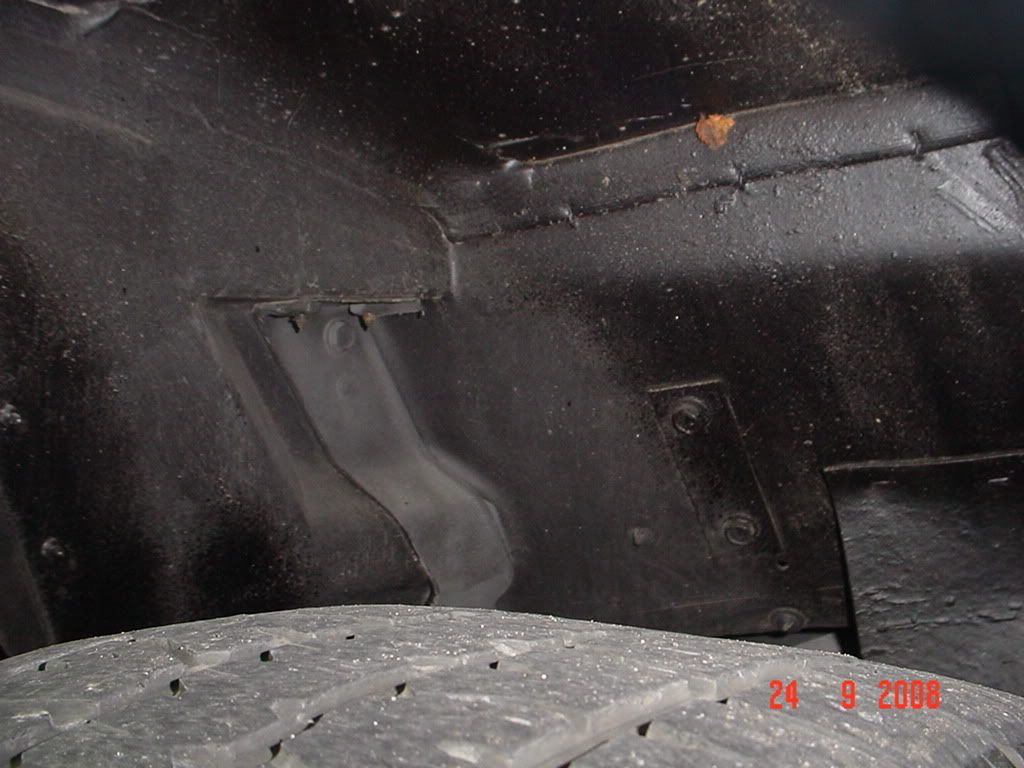
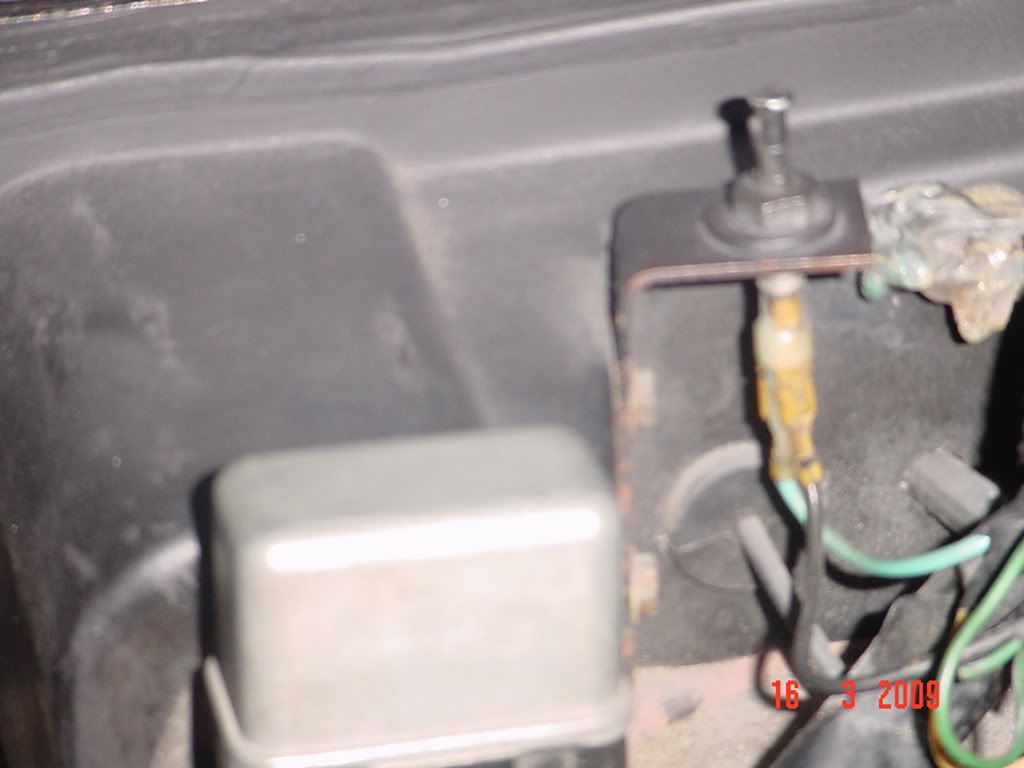
From the same side or when you look from under the front bumper (just before a wheel) you can look up the front bumper. You'll see a plastic panel with a 90 degrees angel down. This panel is bolted to the valance panel and I think is bolted to the steel reinforcement of the front bumper. I don't know which bolts to just here.. The screwdriver is pointing toward the hole (1 of the 2) where the bolt should be, just beside the wreck? that attaches the bumper to the fender. Wires are for the sidemarker.

IMG_4701.JPG


Last.
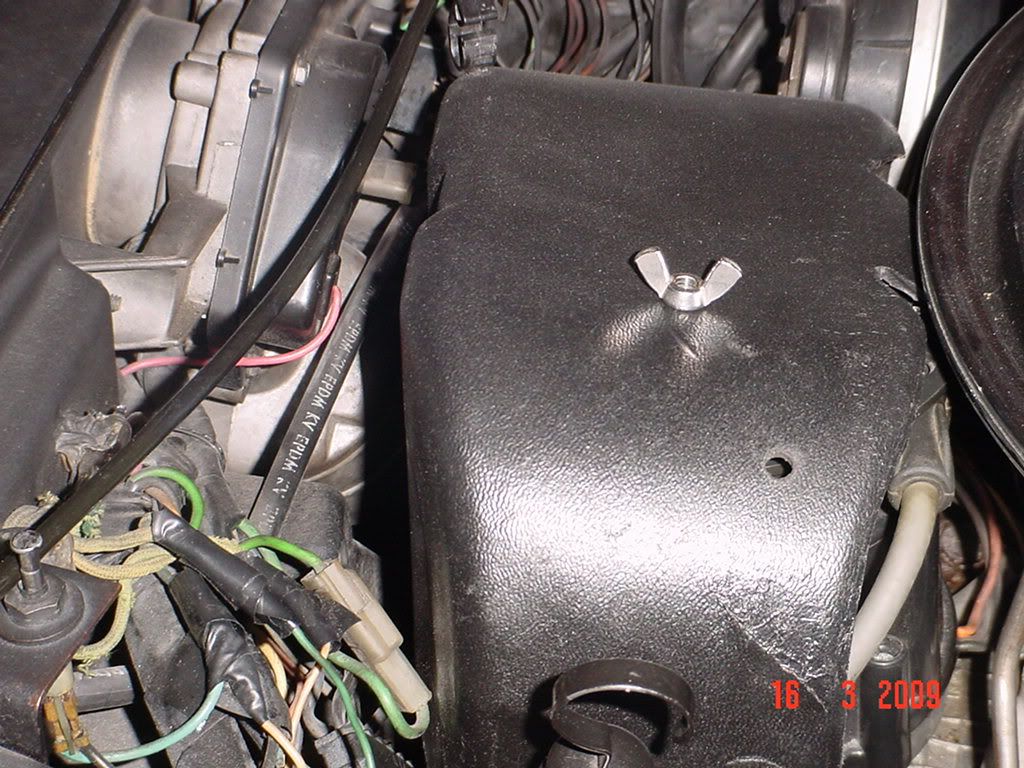
All the bolts that attach the valance panel to the underside of the radiator support and the plastic panel on the side. In the picture you see the plastic panel. The bolt patern is in the same curve as the valance panel in the middle of the picture (between the poly bumper and the steel chassispart.

IMG_4702.JPG


I hope somebody could help me. I have some plastic bags with bolts in them marked "frontend somewhere" So they could be the ones that I'm looking for :D

Groeten Peter
 
Nobody willing to grab a camera and shoot these pictures? :ugh
Takes less then 5 minutes ;)

Groeten Peter
 
Peter..,

Give me till tomorrow...I will jack the front end and try to give you something decent to look at.
Remember...my underside isn`t as clean as yours.
Hang in there...;)
 
Peter.,

Took a few pictures. Let me know if these help or not. If not. I'll take some more.
Regards...,
Roger
DSC00353.jpg
 
Hello Roger,

All I can say is that the pictures are perfect! :thumb
Now I know which bolts to look for and considering its a driving 81 the underside is very clean.
Thanks!

Groeten Peter
 
Peter..,

Glad I could help. If you need more...let me know (the car is still on jackstands). Over the years, you have helped so many people (including myself), its the least I could do. ;)
Regards..,
Roger
 
Hello Roger,

If you have some time, I could use your help again.
I forgot to mension I can't see the bolt/screw I needed from the first picture. To explain. If you sit by the front wheel and look a little inside the wheelwell forward you can see the backside of the bumper/fender connection. At the end the bumper connects to the fender with a different bolt/nut (I think) but I don't know which. If you can take that picture thanks.

Next is easy, the hood relais is bolted to the car with two bolts but I don't know which.

Last one. the front marker/louvre is connected to the subframe with 4 screws. I need them to connect my new lights on the inside.
Thanks :)

Groeten Peter
 
Hello Peter..,

Sorry for the late reply. Worked all day in the garage (not car related) and pretty well pooped right now. If you don't mind, I'll get back to you first thing tomorrow morning with the pictures you requested.
I think I'll take the wheel off to get a better view.

Regards..,
Roger
 
Hello Roger,

Thanks! One question answered :) Slowly but surely all the bolts are finding there way on to the vette at the places were they need to be! Also please take your time, I'm not in a hurry :)

btw. If you turn the front of the wheel to the inside you could get a good photo I think.

And maybe everybody can brainstorm on this next question. I'm rebuilding my steering column and want te repaint in to a Non original Corvette color. That is no problem but the horn button has the black circle with the 81 logo in the middle. The two (or three) are fixed together. Besides protecting the black circle with tape, does somebody have a different idea how to paint this. And I'm looking to paint it as close to perfect as I can get it. :)

Groeten Peter
 
Peter,

Were the pictures of different bolts & nuts location satisfactory?
I'm not sure I got all those that you wanted. If not, let me know and I'll take some more.

On the other subject, I taped the horn button when I repainted mine. I wasn't sure I could take it off without breaking it or scratching the plastic part.
Here's a pic.
Regards...,
Roger
DSC00370.jpg
 
Hello Roger,

Thanks again for the pictures the last 3 pictures were perfect but I think I didn't explain the first two question well enough because the first 4 pictures are almost right :).
If you look at the first picture in this tread I placed a red circle at connection bumper/body right in front of the wheel. There should be a bolt and nut overthere but I don't know which. :)

My mistake on this one but I didn't mean the hinges but the hood relaise handel. On the inside of the car just under the dash, it connects to the pillar with 2 bolts. But nice to see your hinges now I know for sure how to put the foam overthere.

You did a great job on the horn button. If you can get such a good result with tape I think I'll stick to that idea :)

Groeten Peter
 
Hello Peter..,

Sorry for the wait. So many projects...but so little time. I think I may have the first picture resolved. Have a look. The bolt (screw) is
13/32" in size by the way.

DSC00372-1.jpg


DSC00371-1.jpg


As for the second one (hood release handle), it's a little tricky since it's right behind the air vent tube. I sealed all those last year and I'm reluctant to take them apart again. But I can see the bolts or screws you're talking about. It's only a question of having proper lighting to be able to take a decent picture. I'm still working on it.

If you're wondering what kept me busy lately...have another look.
DSC00378.jpg


I hope to be able to clean it better without tearing it more than it is. The gas tank was in great shape

Regards..,
Roger
 
Hello Roger,

Thanks for the picture's! Now I know what screw to use, I remember have two of those :)

If you can't take a picture of the hood release handle that just let it be. I don't want to bother you with my hard to reach questions. Maybe a question that is very easy to find. The headlight caps are secured with 4 screws each (2 in the front and one on each side). If you have the time and you think they are the original ones. After 5 years I can't remember which ones to use....

BTW, great looking "tank options list"!! Mine was almost completely gone so I'm very jealous at what you have right there. Be careful with it!

Groeten Peter
 
Two new questions..

I don't know if somebody has the time to put this on a few pictures (or even maybe Roger :D)

First one. I have the ground strap that goes from the engine to the spark iginition shield. There also is a bolt or stud in the ignition shield but I don't have the correct screw. Is it a normal screw or one with wings? Please a picture.

Second question. There is a switch that shows if the hood is down or up. Its located on the top of the firewall on the right side behind the right cilinderbank and next to a big relais. (I think everybody knows what I'm talking about..) I found one wire (positive) to connect to the switch but no negative wire. The switch is mounted to the upperside of the firewall so polyester no metal. I don't have an idea where the ground wire for the switch is or how this works. If somebody has some pictures. Yes please :)

Well, that's it for now! :cool

Groeten Peter
 
Peter,the ignition shield needs a wing nut or a screw with wings
I'll see if I can get a pic for you.
I'll have to look at the other switch to see if I can find where it goes....:cool
I always thought it was part of the alarm system....;)
 
Thanks! Is it the same kind of wing nut as on top of the aircleaner?
And your absolutely right, its for the alarm system. Took me 3 lines to discribe the thing and you did it and 2 words :D

Groeten Peter
 
Hello Peter..,
I'll chip in...not knowing if It will help you or not, but here goes...

1. Wing nut
DSC00392.jpg


2. Wing nut again
DSC00393.jpg


3. Hood switch
DSC00395.jpg


The hood switch has 2 wires: one black
one light blue (looks green on the pic)
Both wires disappear in the wire harness that goes in the firewall.

Regards,
Roger
 
As always you're of great help Roger, thanks! :upthumbs

I've seen the light green wire and I didn't see any cut lines when "resealing" the wiringharness. The other wire being black I think I overlooked it. Till next time :w

Groeten Peter
 
I got the parts I missed. So the steeringcolumn bolt is back in place trough the firewall.
Got the wingnut and the missing hood switch and everything is back in place.
So thank you all without all of you it would have taken a long long looong time :)

Now the really easy question.
I want to install the battery but I don't know if the terminals should face forward or to the rear? If they face forward the negative terminal is on the drivers side and the positive on the passengerside. Problem is, my positive cable is to short to fit this way. If the terminals face to the rear it's also a problem more or less. So my question, is it to the front or rear and are the terminals correct or reversed to original? I have a optima yellow cap.

Groeten Peter
 

Corvette Forums

Not a member of the Corvette Action Center?  Join now!  It's free!

Help support the Corvette Action Center!

Supporting Vendors

Dealers:

MacMulkin Chevrolet - The Second Largest Corvette Dealer in the Country!

Advertise with the Corvette Action Center!

Double Your Chances!

Our Partners

Back
Top Bottom