- Thread starter
- #61
Bob Heine
Well-known member
WARNING: This post contains disturbing images and owners of unmolested C3 Corvettes should read on at their own risk.
I tried to upgrade the sound system 30 years ago. Added an amplifier and two rear speakers but the head unit was the original AM/FM radio so the crappy sound was just louder,. I modified the center gauge bezel to accept a Blaupunkt cassette stereo and it was a big improvement. Unfortunately the cassette player no longer works and the aftermarket speakers are crumbling.
When I upgraded my ’87 convertible a couple of years ago for a second time, the Sony head unit, shown in the gauge upgrade post, was only a couple of years old and working fine, as was the matching CD changer. The head unit plays cassettes and controls the CD/MP3 changer that I plan to hide in the large storage compartment. The changer takes up about half the storage space and I’ll need to make a new custom insert. The jack will have to be stored inside the spare tire, like it is in my ’87.

34 years ago I bought a pair of 4x10-inch co-axial speakers to mount in the kick panels of my ’69 Corvette convertible, which had the AM/FM Stereo option. I wrecked the car before I had a chance to install the new speakers so I figured I’d install them in my ’72. I bought the speakers from a Lafayette Radio catalog (yeah, I’m old!) and they had a limited refund policy that didn’t include “I unpacked them and they don’t fit.” Rather than throw them away, I decided to mount them in the rear wall of the storage area in the coupe. I fiberglassed a couple of foam speaker insulators onto the back wall and it worked pretty well. Fast-forward to this year and the foam in those speakers has turned to dust. Simple solution is to buy a couple of new 4x10 tri-axial speakers. The speakers arrive and I try to install them. Speaker magnets have grown quite a bit in 34 years and the foam enclosures, meant for coaxial magnets, are too small. Time to make new enclosures. I gathered my mold-making material: an old piece of scrap plywood, two 3” wood screws, two short length of ¼” copper tubing, a couple of spray paint can caps, a roll of masking tape and some plastic wrap.
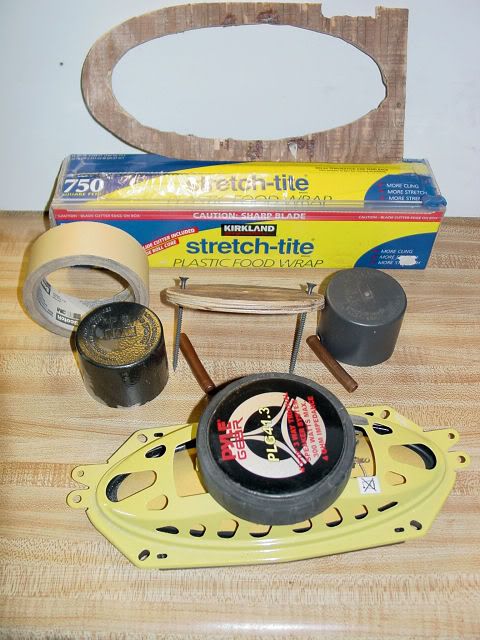
The two screws run through the copper tubing spacers hold the two plywood pieces apart.
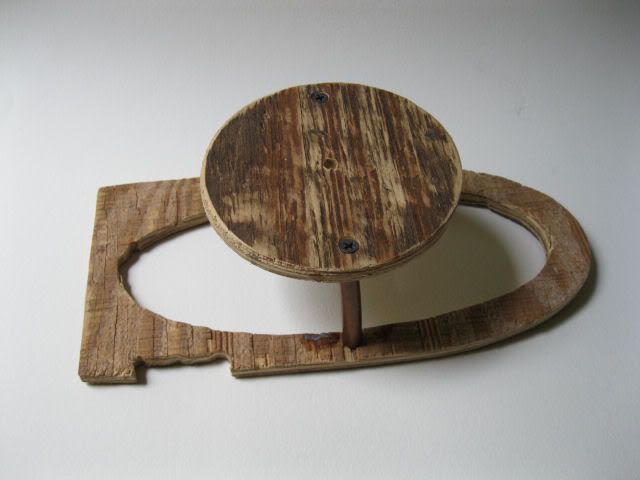
Taped one of the spray can caps to the round end of the base and then taped the gap between the base and top.
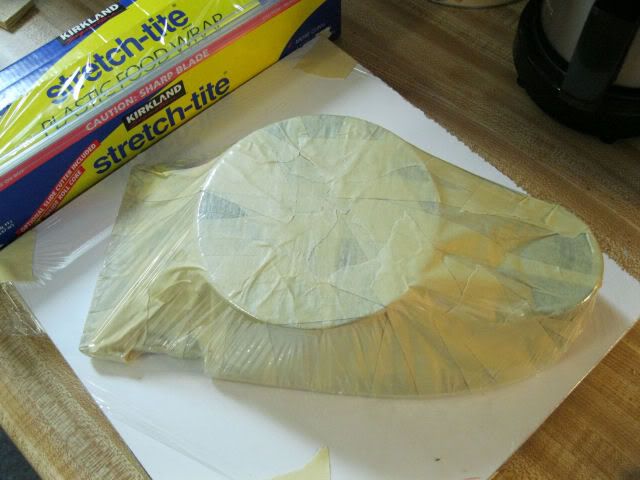
Next step is to wrap the whole form in plastic wrap and screw it down to a piece of mica shelving. Fitted a layer of woven fiberglass, brushed on some epoxy resin and let it cure overnight and voila, a speaker enclosure. I popped the fiberglass off the mold, dismantled the framework, flipped the base over and reassembled another mold to make a second, reverse version for the other side (there’s a notch that goes around a metal bracket in the back wall on both sides).
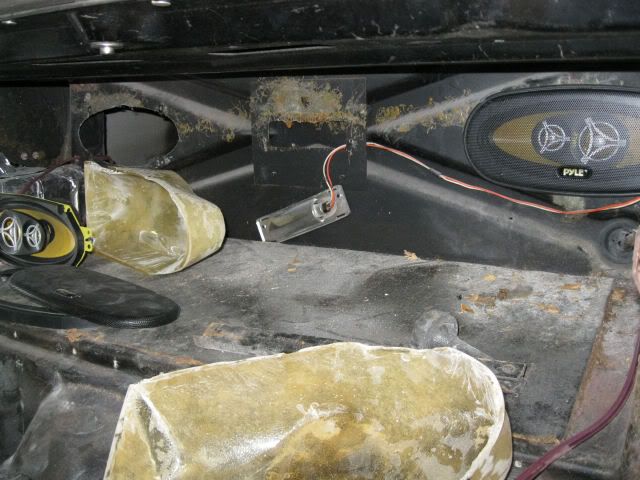
Here is where the speakers go in the back wall (grilles and surround will be painted light saddle to match the interior). These are the holes I cut 30 years ago.
The dash speakers were simpler because I didn’t need enclosures. I hacked up the stock mounting frames to attach a pair of 4”x6” triaxial speakers to the stock locations in the dash pad.
I haven’t tried putting the dash in the car so I’m sure there will be fitment issues with the tach or speedo and this will turn out to be have been a terrible mistake. I’ll worry about that another day….
As long as I was installing additional and more powerful speakers, I decided to install a subwoofer. Found space for a subwoofer behind the passenger seat but since there’s an (almost) identical space behind the driver seat, I’ll be installing two subwoofers. The space is relatively small and real shallow. I found a Pioneer Premier 8” sub that is less than 3” deep. I hacked a large hole in the bulkhead behind the passenger seat and the only thing in the way is a step in the fiberglass floor behind the bulkhead. I notched it so the subwoofer fits just fine. Unfortunately the hole in the floor goes through to the outside so a fiberglass patch has to be added to the list of projects.
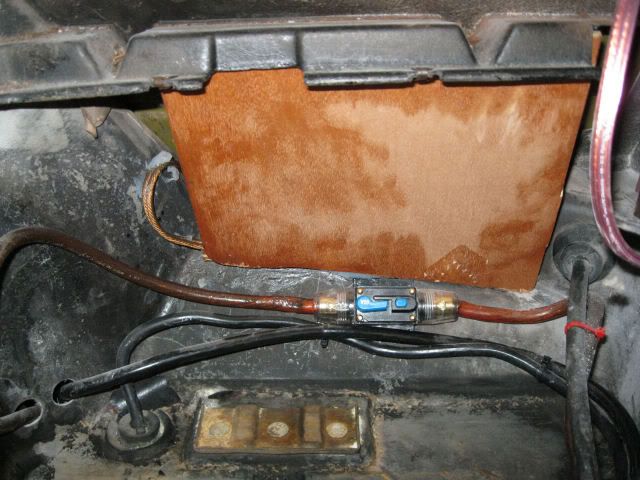
The patch for the driver side is smaller but this side is open to the battery compartment so I built a plywood enclosure to seal off the subwoofer from the battery. The aluminum flashing patch in the hole will be used as a mold for the final fiberglass patch. I will be enclosing the speaker on the passenger side as well.
At the same time I was searching for shallow subwoofers, I came across some compact amplifiers. Sony makes extra slim small footprint amplifiers meant to fit under the front seat of compact cars and trucks. The subwoofers have their own “900W” (Sony Xplod XM-1S) under the driver seat. The four triaxials have a second “500W” (Sony Xplod XM-4S) under the passenger seat. The floorboard under the seats has an indentation that is the perfect place for the amps. I did have to trim the seatbelt retractor cover but otherwise it’s a drop-in. The battery being only inches away from the amplifier under the driver seat is also handy.
I put the power ratings in quotes because that’s their maximum rating with some minimal load. I’m wiring the two amps with 4-gauge wire directly from the battery through a 60-amp circuit breaker (I’m not fond of unscrewing inline fuses buried in the bowels of the car just because my full-time assistant, Mr. Murphy, drops a screwdriver across the big terminals.
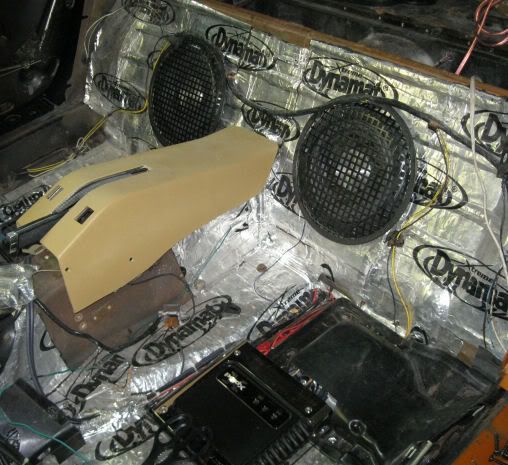
Here’s what the subwoofer install looks like. The 10” grilles provide a little protection for the speakers from Mr. Murphy.
I tried to upgrade the sound system 30 years ago. Added an amplifier and two rear speakers but the head unit was the original AM/FM radio so the crappy sound was just louder,. I modified the center gauge bezel to accept a Blaupunkt cassette stereo and it was a big improvement. Unfortunately the cassette player no longer works and the aftermarket speakers are crumbling.
When I upgraded my ’87 convertible a couple of years ago for a second time, the Sony head unit, shown in the gauge upgrade post, was only a couple of years old and working fine, as was the matching CD changer. The head unit plays cassettes and controls the CD/MP3 changer that I plan to hide in the large storage compartment. The changer takes up about half the storage space and I’ll need to make a new custom insert. The jack will have to be stored inside the spare tire, like it is in my ’87.
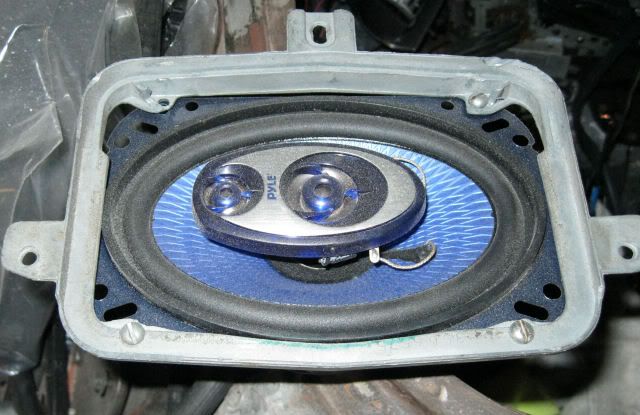
34 years ago I bought a pair of 4x10-inch co-axial speakers to mount in the kick panels of my ’69 Corvette convertible, which had the AM/FM Stereo option. I wrecked the car before I had a chance to install the new speakers so I figured I’d install them in my ’72. I bought the speakers from a Lafayette Radio catalog (yeah, I’m old!) and they had a limited refund policy that didn’t include “I unpacked them and they don’t fit.” Rather than throw them away, I decided to mount them in the rear wall of the storage area in the coupe. I fiberglassed a couple of foam speaker insulators onto the back wall and it worked pretty well. Fast-forward to this year and the foam in those speakers has turned to dust. Simple solution is to buy a couple of new 4x10 tri-axial speakers. The speakers arrive and I try to install them. Speaker magnets have grown quite a bit in 34 years and the foam enclosures, meant for coaxial magnets, are too small. Time to make new enclosures. I gathered my mold-making material: an old piece of scrap plywood, two 3” wood screws, two short length of ¼” copper tubing, a couple of spray paint can caps, a roll of masking tape and some plastic wrap.
The two screws run through the copper tubing spacers hold the two plywood pieces apart.
Taped one of the spray can caps to the round end of the base and then taped the gap between the base and top.
Next step is to wrap the whole form in plastic wrap and screw it down to a piece of mica shelving. Fitted a layer of woven fiberglass, brushed on some epoxy resin and let it cure overnight and voila, a speaker enclosure. I popped the fiberglass off the mold, dismantled the framework, flipped the base over and reassembled another mold to make a second, reverse version for the other side (there’s a notch that goes around a metal bracket in the back wall on both sides).
Here is where the speakers go in the back wall (grilles and surround will be painted light saddle to match the interior). These are the holes I cut 30 years ago.
The dash speakers were simpler because I didn’t need enclosures. I hacked up the stock mounting frames to attach a pair of 4”x6” triaxial speakers to the stock locations in the dash pad.
I haven’t tried putting the dash in the car so I’m sure there will be fitment issues with the tach or speedo and this will turn out to be have been a terrible mistake. I’ll worry about that another day….
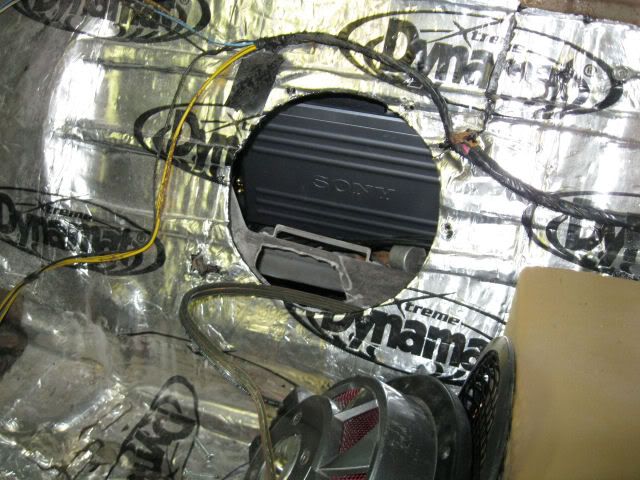
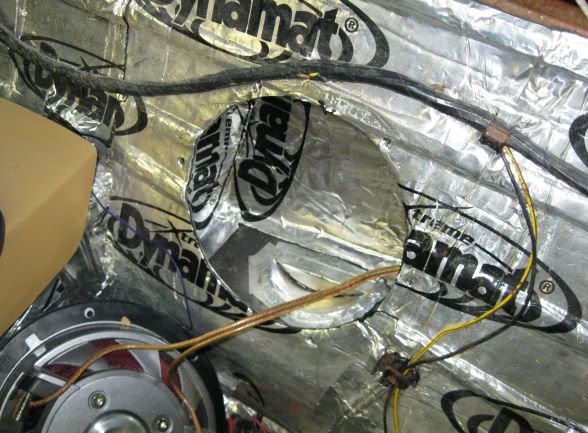
As long as I was installing additional and more powerful speakers, I decided to install a subwoofer. Found space for a subwoofer behind the passenger seat but since there’s an (almost) identical space behind the driver seat, I’ll be installing two subwoofers. The space is relatively small and real shallow. I found a Pioneer Premier 8” sub that is less than 3” deep. I hacked a large hole in the bulkhead behind the passenger seat and the only thing in the way is a step in the fiberglass floor behind the bulkhead. I notched it so the subwoofer fits just fine. Unfortunately the hole in the floor goes through to the outside so a fiberglass patch has to be added to the list of projects.
The patch for the driver side is smaller but this side is open to the battery compartment so I built a plywood enclosure to seal off the subwoofer from the battery. The aluminum flashing patch in the hole will be used as a mold for the final fiberglass patch. I will be enclosing the speaker on the passenger side as well.
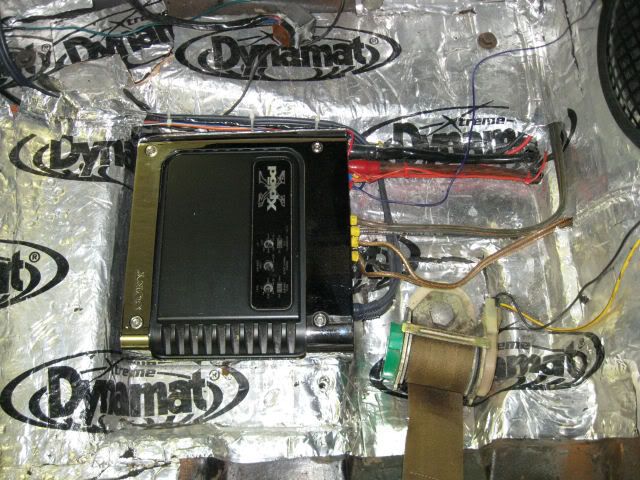
At the same time I was searching for shallow subwoofers, I came across some compact amplifiers. Sony makes extra slim small footprint amplifiers meant to fit under the front seat of compact cars and trucks. The subwoofers have their own “900W” (Sony Xplod XM-1S) under the driver seat. The four triaxials have a second “500W” (Sony Xplod XM-4S) under the passenger seat. The floorboard under the seats has an indentation that is the perfect place for the amps. I did have to trim the seatbelt retractor cover but otherwise it’s a drop-in. The battery being only inches away from the amplifier under the driver seat is also handy.
I put the power ratings in quotes because that’s their maximum rating with some minimal load. I’m wiring the two amps with 4-gauge wire directly from the battery through a 60-amp circuit breaker (I’m not fond of unscrewing inline fuses buried in the bowels of the car just because my full-time assistant, Mr. Murphy, drops a screwdriver across the big terminals.
Here’s what the subwoofer install looks like. The 10” grilles provide a little protection for the speakers from Mr. Murphy.


