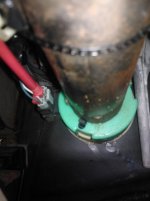
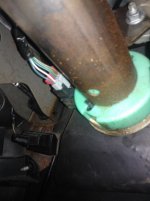
Both codes can be attributed to the steering wheel is not in its proper position after you disconnected it from the rack. There is a procedure to follow which includes voltage outputs from the steering wheel sensor. Code C1288 Steering Wheel Positioning Sensor Code. C1283 too long to center steering. Hope this helps you out.
This is copied from another forum for code C1288.
Circuit Description
The vehicle stability enhancement system (VSES) is activated by the electronic brake control module (EBCM) calculating the desired yaw rate and comparing it to the actual yaw rate input. The desired yaw rate is calculated from measured steering wheel position, vehicle speed, and lateral acceleration. The difference between the desired yaw rate and actual yaw rate is the yaw rate error, which is a measurement of over-steer or under-steer. If the yaw rate error becomes too large, the EBCM will attempt to correct the vehicle's yaw motion by applying differential braking to the left or right front wheel.
The amount of differential braking applied to the left or right front wheel is based on both the yaw rate error and side slip rate error. The side slip rate error is a function of the lateral acceleration minus the product of the yaw rate and vehicle speed. The yaw rate error and side slip rate error are combined to produce the total delta velocity error. When the delta velocity error becomes too large and the VSES system activates, the drivers steering inputs combined with the differential braking will attempt to bring the delta velocity error toward zero.
The VSES activations generally occur during aggressive driving, in the turns or bumpy roads without much use of the accelerator pedal. When braking during VSES activation, the brake pedal will feel different than the ABS pedal pulsation. The brake pedal pulsates at a higher frequency during VSES activation.
Conditions for Running the DTC
The ignition is ON.
Conditions for Setting the DTC
C1287
One of the following conditions exists:
• The steering wheel position sensor is synchronized and the steer rate (speed that the steering wheel appears to be turning) is greater than 1100 degrees/second.
• The steer rate is less than 80 degrees/second and the difference in the phase angle between Phase A and Phase B is greater than 20 degrees.
• The 2 steering sensor signals (Phase A and Phase B) do not agree for 1 second. Under this condition, this DTC will set along with DTC C1281.
C1288
One of the following conditions exists:
• Both Phase A and Phase B are greater than 4.9 volts for 1.6 seconds.
• Both Phase A and Phase B are less than 0.2 volts for 1.6 seconds.
• The difference in the changes in Phase A and Phase B is greater than 35.2 degrees for 9.76 milliseconds.
Action Taken When the DTC Sets
• The EBCM disables the VSES for the duration of the ignition cycle.
• The Traction Control and Active Handling indicator turns ON.
• The DIC displays the Service Active Handling message.
• The ABS remains functional.
Conditions for Clearing the DTC
• The condition for the DTC is no longer present and the DTC is cleared with a scan tool.
• The EBCM automatically clears the history DTC when a current DTC is not detected in 100 consecutive drive cycles.
Diagnostic Aids
• The scan tool may display 2 additional characters after the DTC. Take note of the 2 character code and any other DTCs that are set. The 2 character code is an engineering aid used in order to determine the specific criteria which caused the DTC to set.
• During diagnosis, park the vehicle on a level surface.
• Check the vehicle for proper alignment. The car should not pull in either direction while driving straight on a level surface.
• Find out from the driver under what conditions the DTC was set (when the DIC displayed the Service Active Handling message). This information will help to duplicate the failure.
• The Snapshot function on the scan tool can help find an intermittent DTC.
Test Description
The numbers below refer to the step numbers on the diagnostic table.
2. Perform the Steering Position Sensor Test in order to verify if the steering wheel position sensor (SWPS) is operating properly.
3. Tests for the proper operation of the steering wheel position signal A circuit in the low voltage range.
4. Tests for the proper operation of the steering wheel position signal B circuit in the low voltage range.
5. Tests for the proper operation of the steering wheel position signal A circuit in the high voltage range. If the fuse in the jumper opens when you perform this test, the signal circuit is shorted to ground.
6. Tests for the proper operation of the steering wheel position signal B circuit in the high voltage range. If the fuse in the jumper opens when you perform this test, the signal circuit is shorted to ground.
7. Tests for a short to voltage in the 5 volt reference circuit.
8. Tests for a high resistance or an open in the low reference circuit.
Step Action Values Yes No
Schematic Reference: ABS Schematics
1 Did you perform the ABS Diagnostic System Check? -- Go to Step 2
Go to Diagnostic System Check - ABS
2
1. Install a scan tool.
2. Turn ON the ignition, with the engine OFF.
3. With the scan tool, perform the Steering Position Sensor Test.
Did the SWPS pass the test? -- Go to Diagnostic Aids Go to Step 3
3
1. Turn OFF the ignition.
2. Disconnect the steering wheel position sensor (SWPS) connector.
3. Turn ON the ignition, with the engine OFF.
4. With the scan tool, observe the Dual Analog SWPS Input A parameter in the VSES data list.
Does the scan tool indicate the Dual Analog SWPS Input A parameter is less than the specified value? 0.2 V Go to Step 4
Go to Step 13
4
With the scan tool, observe the Dual Analog SWPS Input B parameter.
Does the scan tool indicate the Dual Analog SWPS Input B parameter is less than the specified value? 0.2 V Go to Step 5
Go to Step 14
5
1. Turn OFF the ignition.
2. Connect a 3 amp fused jumper wire between the 5 volt reference circuit of the steering wheel position sensor (SWPS) and the signal A circuit of the steering wheel position sensor (SWPS).
3. Turn ON the ignition, with the engine OFF.
4. With the scan tool, observe the Dual Analog SWPS Input A parameter.
Does the scan tool indicate that the Dual Analog SWPS Input A parameter is greater than the specified value? 4.9 V Go to Step 6
Go to Step 10
6
1. Turn OFF the ignition.
2. Disconnect the fused jumper wire.
3. Connect a 3 amp fused jumper wire between the 5 volt reference circuit of the steering wheel position sensor (SWPS) and the signal B circuit of the steering wheel position sensor (SWPS).
4. Turn ON the ignition, with the engine OFF.
5. With the scan tool, observe the Dual Analog SWPS Input B parameter.
Does the scan tool indicate that the Dual Analog SWPS Input B parameter is greater than the specified value? 4.9 V Go to Step 7
Go to Step 10
7
1. Disconnect the fused jumper wire.
2. Measure the voltage between the 5 volt reference circuit of the steering wheel position sensor (SWPS) and the low reference circuit of the steering wheel position sensor (SWPS).
Does the voltage measure less the specified value? 5 V Go to Step 8
Go to Step 9
8
1. Turn OFF the ignition.
2. Disconnect the negative battery cable. Refer to Battery Negative Cable Disconnect/Connect Procedure in Engine Electrical.
3. Measure the resistance from the low reference circuit of the steering wheel position sensor (SWPS) to a good ground.
Does the resistance measure less than the specified value? 5 ohms Go to Step 16
Go to Step 15
9
Test the 5 volt reference circuit of the steering wheel position sensor (SWPS) for a short to voltage. Refer to Circuit Testing and Wiring Repairs in Wiring Systems.
Did you find and correct the condition? -- Go to Step 20
Go to Step 17
10
Test the 5 volt reference circuit of the steering wheel position sensor (SWPS) for the following conditions:
• An open
• A short to ground
• A high resistance
Refer to Circuit Testing and Wiring Repairs in Wiring Systems.
Did you find and correct the condition? -- Go to Step 20
Go to Step 11
11
Test the signal A circuit of the steering wheel position sensor (SWPS) for the following conditions:
• An open
• A short to ground
• A high resistance
Refer to Circuit Testing and Wiring Repairs in Wiring Systems.
Did you find and correct the condition? -- Go to Step 20
Go to Step 12
12
Test the signal B circuit of the steering wheel position sensor (SWPS) for the following conditions:
• An open
• A short to ground
• A high resistance
Refer to Circuit Testing and Wiring Repairs in Wiring Systems.
Did you find and correct the condition? -- Go to Step 20
Go to Step 17
13
Test the signal A circuit of the steering wheel position sensor (SWPS) for a short to voltage. Refer to Circuit Testing and Wiring Repairs in Wiring Systems.
Did you find and correct the condition? -- Go to Step 20
Go to Step 17
14
Test the signal B circuit of the steering wheel position sensor (SWPS) for a short to voltage. Refer to Circuit Testing and Wiring Repairs in Wiring Systems.
Did you find and correct the condition? -- Go to Step 20
Go to Step 17
15
1. Disconnect the EBCM harness connector.
2. Install the J 39700 universal pinout box using the J 39700-300 cable adapter to the EBCM harness connector only.
3. Test the low reference circuit of the steering wheel position sensor (SWPS) for a high resistance or an open. Refer to Circuit Testing and Wiring Repairs in Wiring Systems.
Did you find and correct the condition? -- Go to Step 20
Go to Step 17
16
Inspect for poor connections at the harness connector of the steering wheel position sensor (SWPS). Refer to Testing for Intermittent and Poor Connections and Connector Repairs in Wiring Systems.
Did you find and correct the condition? -- Go to Step 20
Go to Step 18
17
Inspect for poor connections at the harness connector of the EBCM. Refer to Testing for Intermittent and Poor Connections and Connector Repairs in Wiring Systems.
Did you find and correct the condition? -- Go to Step 20
Go to Step 19
18
Replace the steering wheel position sensor (SWPS). Refer to Steering Shaft, Lower Bearing, and Jacket - Disassemble - Off Vehicle and Steering Shaft, Lower Bearing, and Jacket - Assemble - Off Vehicle in Steering Wheel and Column - Tilt.
Did you complete the repair? -- Go to Step 20
--
19
Replace the EBCM. Refer to Electronic Brake Control Module (EBCM) Replacement .
Did you complete the repair? -- Go to Step 20
--
20
1. Clear the DTCs using the scan tool.
2. Operate the vehicle within the Conditions for Running the DTC as specified in the supporting text.
Does the DTC reset? -- Go to Step 2
System OK
Copied from another forum for code C1283
DTC C1283 Excessive Time to Center Steering
Circuit Description
Steer angle centering is the process by which the EBCM calibrates the steering sensor output so that it reads zero when the steering wheel is centered. The initial steering wheel center position is calculated after driving 10 km/h (6 mph) for more than 10 seconds in a straight line on a fairly level surface. The EBCM uses the Yaw Rate Sensor, Lateral Accelerometer and Wheel Speed Sensors to tell if the vehicle is moving in a straight line. This centering routine is necessary to compensate for wear in the steering and suspension. Wear in the steering and suspension can result in a change in the relationship between the steering wheel and the front wheels. By running the centering routine the EBCM can compensate for these changes by changing the digital and analog center position.
Conditions for Setting the DTC
The initial steering wheel center position will be determined quickly unless there is a large offset in the yaw sensor or lateral accelerometer output. When this happens the system will believe the steering is far off center even though the vehicle is being driven in a straight line. Under this condition and with a continuous vehicle speed of 40 km/h (25 mph) or greater for longer than 10 minutes, DTC C1283 will be set.
Action Taken When the DTC Sets
ABS and TCS remain enabled, Active Handling is disabled.
Indicators that turn on: Car Icon (TCS indicator)
Messages displayed on the DIC: Service Active HNDLG Service Vehicle Soon
Conditions for Clearing the DTC
Condition for DTC is no longer present and scan tool clear DTC function is used.
Fifty ignition cycles have passed with no DTCs detected.
Diagnostic Aids
It is very important to check the vehicle for proper alignment. The car should not pull in either direction while driving straight on a flat surface.
It is very important to find out from the driver when the code was set (when the SERVICE ACTIVE HNDLG message was activated). This information may help to duplicate the failure.
It is very important that a thorough inspection of the wiring and connectors be performed. Failure to carefully and fully inspect wiring and connectors may result in misdiagnosis, causing part replacement with reappearance of the malfunction. Check connector C102 RH side rear of engine compartment for water intrusion or missing plugs, and that the connector is oriented horizontal to prevent water intrusion.
An intermittent malfunction is most likely caused by a poor connection, rubbed through wire insulation, or a wire that is broken inside the insulation. Refer to Testing for Electrical Intermittents in Wiring Systems.
The Snapshot function on the scan tool may help in finding an intermittent DTC C1283.
Test Description
The number(s) below refer to the step number(s) on the diagnostic table.
This step checks for the proper Lateral Accelerometer input.
This step checks for the proper Yaw Rate Sensor input.
DTC C1283 Excessive Time to Center Steering Step
Action
Value(s)
Yes
No
1
Was the Diagnostic System Check performed?
--
Go to Step 2
Go to Diagnostic System Check - ABS
2
Turn the ignition switch to the ON position, engine OFF.
Using a scan tool read ABS/TCS/Active Handling DTC(s).
Are any of the following DTC(s) present, C1221-C1235, C1282, C1284, or C1285?
--
Go to the Applicable DTC. Go to Diagnostic Trouble Code (DTC) List/Type
Go to Step 3
3
Turn the ignition switch to the OFF position.
Disconnect the EBCM connector.
Install J 39700 Universal Pinout Box using the J 39700-25 cable adapter to the EBCM and the EBCM harness connector.
Turn the ignition switch to the ON position, engine OFF.
Using J 39200 DMM, measure the voltage between terminals 22 and B of J 39700 .
Is the voltage within the range specified in the value(s) column?
2.3-2.7 V
Go to Step 5
Go to Step 4
4
Replace the Lateral Accelerometer. Refer to Lateral Accelerometer Replacement .
Is the replacement complete?
--
Go to Diagnostic System Check - ABS
--
5
Using J 39200 DMM, measure the voltage between terminals 21 and B of J 39700 .
Is the voltage within the range specified in the value(s) column?
2.3-2.7 V
Go to Step 7
Go to Step 6
6
Replace the Yaw Rate Sensor. Refer to Yaw Rate Sensor Replacement .
Is the replacement complete?
--
Go to Diagnostic System Check - ABS
--
7
Read the diagnostic aids and conditions for setting the DTC.
Cycle the ignition switch from the OFF to ON position.
Carefully drive the vehicle above 40 km/h (25 mph) for 10 minutes, while monitoring a scan tool for ABS/TCS/Active Handling DTC(s).
Did DTC C1283 set as a current DTC?
--
Go to Step 8
Go to Diagnostic System Check - ABS
8
Replace the EBCM. Refer to Electronic Brake Control Module (EBCM) Replacement .
Is the replacement complete?
--
Go to Diagnostic System Check - ABS
--