Welcome to the Corvette Forums at the Corvette Action Center!

Question on applying body assembly rivets

The problem is some of these rivets are deep in the interior of the body...meaning that you more or less need two people. One on top of the rivet to hold it in place, and the other on the other side of the car with the punch and hammer.

Chris,

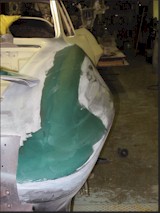
I know where the rivets are, I am refinishing the body reinforcements on the 65 Convertible I am working on. It does required two people but with the body off I think I think they are all accessible. The head of the rivet is inside the body and the bucking bar, which is farly small, will (I think) fit on the shaft side of the rivet. The correct way is with the gun on the head of the rivet and the bucking bar on the shaft side. It would be much harder if you were trying to hammer on the shaft side.

Dave
 
Is the rivet gun simply an air hammer by another name? If so, all I need is the rivet set and bucking bar.

An air hammer with a regulator should work. My only question would be whether the rivet set that goes in the gun would fit. If it does it should work fine. Practice first and you will be surprised at how little air pressure you need to do a good job.

Dave
 
Aircraft practice is to use the gun on the head end of the rivet and buck the shank end, but St. Louis did it the other way around; the bucking bar (or fixed block, in the case of the subassembly fixtures) was on the flat head end of the rivet, and the gun was used on the shank end after loading the steel part to be riveted.

I have an article coming on setting Corvette body rivets in the February issue of "Corvette Enthusiast".

The difference between the expensive air guns and the run-of-the-mill guns is primarily a longer-stroke progressive throttle trigger; for Corvette body use, the ordinary air guns work just fine. Practice a little and experiment with air pressure and you'll get the hang of it in short order.
:beer
 
JohnZ said:
Here's a close-up of the rivet-setting tool for the air gun - it's concave so it mushrooms the end of the rivet evenly into a round head. I get mine (for 3/16" rivets) from Aircraft Tool Supply, www.aircraft-tool.com . Works like a champ; practice for ten minutes to experiment with the air pressure that works best for you, and have at it!

http://www.corvetteactioncenter.com/forums/attachment.php?s=&postid=289339

John,

I visited my local tool store yesterday and the guy behind the counter said, "If you want a flat finish, then you don't want the concave end on the tool; you'll end up with domed rivets."

:confused
 
Aircraft practice is to use the gun on the head end of the rivet and buck the shank end, but St. Louis did it the other way around; the bucking bar (or fixed block, in the case of the subassembly fixtures) was on the flat head end of the rivet, and the gun was used on the shank end after loading the steel part to be riveted.

John,

I will not argue how the plant did it, you know much more than I do in that regard (actuallly I know nothing). However, the reason I was taught to use the gun on the head is so you do not push the rivet out of the hole before it expands enough to stay in place (or expands when it is out of position). The couple of times I tried it other way the head was not flush.

As a side comment, I think riveting on the head is kind of neat because nothing moves and it is the force flowing though the rivet reacting against the mass of bucking bar that compresses the rivet (don't know if I said that right).

Dave
:beer
 
Nothing wrong with "domed" rivets, and the concave tool makes it much easier to control how the rivet deforms and what shape it takes against the steel part it's attaching; the flat tool makes it much more difficult to control the finished shape of the rivet, especially when you start with a rivet cut to correct exposed shank length with nippers. St. Louis had rivets neatly pre-cut to proper length for the application on each operation (about eight different lengths of 3/16" rivets with perfectly flat shank ends), but most hobbyists just buy the long ones and "nip" to the length they need.

The key difference here is that in aircraft applications, the rivet is a structural part, providing permanent attachment and clamping force between two parts; in the Corvette body applications, it's little more than an assembly aid, to hold a reinforcement in position until bolts can be driven through it later to attach a part through the fiberglass to the metal part - the rivets aren't a structural member - they just keep the metal part from fallling off until a bolt is driven into it.
:beer
 
The key difference here is that in aircraft applications, the rivet is a structural part, providing permanent attachment and clamping force between two parts; in the Corvette body applications, it's little more than an assembly aid, to hold a reinforcement in position until bolts can be driven through it later to attach a part through the fiberglass to the metal part - the rivets aren't a structural member - they just keep the metal part from fallling off until a bolt is driven into it.

John,

I will have to agree with you. I looked at the rivets on my 65 and they are cockeyed, the shafts are bent and the heads are not flush - they would not meet FAA standards. For originality I lose the argument.

I still plan to do mine the FAA way for simple accessibility. The heads for the most part are inside the car and the bucking bar will (I think) fit in the areas on the outside. Hopefully I will not lose too many points for over restoring.:)

Besides I have driven too many rivets to do it the other way.

Dave
:beer
I enjoyed the discussion.
 
67HEAVEN said:
But John, if I ever decide to sell, and the potential buyer looks underneath, won't he know it's not a factory original car?

;LOL
fender-dr-front5-160.jpg

I think it's possible that they might notice the "domed fenders" before they noticed the "domed rivets"
:D :eek :beer ;LOL
 
So please show us a photo of your test rivit and what you are going to use to back it up.The dome looks allful deap it seems it would bottom out prior to making a complete dome.If it works for u let me know and I will aquire one for my self.
 
Here's an underbody shot of a Bowtie candidate C3 I inspected recently - note "domed rivets" :D :beer
 
John,

It is interesting that for the top rivets the large head, which I assume is designed for the fiberglass side, is on the metal side. The head on the other side had to have been beaten into the fiberglass.

I saw the same thing in the wiper shaft area on my '65. I put them back "correctly" with the large head on the fiberglass side. :hb


Dave
:beer
 

Corvette Forums

Not a member of the Corvette Action Center?  Join now!  It's free!

Help support the Corvette Action Center!

Supporting Vendors

Dealers:

MacMulkin Chevrolet - The Second Largest Corvette Dealer in the Country!

Advertise with the Corvette Action Center!

Double Your Chances!

Our Partners

Back
Top Bottom