
 4LT GS Roadster
My 2001 convertible is my everyday car. I drive it in rain, snow and good weather. It is and always has been garaged. Three weeks ago at about 128,000 miles the back glass window separated from the top. The separation first started at the top and when it got to the sides and started separating at the bottom I stopped driving it.
I’ve done lots of research on this site and others (including BMW, Audi and other convertible top postings). The results are that upholstery people usually say the sealing process is high pressure done under heat at the factory and there is no way to duplicate it in the field so you have to replace the top. Estimates for top replacement range from lows in the area of $500 to $1000 to a high of $3000 with the average being $1000 to $1500.
Some people report glue attempts with total failures after days or weeks. Others report glue success and the glue holding after much longer times.
Those reporting glue success used a variety of glues including: JB Weld, Black silicone RTV sealant, pure clear silicone sealer, 3M high black weatherstrip adhesive, and urethane windshield glue. One person posted that he used a cyanoacrylate glue that he got at a hobby shop. Super glue and its various other names are cyanoacrylate glues.
I did my own research and settled on Rhino Glue which is a specially formulated cyanoacrylate that is waterproof, weatherproof and completely resistant to heat and cold. See www.rhinoglue.com for more information.
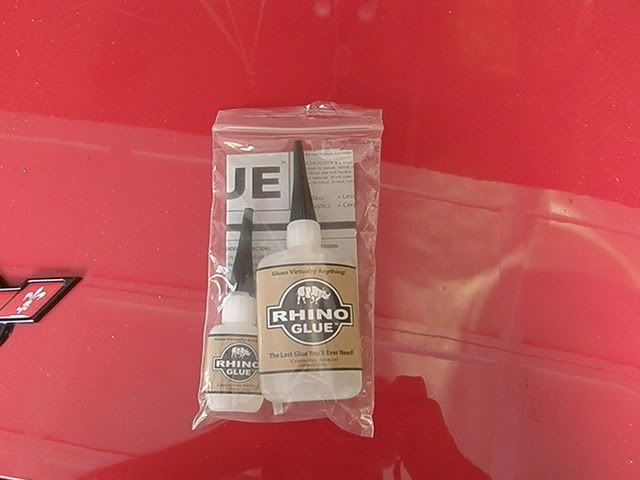
I was not able to find this glue in any store and bought it online. This is a totally different glue than Liquid Nails Rhino Ultra Glue. Do not buy the Liquid Nails kind.
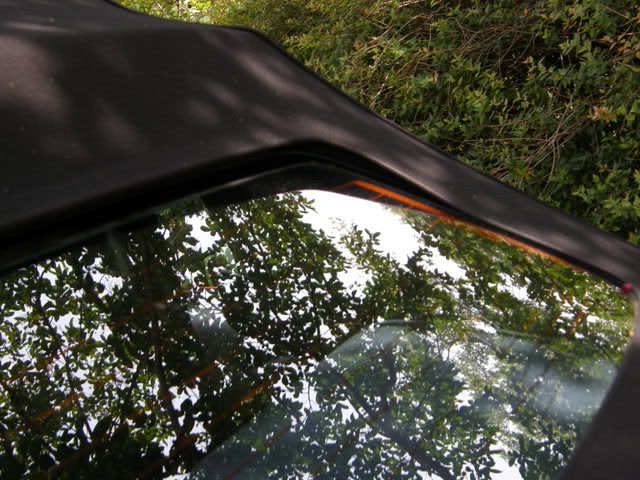
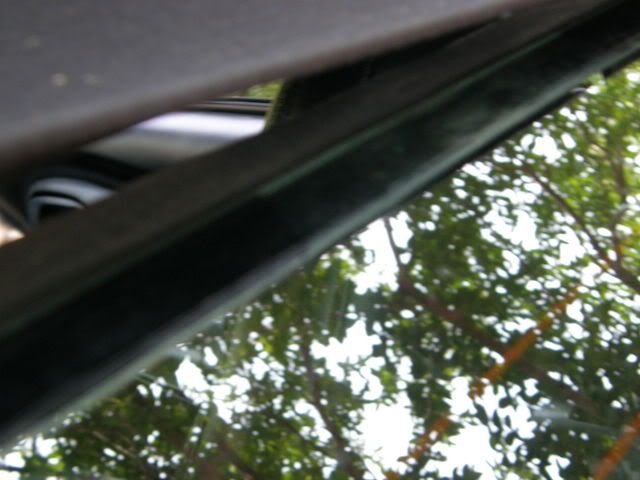
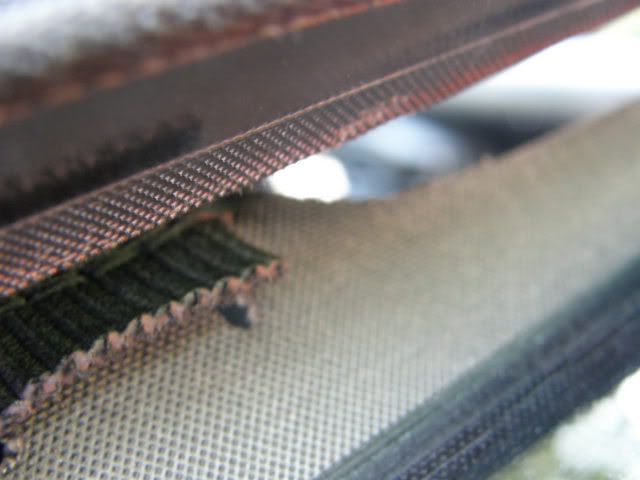
Here are pictures of what the separation looked like before I started gluing.
The first one was taken when the separation first started. Compare it with the ones below with the suction cups and you can see the progression of the separation down the side with just a little more driving.
My advice is to catch it before the window comes completely loose.
These round red things are suction dent pullers.
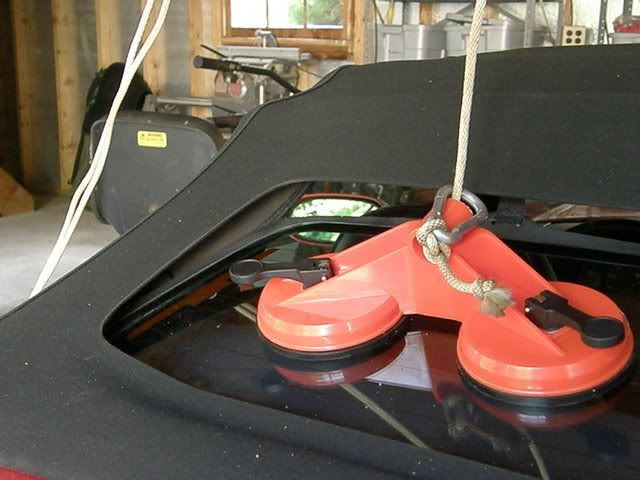
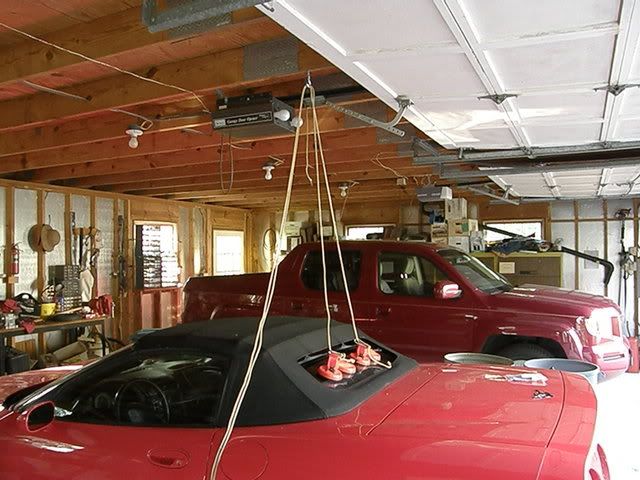
I found these online. They come in a 1, 2, 3 or 4 suction cup variety. www.cvfsupplycompany.com/sucusucupdep3.html. I bought the 4 cup variety without thinking. I got 2 of them (only needed one in the end) for $30 and that included the shipping. When they arrived, I realized that they were too large for the window so I cut them in half. A better choice would have been either the 2 cup or 3 cup ones. I then rigged up a way to pull them so that the glass would be pulled against the fabric. You can see that this simply involved screwing an eye into the rafter above.
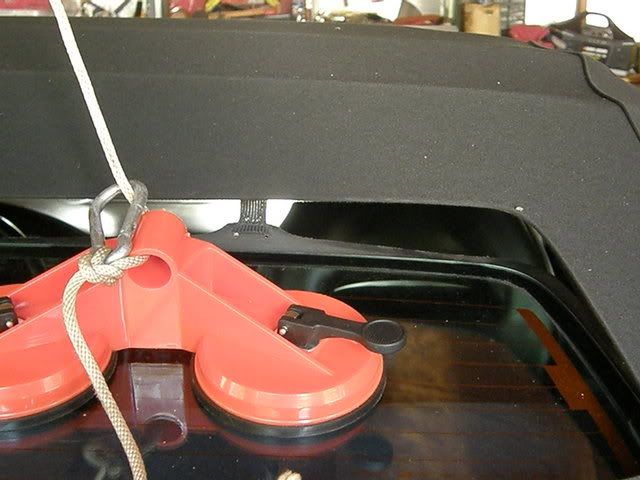
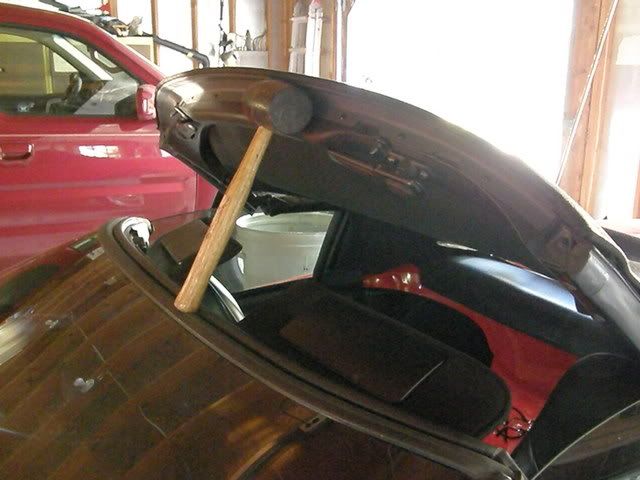
I found that if I unlatched the top and lifted it about a foot that it relieved the stretched fabric enough to manually push it against the glass. Note the rubber mallet I used to hold the front of the top up.
I then applied the glue around the glass about 3 to 6 inches at a time. Be careful and test this out before you apply the glue. I made the mistake of starting on the sides and moving toward the middle and was left with a significant bunching at the middle. The glue set up so fast that I actually had to cut the top away from the glass at the corner to smooth out the bunching. At the finish of the job, I was still left with a little bunching at the drivers side. As I’m not a perfectionist and it isn’t very noticeable, I haven’t tried to correct it.
This is the finished job before I removed the dent pullers.

I did the job at 7 PM and left the suction cups attached until the next morning at about 8 AM. I then drove the car to an automated carwash which I figured would be a great test for the bonding strength. It came through with flying colors - no separation of the window from the top and no sign of leaking.
I then drove it 50 miles with no sign of any separation.
If the glue is as advertised, judging by the part I had to remove and redo, I expect it will hold up for a very long time.
I’ve done lots of research on this site and others (including BMW, Audi and other convertible top postings). The results are that upholstery people usually say the sealing process is high pressure done under heat at the factory and there is no way to duplicate it in the field so you have to replace the top. Estimates for top replacement range from lows in the area of $500 to $1000 to a high of $3000 with the average being $1000 to $1500.
Some people report glue attempts with total failures after days or weeks. Others report glue success and the glue holding after much longer times.
Those reporting glue success used a variety of glues including: JB Weld, Black silicone RTV sealant, pure clear silicone sealer, 3M high black weatherstrip adhesive, and urethane windshield glue. One person posted that he used a cyanoacrylate glue that he got at a hobby shop. Super glue and its various other names are cyanoacrylate glues.
I did my own research and settled on Rhino Glue which is a specially formulated cyanoacrylate that is waterproof, weatherproof and completely resistant to heat and cold. See www.rhinoglue.com for more information.
I was not able to find this glue in any store and bought it online. This is a totally different glue than Liquid Nails Rhino Ultra Glue. Do not buy the Liquid Nails kind.
Here are pictures of what the separation looked like before I started gluing.
The first one was taken when the separation first started. Compare it with the ones below with the suction cups and you can see the progression of the separation down the side with just a little more driving.
My advice is to catch it before the window comes completely loose.
These round red things are suction dent pullers.
I found these online. They come in a 1, 2, 3 or 4 suction cup variety. www.cvfsupplycompany.com/sucusucupdep3.html. I bought the 4 cup variety without thinking. I got 2 of them (only needed one in the end) for $30 and that included the shipping. When they arrived, I realized that they were too large for the window so I cut them in half. A better choice would have been either the 2 cup or 3 cup ones. I then rigged up a way to pull them so that the glass would be pulled against the fabric. You can see that this simply involved screwing an eye into the rafter above.
I found that if I unlatched the top and lifted it about a foot that it relieved the stretched fabric enough to manually push it against the glass. Note the rubber mallet I used to hold the front of the top up.
I then applied the glue around the glass about 3 to 6 inches at a time. Be careful and test this out before you apply the glue. I made the mistake of starting on the sides and moving toward the middle and was left with a significant bunching at the middle. The glue set up so fast that I actually had to cut the top away from the glass at the corner to smooth out the bunching. At the finish of the job, I was still left with a little bunching at the drivers side. As I’m not a perfectionist and it isn’t very noticeable, I haven’t tried to correct it.
This is the finished job before I removed the dent pullers.
I did the job at 7 PM and left the suction cups attached until the next morning at about 8 AM. I then drove the car to an automated carwash which I figured would be a great test for the bonding strength. It came through with flying colors - no separation of the window from the top and no sign of leaking.
I then drove it 50 miles with no sign of any separation.
If the glue is as advertised, judging by the part I had to remove and redo, I expect it will hold up for a very long time.
Last edited by a moderator:
 Jane Ann


