Welcome to the Corvette Forums at the Corvette Action Center!

If you've got the gift as a photographer...

What a great thread. Lots of good tips too. I recently had a bad experience with photo processing at a local store. I've used them before and got the DVD made too so it's easy to post pictures. Overall they have been ok for what I was using the photos for. Well guess what? They don't have the film picked up by a courier any more. Now it's mailed and it got x-rayed. All of my NCRS Indiana Regional pictures except the digital ones were ruined. I drug my Canon F1 and all of it's lenses and accessories to Auburn for nothing.

I guess the lesson learned is know your lab and don't get lazy. By that I mean I should have driven my film to the pro lab in Ft. Wayne that I used to use when I lived there. I just didn't want to spend the time doing it.

Kodak has some new professional film I want to try too but I have to go to Ft. Wayne to get that. Looks like a trip is in the works.

I use my tripod indoors and out. The older I get the harder it is to hold the camera just like I want. I set the height and angle then set the camera settings. The F1 is a fully manual camera but that is how I learned way back. I also use the timer to trip the shutter. That way no hand are on the camera when it trips. A cable release works well too but my digitals don't have any provision for that.

Another thing that is a good tool to take along is some reflective panels. Early or late in the day gives you the best lighting and color but you often get shadows where you don't want them or you may want the sunset in the background ect. The flash on the camera isn't always the direction that you need light to come from. Take some cardboard that you can fold and cover it with aluminum foil, shiny side out. You can make as many of these as you want in several sizes. With a little though and some various lengths of wooden dowel rods and maybe a folding easel that is easy to store in the car, you can have panels that you can position where you need them to reflect light onto your car exactly where you need it. The cost is almost nothing too.

If you still like to play with film like I do take your digital along and use it to set up you composition and lighting since you have instant results. Then take a few with the film camera bracketing the exposure to be sure you end up with the look that you want.

I just got a new digital that I haven't had the chance to play with too much. It's a huge improvement over my old one and does macro right up there with my Canon macro lens. I'm impressed. If the global warming hold out a little longer this year I may be able to get the car out for some pics.

Tom
 
I like it.

I think the car looks better shot in the open shade where there is good color saturation in the red. Bright sunlight would have made the car too glary. Notice the reflections in the side panels of the car...it adds some interest. Good composition too. The only thing I would do different is try to lose the corner of the building. If possible move the car forward a bit. And for an added touch, shoot the same shot after a rain shower when the pavement is wet. It darkens the dull hardscape and adds reflection. You've got a ggod thing going with that location. Just try a few more ideas and angles until you've exhausted the location.

Thanks for the suggestions! Will keep them in mind for next time.

One of the limitations in these photos was a "new" garage door mounted on the wall just forward of the car... I was trying to keep it out of the photos because I felt the "new" would detract from the "old" I was going for in the background.

I would have done the same.:)
 
For all you digital photographers reading this thread, here's a very interesting tip I didn't know about.

Most digital cameras save your pictures in the JPEG format. JPEG is known as a "lossy" format, because the compression scheme causes the image to lose detail and clarity each time the image is edited and saved. Here's a few things you can do to combat this loss in quality:
  1. [FONT=Verdana, Arial, Helvetica, sans-serif]If possible, perform as many edits as possible in one session so you're not saving to the JPEG format repeatedly.[/FONT]
  2. [FONT=Verdana, Arial, Helvetica, sans-serif]When resaving a JPEG, use the same compression setting that was used for the inital save. With digital cameras, this is not always possible, since the camera uses settings such as Basic, Normal, and High instead of numerical settings. If the numerical equivalent for the quality settings are available in your camera's user manual, keep these numeric values handy so you can refer to them when you need to resave the JPEG images. You'll still have some loss in quality even when you use the same compression settings, however, it will result in less damage than if you were to use different settings with each save.[/FONT]
  3. [FONT=Verdana, Arial, Helvetica, sans-serif]The best solution is to convert your images to a lossless format as soon as you download them from your camera. Leave the images in the lossless format through the editing process and only convert to JPEG as the last step before putting the images on the Web (again, use the same compression settings as the initial save, if at all possible). It's a good idea to archive your images in a lossless format since you never know if you'll need to edit the images for another purpose in the future. The most common lossless image formats to use are Bitmap (BMP), TIFF, and PNG. Bitmap is a uncompressed format so the images will be quite large. TIFF and PNG will result in smaller file sizes, although not as small as JPEG format. Obviously, the down side to this solution is the additional storage space required as a result of the larger file sizes.[/FONT]
Verrrrrry interesting. :)
 
Here are 2 shots taken in 1974 at the Cayuga Ontario Corvette Dragmeet. Anyone recognize these cars? I have others. If you now your car was there, describe it to me and I'll see if I have a shot of it. Many were modified. That black/white 67 was the overall winner. Saw an interesting 62 that was painted with what seemed to be flat beige stucco like paint with a red cove.[/quote]

"Saw an interesting 62 that was painted with what seemed to be flat beige stucco like paint with a red cove.’
I saw that car too. It was an Almond Beige car with red interior, power windows, FI and hard top only car. He was running an intake and carb from a ’64 365hp coupe as he had grown weary of the hot restart problems the FI was giving him. The overall winner with the black ’67 I think was his good buddy.
At that time and for some year’s prior vinyl tops were very popular. After market installations were common. An even cheaper route, but less common was to run two lines of tape to mimic the seams and spray a roof with wrinkle paint. The owner of the beige ’62 had the whole car done in wrinkle paint in the same colour as original and the coves done in red to match the interior. He thought it a good idea, he didn’t have wax it, didn’t worry about it getting scratched. Only took a few minutes to wash with a scrub brush and hose it off.
He was a nice guy but quite short. He had a block fastened to the accelerator pedal. The clutch and brake had extensions added so he could reach the pedals. He also had a cushion to sit on.
When I saw the FI emblems I was drawn to the car. After I saw the interior and the power windows I had to have it. He said it wasn’t for sale. A few days later it was mine and still is.
There was also a black ’62 with red interior and FI there that day. Really a 340hp car with the FI added.
It would be neat to see your photos and take a walk down memory lane.
 
For all you digital photographers reading this thread, here's a very interesting tip I didn't know about.

Most digital cameras save your pictures in the JPEG format. JPEG is known as a "lossy" format, because the compression scheme causes the image to lose detail and clarity each time the image is edited and saved. Here's a few things you can do to combat this loss in quality:
  1. [FONT=Verdana, Arial, Helvetica, sans-serif]If possible, perform as many edits as possible in one session so you're not saving to the JPEG format repeatedly.[/FONT]
  2. [FONT=Verdana, Arial, Helvetica, sans-serif]When resaving a JPEG, use the same compression setting that was used for the inital save. With digital cameras, this is not always possible, since the camera uses settings such as Basic, Normal, and High instead of numerical settings. If the numerical equivalent for the quality settings are available in your camera's user manual, keep these numeric values handy so you can refer to them when you need to resave the JPEG images. You'll still have some loss in quality even when you use the same compression settings, however, it will result in less damage than if you were to use different settings with each save.[/FONT]
  3. [FONT=Verdana, Arial, Helvetica, sans-serif]The best solution is to convert your images to a lossless format as soon as you download them from your camera. Leave the images in the lossless format through the editing process and only convert to JPEG as the last step before putting the images on the Web (again, use the same compression settings as the initial save, if at all possible). It's a good idea to archive your images in a lossless format since you never know if you'll need to edit the images for another purpose in the future. The most common lossless image formats to use are Bitmap (BMP), TIFF, and PNG. Bitmap is a uncompressed format so the images will be quite large. TIFF and PNG will result in smaller file sizes, although not as small as JPEG format. Obviously, the down side to this solution is the additional storage space required as a result of the larger file sizes.[/FONT]
Verrrrrry interesting. :)

From dreaming of a DSLR, i heard RAW format was supposed to be the best source, as it's basically the source code.. INFO

While people struggle with the proprietary formats, i heard only good things about RAW format.. ;)
 
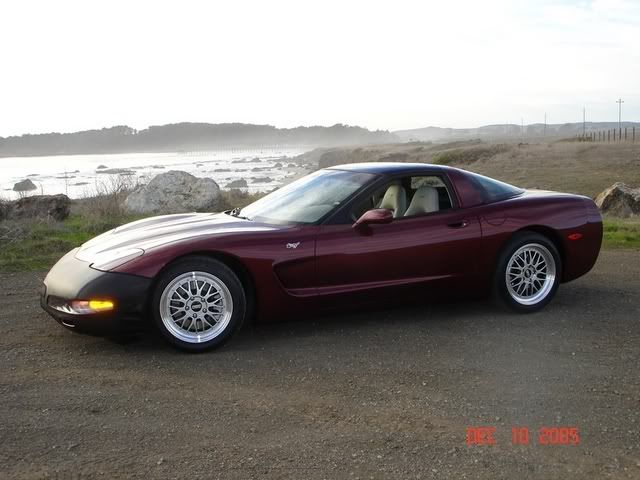
Not the best but I was working against the sun - literally.

Late afternoon shot and in order to get the lake in the background I was shooting toward the setting sun. This caused the side of my car nearest me to be in shadow, but I'm still pleased with the image.

As an aside, I tried using the flash to fill in the shadows a bit, but this caused a reflection off the parking lights so I turned it off.

:wJane Ann

HPIM1603_2_K.jpg
 
Jane Ann,

I like your pic a lot!

SAVE THE :w
 
Very nice composition Jane Ann. One way to offset back lighting is to use flash but as you stated you can get direct reflections. I have a few large remote flash guns that I have used at angles to light the subject without reflection. This sort of thing gets expensive but there is an cheap and easy way to get acceptable results.

Take some cardboard panels and cover them with aluminum foil. You can experiment with both the shiney side and the dull side to get the illuminiation that you like. They can also be folded to take along with you. Then you prop them up with something like wooden dowel rod from the Home Depot to reflect natural light onto the dark areas of the car that are shadowed by the back lighting. Adjust them as needed and take several shots using different lighting until you get the look you are after.

I played with your picture on Photoshop for a few minutes but I can't lighten the dark side too much without turning the lake white. I adjusted the color a little too.

e94f3162.jpg


Tom
 
Good suggestion about the foil panels, Tom!! I hadn't thought of that but I'll sure give it a try. Thanks!!

I ran into the same problem while trying to lighten the photo a little during editing... the lake and sky would look too bleached out.

I like what you did with the photo. Wish I could afford Photoshop. ;) :L

Jane Ann
 
I have Photoshop 7.0 and I have only played with it a little. I can edit pictures but there is so much else that it can do. It's just amazing. I wish I had the time to really learn it. My son is licensed on all of this stuff. He installed it when he built my computer and keeps me up to date on the newest versions.

Mor just quick pics I use my old Sony Mavica FD75. I like it's simplicity with the floppy disc and it has a 10x optical zoom. Even though it's an antique as digital cameras go I still haven't mastered all that it can do. I like how easy it is to grab, take a picture in the garage and post it on line in just a few minutes. The downside is that it uses up the batterys fast and I have to carry a pocket full of floppys when I go to a show.

My new one is a HP Photosmart R727 6.2 mega pixels. There are bigger ones but it is a best buy on several magazine lists. It will do Macro photography and some other things that I use a lot. With the 2gb card in it I can take up to 1400 pictures so it's great for shows. I like the titanium case over the plastic used in so many other camers too.

Tom
 
Instead of a flash, use a large reflector (Like a sliver sunshade) to direct the sunlight in a diffused way.
 
Any interest in reviving this thread? I thought perhaps a few of you may have taken the opportunity this summer to take new photos utilizing some of the suggestions made here.

Got any to share?

Here's a late afternoon photo of my Vette - lakeside, low angle, wheels slightly turned, off-centered.

HPIM1603_2_K.jpg


:wJane Ann
 
Beautiful picture Jane Ann.

I notice a lot of the photo people are using Photoshop. It's a little pricey for me and I have been using Photoshop Elements 5.0 with good sucess. It's supposed to be 90% Photoshop at 20% of the price. I think I paid $80 for it at Costco.

I took this one before my car was painted at one of the Helen runs.

200303_Helen4.jpg
 

Corvette Forums

Not a member of the Corvette Action Center?  Join now!  It's free!

Help support the Corvette Action Center!

Supporting Vendors

Dealers:

MacMulkin Chevrolet - The Second Largest Corvette Dealer in the Country!

Advertise with the Corvette Action Center!

Double Your Chances!

Our Partners

Back
Top Bottom