Welcome to the Corvette Forums at the Corvette Action Center!

Revivification of a 1963 Split Window

RestoCreations

Well-known member
Joined
Jun 25, 2009
Messages
80
Location
Birmingham, Alabama
Corvette
59, 63 Vert, 67 Vert, 67 Coupe, 63 Split
This is posted on the other forum, but I am going to slowly start transferring my build threads to this forum.

I purchased this car in May of 2014 and slowly started working on it that June.


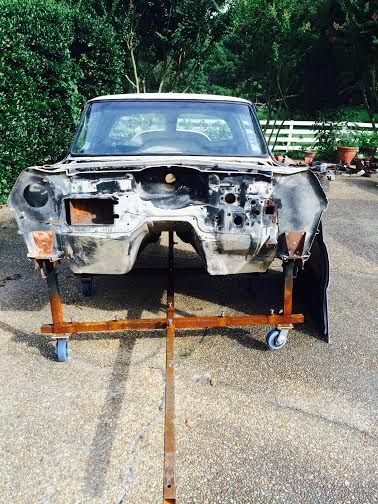
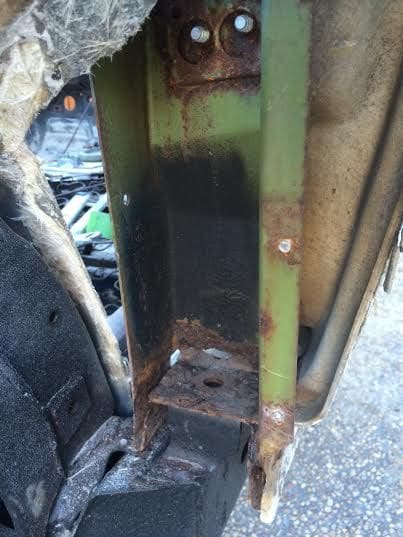
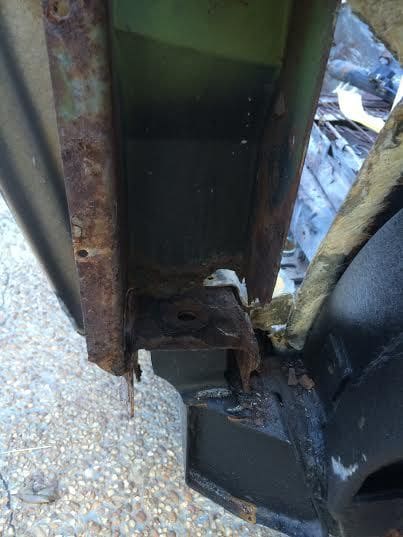
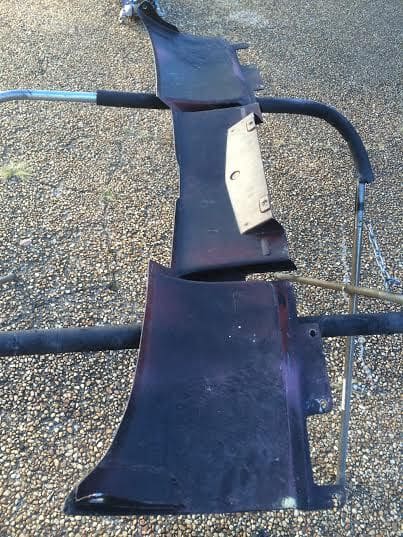
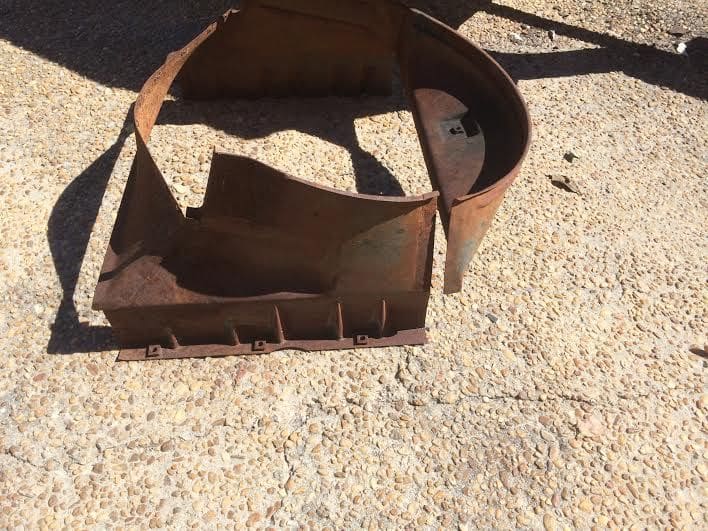
-This is a numbers matching 340hp car with Daytona Blue exterior and Daytona Blue Interior. A previous owner started the restoration of the car many years ago, but did not get very far. The panels and roof were removed to address birdcage rust.


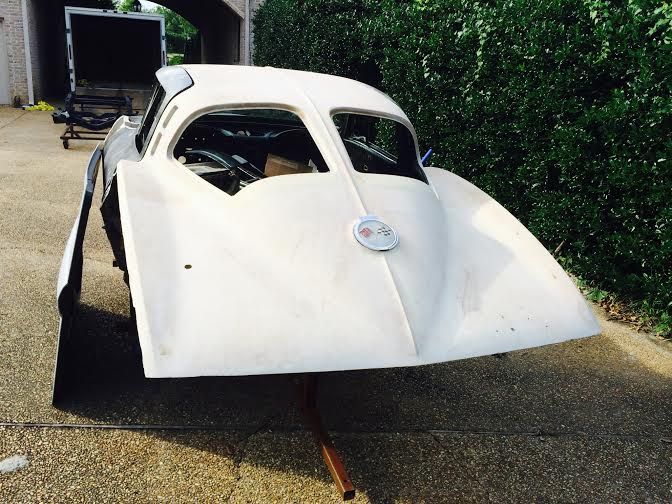
-The engine is currently at the machine shop being inspected and rebuilt. Fortunately, it does not look to have ever been molested, although the original intake and carb were throw away, sold, or lost at some point.
-I have a new press molded jig assembled front clip, quarters, taillamp panel, and the needed bonding strips on order from Sermersheim.
 
8/01/2014

No real progress, but I did put my new gantry crane to use and reinstalled the body back on the frame today. The hoist straps from Corvette Central were way too long, so ended up using two tie down straps instead. Not sure why CC cant figure out an appropriate length for their body lift straps.


80-gantry_crane_f466b098a23152d074840eb674c753ffd8bff535.jpg
 
10/17/2014


Well, the cage is a bit worse than i thought, but still no real major issues or concerns. I removed the body mount/splash panels from the rear wheel wells and the latch pillar fiberglass so the metal shop can have access to the cage. I am not the worlds greatest welder, so i am passing this task off. The driver's side latch pillar is the worst. The rest of the cage is solid, so i assume salt settled in the lower portion of the cage and caused it to rot. The rocker channels are fine and still sport their nice original green zinc paint.


80-63d_split_birdcage_2_18ae711c5195c206d1e9d7fe5cd1dbcfadea23bf.jpg


80-63d_split_birdcage_810d4eab4d7541da9c1b227bdcc48628a1aead49.jpg


Somebody glassed in the holes in the original exhaust panel.


80-63d_exhuast_panel_735aec3ed289d86f5b0d29ca71d5ff3080dd1ce6.jpg


80-63d_exhaust_panel_3_41f9caea421986037f4f11d7ca1d1b7a1d0d56dc.jpg


80-63d_split_exhaust_panel_2_bcd7ac2ea89ae9381cd8a36cd488e67e04666d71.jpg
 
10/17/2014


The radiator shroud spot welds let loose on one side. I drilled 3 holes then plug welded them and ground them smooth. This only took about 30 minutes and was well worth the effort.


80-63d_radiator_shroud_913270cf6466409d52cbd2939beff0d02de511de.jpg


80-63d_radiator_shroud_3_036f2c2609da22d27fa9c9ecd04f0d7ba562af51.jpg


80-63d_radiator_shroud_4_b09170d77d1be43661802e58359aba7a31448d1f.jpg


12/30/2014


Correct intake, but i plan on using a 461 intake from a 64-65 with a quickfuel 600cfm carburetor. This will go in a box and on a shelf to go with the car for when it is sold someday hopefully many years down the road.


Distributor rebuilt by lars and set up for the new Howard's hydraulic roller camshaft.


1/16/2015
Drip rail repair progress.


BEFORE


AFTER
80-image_99ff226ca2fa164de6d459c8f67a0d6d1836aef4.jpg


BEFORE


AFTER
80-image_529ccc9a0c337281217cddd2e072da7ba596a886.jpg


80-image_c24ff6ce196c610b47669fec3c52088d17349631.jpg


1/29/2015


I picked the car up this morning from the body shop. The drip rails have been replaced and the other necessary metal repairs to the birdcage are complete. I also had them lightly soda blast the cage to remove as much rust as possible.


I brushed the top portion of the birdcage with SPI epoxy primer after using wax and grease remover. I also poured the epoxy inside of the cage where i could. I'm not going to bother spraying the cage with the crappy rattle can zinc oxide. I'll apply it to the visible areas, but not those that will be covered.


Next I cleaned the bonding strips.


And finally I applied 3m Panel Bond to the birdcage then riveted the bonding strips in place. I know they used some sort of seam sealer type product under the bonding strips at the factory, but I am going for maximum adhesion.


2/24/2015


These pictures did not turn out very clear, but I sprayed the green zinc oxide paint on the birdcage today and it looks really nice.


.
 
2/25/2015
After sanding I applied a rust encapsulator primer. I also used Eastwoods internal frame coating to spray and coat the inside sections of the upper birdcage.


3/20/2015

The paint and body shop finished gluing the panels on today. She is all one piece again.


80-image_6182baf016ce193343b8bd4ec64f63afb0ab7209.jpg


80-image_731a8047b76f775a7eb1ab7f8cad9a51feca76c9.jpg
 
8/24/2015
Long story short, the original frame was not repaired correctly, so I bought a "rust free, no hit, best frame i've ever seen before" off of eBay. Well, needless to say, it turned out the other way. Instead of taking another loss, I decided to put my limited welding and fabrication skills to the test. I think I did alright! $250.00 worth of metal and 8 hours of work and the frame is repaired, for the most part...still many minor repairs and touch ups that must be made.


I left as much good metal in place as possible and overlapped for further strength. Maybe not the prettiest repair on the inside, but this frame should now be extremely solid!!!


80-image_028d3e32dddafab238b8a4fb7987a625e1a283b6.jpg


80-image_32d182450580c232fe28544ed41ba3249c7f497a.jpg


80-image_b9a29413792c703ffa2f3eca2ae3a1a8363204c4.jpg


80-image_69ff1230c2001f726829b037893e82016f26d409.jpg


80-image_26b91fbaaaf7c2eaf0cad0ebb1275e5ab164c4b8.jpg


80-image_50903d6a285a7b257e3760a45590bad9ba14a640.jpg


80-image_1b8bee81cbd294e48f4bd90a1f489a6e82e5ec77.jpg


80-image_3bd6bdc79e550c8219b06fcc37ad700ba91a4607.jpg


http://cimg8.ibsrv.net/gimg/www.corvetteforum.com-vbulletin/1120x2000/80-image_2a0fd0835ffbddbf2da584076609742b8e8f92bc.jpg[/IMG


[IMG]http://cimg1.ibsrv.net/gimg/www.corvetteforum.com-vbulletin/2000x1064/80-image_6242ff5e61d92082e7500abf97661d7165b9a4c5.jpg
 
6/15/2016


I ended up sending the "perfect" and "rust free" frame I purchased off of eBay to Roger Gress in Michigan for repairs because something just didn't look right to me. Roger is a really nice guy, but I think he is pretty much retired and therefore it took him around 5 months to repair the frame. Unfortunately, he also disregarded my request not to blast the frame and did as he wanted, which removed all my hard work of smoothing out the pits, not to mention over $300 dollars in epoxy and other materials. I didn't have it in me to do it all over again, so i just had the frame powder coated and called it a day.


80-frame_repair_4_f9517c95afd8b10e30a883b9fc502876631a7084.jpg


80-frame_repair_5_ad717133a47b2aff0def5492e0e367cc485aae9c.jpg


80-frame_repair_ec59ef73f631ca27a72faa11f0972f842a8a358b.jpg


80-frame_repair_2_52e2fbda4d230451466205b003f4398d9407f148.jpg


80-frame_repair_6_f4c9fc9a834dd081230c9704075126010f6cf155.jpg


80-frame_repair_7_0074421c72c2d76b9b56ae817da6f2cb6d5da25b.jpg


80-frame_repair_8_f5a833767a312122bc7094f88e7424b8338da31a.jpg


80-frame_repair_9_fda6e033f3ef1c441ce41038de6a48fda3eb8679.jpg


80-frame_repair_10_6262dcfc199e28739c57b92c300008f32106f8b3.jpg
 
The engine builder had the engine for almost two years, which was ok since we were not in a hurry, but still a little excessive.


The cam I picked. I think I already mentioned this previously, but I like Howard's retro-fit hydraulic roller cams because the gear is compatible with the stock cast iron distributor gear. My engine builder says this cam with clear the stock style pistons even with the heads upgraded to larger valves...we shall see. If not, then I will probably need to order custom pistons with a deeper dish. The block has it's standard deck and does not need attention, so that is a plus.


New Lightweight Eagle rods with ARP cap bolts


Speed Pro Forged Stock style replacement pistons 30 over.


New Flywheel. This one is 27 pounds, which i think is 3 pounds lighter than stock?


The oil pan was pretty banged up in the front from someone hammering out a dent. Considering the price of high capacity pans, I decided it best to repair this one by filling the dents. Most fillers probably would not hold up to the fluctuation in temperature an oil pan experiences, so i used 3m panel bond, sanded, then sprayed the pan with SPI epoxy primer


80-image_bb294f757c040a23e30718db57dd5e3faa8408eb.jpg


80-image_a8e0193fd6b0847055109ca8470c3724e3f12214.jpg


80-image_43f97828f0e2fea3ab2f31499f77853283fb058e.jpg


The builder misunderstood what i said about not painting the engine, so I will need to respray it with the correct orange.
I had the heads upgraded to 1.6/2.02 valves and we went with a Howards Cams hydraulic roller camshaft. I also purchased a 64-65 winters intake so I could run a quick fuel or holley carburetor instead of the AFB.


80-engine_rebuild_2e6feaf340ee81f14776f280872fa39fbfcdccd7.jpg


80-engine_rebuild_2_3985965a53d4fad5813fc8eeca3961956e2a8091.jpg


80-engine_rebuild_3_b5660908cd42b26b7b2cad1519c252a7048af97f.jpg


80-engine_rebuild_4_0044f9410c8533fe7712b6154610204b31b61965.jpg


80-engine_rebuild_5_719bb63d1595303629c4b3d2c74d9dd89cd7249d.jpg


80-engine_rebuild_6_621861835583e5a7ef3cb2e6818e7170aa12dc3e.jpg


80-engine_rebuild_7_d1236d6a13e3225a3ab03e4bbf4d39d5be373c8f.jpg


80-engine_rebuild_9_41a79819a8dfe52f28890282b6856e55f5965a00.jpg


80-engine_rebuild_10_9ad02ceadd0c9aa7a64e0e8e19f3b7bd8a8ee51d.jpg
 
It takes a lot of dedication to go this deep into restoring a birdcage. Too many would have just covered up the damage, made it look pretty and sold it. Thanks for posting this build here. I look forward watching this one progress.

Tom
 
It appears that you are doing the project right. :thumb Way to save another mid year. I love these cars.
 

Corvette Forums

Not a member of the Corvette Action Center?  Join now!  It's free!

Help support the Corvette Action Center!

Supporting Vendors

Dealers:

MacMulkin Chevrolet - The Second Largest Corvette Dealer in the Country!

Advertise with the Corvette Action Center!

Double Your Chances!

Our Partners

Back
Top Bottom