Welcome to the Corvette Forums at the Corvette Action Center!

Shinoda start

The paint looks spectacular! Well done!! -Mac

Thanks, it takes an unreal number of hours in prep, color sanding, then three polishing steps. Like any skill, a mentor and plenty of practice helps, but does little to reduce the hours involved. I have learned the 'feel' of 1500 wet vs 200 wet plus how to see the small imperfections that need to be removed in those steps, despite not being able to do so, last week!

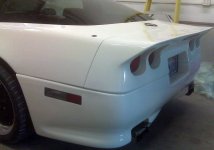
Here's the new rear, with no glass mounted.
NewRearNoGlass.jpg

When the rear glass, other panels and mirrors are on, we will decide on the door handles being black or white.

Those panels are all sanded, with polishing happening tomorrow, then mounting.

Ahh, the two nose pieces need color sanding, etc. :w

I wonder if I'll get my fingerprints back.
 
My 1984 coupe; his old body kit (if that's Jeff L.), which needed lots of work. Some panels shrunk, it seems. I'd bought a few other parts from him and was real glad to have him (very nice guy) include all hardware and the Shinoda stickers, PLUS he dropped the parts at my house, as only he had a truck.

Finished all sanding but the two nose pieces and a couple of minor touch-ups.

I got the rear glass back today with new 1-piece tint; old tint removed. It gets prepped and painted black on the hinge area.

Yes Jeff L.
 
I wonder if I'll get my fingerprints back.

Eventually... or not... The results look worth it to me but then it's not my fingerprints. :)

Didn't John Dillinger try to shave his fingerprints off with a razor?

-Mac
 
Just b/c I have been quiet, don't assume the car is not more assembled.

Both door, cowl and rocker panel sides are on. Mildew resistive foam was cut and shaped to bolster the gap between the door panels and the car door skins. Finding enough clips to hold the Shinoda door panels on took lots of time. I could still use a few as some are marginal.
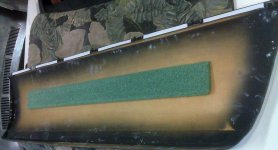
InnerDoorFoamBrace.jpgDoorMoldingClip.jpg

Both cowl pieces need adjustment, yet

Yesterday, the two piece nose was assembled, including the curved metal reinforcement strip I had made where they join. This took a few hours in itself while trying not to scratch the new paint.

Today was spent wrestling with putting the nose on the car. this wa made harder by a marginal former repair, (thanks <not>, USAA and Prestige Collision, in Mission Viejo), the change to the '87 hood on this '84, the nature of such kits, the BigMouth and the screening I had fabricated to keep crap, like leaves, out of the radiator area. Atop that, the original bolts and wire nuts have seen better days, so a hardware chase yielded better hardware for improved fastening of the inner wheel wells to the body panels.

I like the more solid nature of the air intake area (Big Mouth) despite the work it takes to install..

The nose is on; adjusting the fog and turn signal lights and assembly/connection of all those hoses, wires, lights and such remain. The custom nose parts promise to fight me as they did the first time I installed them.

The new rear hatch rubber came today so that goes on tomorrow and I'll evaluate the risk/reward of making/installing drain tubes after getting that nose together and to re-secure the rack's rubber sleeve..
 
I like your new avatar!

-Mac
 
I like your new avatar!
Thanks. It will get replaced as the car is finished. Trust me, y'alls's support helps in a project of this magnitude.

The front end is totally reassembled with the gaps and lines as they should be. but I have to rework the undercar pieces. I have been replacing old hardware (like J-bolts) that are no longer serviceable or are broken. Other things, age related, are addressed, too. It is frustrating to have had work done by 'professionals' , then to discover the short-cuts taken; again, redone as I go.

Example: one steering rack boots was zip-tied on, not clamped. Guess which on was off, breaking the protective seal? Guess who cut the zip and clamped it properly? talk about tight quarters to work a tool into!

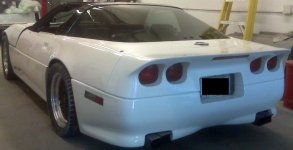
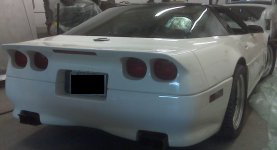
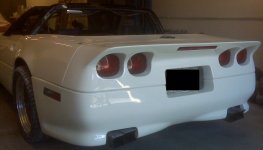
Picture time. Still have to cut the Flowmaster intake pipes to properly align the square, self-made tips, in black chrome.
ShinodaRearNearDone.jpg

Yes, the cowl panels need adjustment and final attachment and the exhaust tips need alignment.:w
 
At least you have (or are learning) the skills to fix things right... and you get to keep the results!

-Mac
 
Missing from this photo are both now-body-color-white door handles, which are installed and working.,as is the new hatch seal.
At least you have (or are learning) the skills to fix things right... and you get to keep the results!-Mac
Jerri and I spoke of this today and I am applying it to the BigMouth and the cat-resistant screen I mounted to keep leaves, stones, small animals and Rustangs away from my radiator.

Closing the hatch with that new seal made me worry that I might break the glass trying to get it down to lock. HE said I'd be the first to do that to the tempered glass.

More of what I learn and remember (not assumed, these days) will get applied to the '55 Nash and the '55 Ford F100 that is C4 from the waist down!:beer
 
WOW!!!

2930d1299216528-shinoda-start-shinodarearneardone-jpg


Coming along nicely! I can't wait to see the finished product!

Tell me about those rims... I've toyed with the idea of something similar on my Carmine Red roadster. I've always liked the black centers with a silver rim.

:wJane Ann
 
WOW!!! Coming along nicely! I can't wait to see the finished product!
Thanks; also eager to see the final.

Tell me about those rims... I've toyed with the idea of something similar on my Carmine Red roadster. I've always liked the black centers with a silver rim.

:wJane Ann
sent a PM
 
enough tail!

Today, I finished wrestling with the nose 'unders', namely the BigMouth and the home made screen. I just wished I'd not lowered the RF tire onto my knee when taking the car off the jack stands! OUCH <the polite version>! Nothing broken; Ima big guy. :ugh

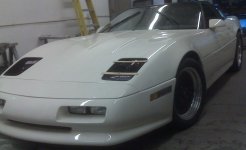
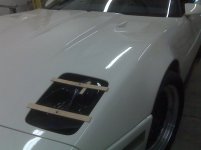
I decided to show you the nose. The headlights will be formed in carbon fiber, after molds from the trimmed-to-fit C6 units. Jerri will use the C6 ballasts and mount/aiming mechanisms, while getting the alignment correct for proper aim and legal height from the road. The paint sticks you see allow for placement and movement during this design process.
ShinodaRFrNeedsHeadlites.jpg C6Headliteplanned.jpg

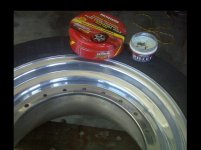
For Jane Ann, the Epsilon 3-piece rims will shine up to near-chrome (but better) with some Mother's (TM) and a few minutes of elbow grease.

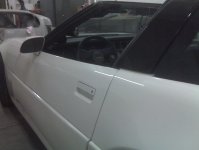
Steve (former race driver) suggested following the theme from the tinted glass, by using black on the roll bar and white on the door handles.The factory black held up well, and seems to be a wrinkle paint, easily Scotch-Brited (TM) as prep, but I used a bead blaster, too. Jerri put flex agent in the paint for the handles, disassembled for that process, to reduce scratching from fingernails and minimized coats so the handles would not bind. I hope that I can find them at night! :chuckle
ShinodaLdoor.jpg

I let the expert reassemble the door handles <insert not-so-polite speak here>.:mad:happyanim:
 
Fixed and installed the last (left) interior door panel and took apart, to install a seal-axle bearing washer, the LR carrier. (learned a few tricks there)

With only a small interior electrical bugger to find and some long-standing wiring issues from the crappy engine install by 'professionals', the car needs minor blems addressed and a detailing:happyanim: before it roars anew.
ShinodaRRear.jpg

Jerri cut the 3" pipe inputs to the Flowmasters, then we rotated (he welded) them together. Now they line up like they are supposed to.
NiceTips.jpg

Some 00 steel pads restored the tips' black chrome to a nice luster.

Oh, he still has to mold.fabricate and install the C6 headlights, so I'm not going away for good, just yet. Next, I have to pull the steering wheel and tighten three bolts inside so the column stops moving like it ain't supposed to move!

Oh, needs shoes, too.

And, an alignment.

and, new gasoline.

And.. oh, hell, it's 25+ years old!.. ..sorta. :w
 
Oh, he still has to mold.fabricate and install the C6 headlights, so I'm not going away for good, just yet. Next, I have to pull the steering wheel and tighten three bolts inside the column
Got the column fixed. That was NOT fun, but is done.

The alignment seems superb (little drive time, so far) and the car is much more stable at highway speed, with throttle 'On/Offs' The rear toe-in was way off.

Probably going to get Goodyears, as soon as I finish redoing the wheels. The Mother's polish is making these aluminum rims shine like chrome, w/o the age-related downsides of chrome. Film at 11.

One new headlight 'mule?' is ready for the release agent, then the 'glass for the mold. The other is just behind it in the process.
HeadlightMules.jpg
While most of the (pricey) C6 headlights were cut/discarded, they are essential for the light enclosures, the aiming mechanism, the ballast, and the lights themselves. These will attach just like the stock 'flippers' do. Each will sit under a clear lens, with small bubbles to clear the lights, which sit slightly above the nose's profile. Small bubbles also look better than the flattish ones. Jerri measured carefully to ensure legal height above the road and to stay within the aiming limits of the adjusters.

Cool, huh? :w and..... all Corvette!
 
Very cool and I'm glad he's planning for adjustors. Nothing worse than misaligned headlights!!

-Mac
 
"New" wheels

Bad news first: radiator, 10% citric acid flush/refill after replacing the missing thermostat and new fan motor to replace the crappy Chinese replacement; now oil in the coolant. CRAP!

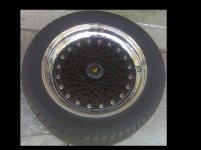
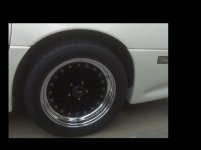
So, I thought about at least one Corvette admiring/driving/owning gal while polishing these Epsilon rims. I did not deflate the first one before removing the bolts; oops, needed resealing; done by MagMasters, based upon prior positive results. The other three were deflated and did not require the $45 task. (Some forums say this can be done at home with silicone.)

Polish4wheel.jpg Plus finger grease and some power buffing.

Prepped and painted the centers in gloss black epoxy and polished the chrome bolts on a gentle wire wheel.
PolishedWheel.jpg
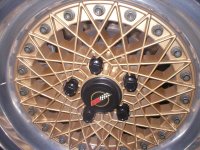
I decided to go one more step and change the center cap logo to something more appropo.
PolishedWheelMounted.jpg

Okay, eagle eyes; they're C3s but trimmed to fit and a deal at the online auction place from a guy in Michigan. Beats the Greek 'E'.
 
Shinoda body kit available

Imagine my surprise when cruising the Orange County, CA CL and finding a '89 Shinoda body kit for sale for $875. How complete it is was not specified but that price is superb! then the cost of installation will be quite higher.
 
father & son

Where did you get your rims? I need center caps,do you know where to get them? If not protect the ones you have, because i been looking for 5yrs. to find some!!vette2-3.jpg


OTE=WhalePirot;1067458]Bad news first: radiator, 10% citric acid flush/refill after replacing the missing thermostat and new fan motor to replace the crappy Chinese replacement; now oil in the coolant. CRAP!

So, I thought about at least one Corvette admiring/driving/owning gal while polishing these Epsilon rims. I did not deflate the first one before removing the bolts; oops, needed resealing; done by MagMasters, based upon prior positive results. The other three were deflated and did not require the $45 task. (Some forums say this can be done at home with silicone.)

View attachment 3532 Plus finger grease and some power buffing.

Prepped and painted the centers in gloss black epoxy and polished the chrome bolts on a gentle wire wheel.
View attachment 3531
I decided to go one more step and change the center cap logo to something more appropo.
View attachment 3533

Okay, eagle eyes; they're C3s but trimmed to fit and a deal at the online auction place from a guy in Michigan. Beats the Greek 'E'.[/QUOTE]
 
Where did you get your rims? I need center caps,do you know where to get them?
I decided to go one more step and change the center cap logo to something more appropo.
Yeah, we covered this before. I have had the Epsilons for many years; just changed to center cap recently.

I recall a fruitless look for replacement centers when we had an exchange about them, back when. :w
 
father & son

Sorry, your right,another senior moment


Yeah, we covered this before. I have had the Epsilons for many years; just changed to center cap recently.

I recall a fruitless look for replacement centers when we had an exchange about them, back when. :w
 

Corvette Forums

Not a member of the Corvette Action Center?  Join now!  It's free!

Help support the Corvette Action Center!

Supporting Vendors

Dealers:

MacMulkin Chevrolet - The Second Largest Corvette Dealer in the Country!

Advertise with the Corvette Action Center!

Double Your Chances!

Our Partners

Back
Top Bottom