Welcome to the Corvette Forums at the Corvette Action Center!

No battle plan survives contact with the enemy.

Ahhh Corvette central

To date....
If you order a-b-c and a-c are in stock they will charge your card & ship em....
When B comes in you get charged and it ships....

I like calling and placing the order , that way I know what they have or do not have....

Mike
 
To date....
If you order a-b-c and a-c are in stock they will charge your card & ship em....
When B comes in you get charged and it ships....

I like calling and placing the order , that way I know what they have or do not have....

Mike

Thanks Mike.

I just picked up the email from Corvette Central tonight, part is on the way. Maybe I'll have glass in it before the GoodGuys show this weekend. Veterans are free (you will need valid military ID) on the 11th. Can't miss it.

Mark.
 
Who are the "Good Guys" ?

Is that a mobil glass repair place?

Mike
 
Is that a mobil glass repair place?

Mike

The GoodGuys is a Plesanton CA biased organization that runs car shows. They are having one this weekend here at the Alameda County Fairgrounds. All Customs and Hot Rods (very small showing of Corvettes) are welcome. Last one I saw one 1965 and six 1963 split window coupes. About half of those were Restomods. Hot Rods, Dangerous Women and corndogs! Free admission for veterans on the 11th! What could be better than that?
 
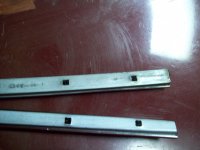
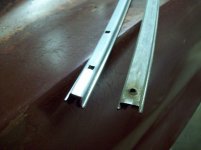
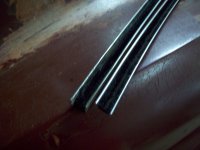
My parts are here and I removed the vent window assembly to replace the front window glass felt guide. The door inner panel was damaged at the screw hole where the vent window frame attaches. I then pulled out the original and compared to the replacement reproduction part. Hardly what I would call a reproduction. It is based on the original in that it is metal and there is a felt channel for the glass to run in. It wasn't going into the frame without a lot of bending and shaping. That piece is retained with two rivets at the bottom of the channel and two tabs from the rubber seal around the vent glass. My kit included the rivets and "pre-bent" glass channels for both doors. I spent a few hours reshaping the driver door channel and using a punch to create the well to retain it in the top of the frame. It went in place with a lot of reforming and coaxing on my part.

Window 65 coupe 002.jpg The new part along side the original, showing the inadequate bend and twist imparted in the new part. Window 65 coupe 001.jpg The upper is the original, the well for the tabs of the seal are a dimple to the left side of the square holes. Window 65 coupe 005.jpg The original is a sharply defined U channel while the reproduction is not as wide and does not have the definition of the old part. Window 65 coupe 007.jpg This photo reveals the reason for the replacement. The felt lining is gone causing a loose and rattling drivers window. I have it installed on the vent window frame. It "looks" fine but the proof will be the operation of the driver window when I have it done.

Mark.
 
Last edited:
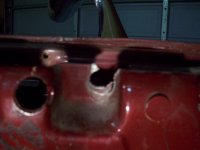
Fiberglass damage.

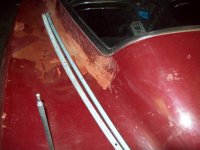
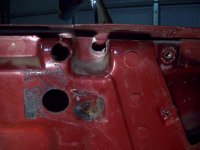
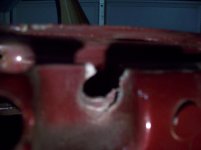
Some photos of the age related damage to the door. Corvette pictures 003.jpgCorvette pictures 005.jpg I will need to get the garage warmer to effect any glass repairs. Too cold to work fiberglass without problems. I hope to be able to focus pictures someday!


Mark.
 

Attachments

  • Corvette pictures 004.jpg
    Corvette pictures 004.jpg
    122.3 KB · Views: 129
Last edited:
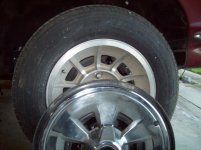
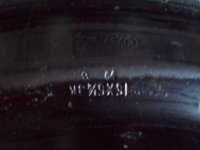
No progress on the Coupe. Wrenching on the Nova, 3rd son needs a driver. I have some photos of the wheels for the coupe.100_2802.jpg100_2803.jpg Looks like 8 of 64 date. The steel wheels and wheel covers are original. 15X5 1/2.
 
Last edited:
Modern two part urathane repair

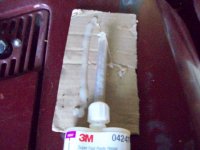
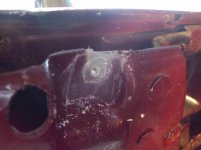
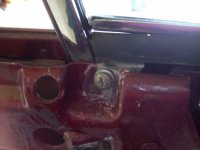
2nd son brought some modern bumper skin plastic repair from 3M. 1-6-13 download 023.jpgWindow inner door panel prepped for 3M 04247two part urethane repair. The damage is wiped down with lacquer thinner and drilled to accept the liquid plastic from the tube of 04247. 1-6-13 download 025.jpg After pumping out six inches of product through the mixing nozzle to ensure a true blend of product it is applied to the door panel using a polypropylene film to back up the hole. It will set in 90 seconds. Another piece of polypropylene film is used on the front side to form the product into shape. This is way too sticky to form any other way. The polypropylene was cut from the bag the tube of 04247 came in. After molding the rapidly setting plastic it is left to set up for 30 minutes. The film was pulled off the hardened plastic. At that point the hole for the 1/4" screw were drilled. This is a very strong repair. He uses this to repair bumper skin tabs that get broken off at his bodyshop. 1-6-13 download 032.jpg1-6-13 download 036.jpg1-6-13 download 036.jpg1-6-13 download 046.jpg1-6-13 download 047.jpg I was able to reassemble the window vent assembly within 1 hour. Now compared to using Fiberglas and polyester resin it is a breeze. It is endothermic and doesn't have to be above 68 degrees to work. I tested the repair (Ugh, grunt) until I was afraid that I would damage the rest of the door. It is solid. One issue is that you'll waste the amount you see in the photo for a small repair. The nozzle is garbage due to the product setting up inside. It machines very well, I used a 1/2" brad point drill to form the pocket for the screw and washer. Another issue is the $ 125.00 applicator 1-6-13 download 028.jpg you see laying at my son's feet in this photo. He did borrow that item for a day. $ 30.00 for the 04247, $ 5.00 for a bag of nozzles. The tandem tube of 04247 came with two nozzles. Easy! It could be a real mess if you do not wear gloves and get this on your hands or clothing. It is real sticky, sets up in minutes and will bond ANYTHING.
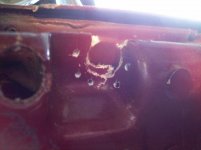
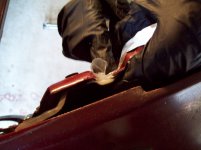
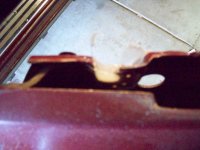
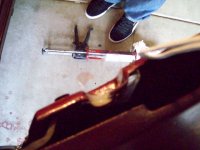
The door is going back together nicely at this point. When my 3rd son is not working we are fixing his driver. Putting a set of three point seat belts in a 1964 Chevy II that never had belts.

Mark.
 
Last edited:
1965 coupe drivers manual crank window glass install.

Okay, struggling with the drivers window. I have it in the door and am attempting to slip it into the window channels. I have tried to get it into the channels with the regulator rolled up, rolled down and in the middle of the door. Not having much luck. The channels are loose in their mounts and do not flex quite enough. Pushing that heavy glass around inside the door using the access opening in the top third of the door isn't working. Have tried supporting the glass with several items; bungee cords, wire and slats of wood. No joy. I sure could use some "speed secrets" from someone who knows how. I am used to metal doors not FRP. Any help will be much appreciated. I am not wanting to damage this obnoxious antique :hb

Mark.

P.S. Yes I know, whine, whine, snivel, snivel!
 
Thank you The Corvette Restorer of 2004

Found a story on repairing the vent window crank that had a tip on the removal and re-installation of the window glass. Using the advice in the article I was able to get the window installed. Not a lot of wiggle room. See below.

http://65corvette.nonethewiser.net/technical/Restorer-Door-Article.pdf

<http: 65corvette.nonethewiser.net="" technical="" restorer-door-article.pdf=""> Thank you Dave Zuberer </http:>:cool!:<http: 65corvette.nonethewiser.net="" technical="" restorer-door-article.pdf="">

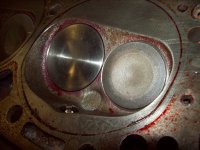
Put the 327 on the engine stand, pulled off the cylinder heads. It has 0.30 over popup pistons, looks like 11 to 1 or 12 to 1 compression ration. Removed the flat tappet solid lifter cam, Erson HiFlow 1M 8113S5 108 25A. I remember Sig Erson Performance Camshafts from my childhood days. Sigurd Erson sold the company along with Mallory Electric to Harry Eberlin of Super Shops fame who went bankrupt in 1997. After changing hands several times the company was bought out by Mr. Gasket and renamed Erson Cams. Mr. Gasket went by the wayside and Erson Cams are a part of PBM Performance Products now. Eric Bolander of Erson Cams in Carson City NV cross referenced the old numbers to existing part numbers (Erson HiFlow 1M E110721) and was very kind to supply me with a cam card to check and degree this cam. Thank you Eric Bolander </http:>:thumb
<http: 65corvette.nonethewiser.net="" technical="" restorer-door-article.pdf="">
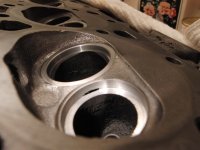
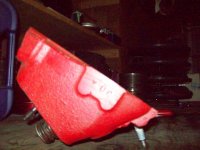
The oil pan has a windage tray in the bottom of the pan and another windage tray is bolted to the center 3 main bearing caps. Not a ball of rust, it looks good inside. It is looking like a 65 Corvette engine. I wonder who ground off the engine numbers</http:> :ugh<http: 65corvette.nonethewiser.net="" technical="" restorer-door-article.pdf="">
Mark.

</http:>
 
Last edited:
Mid Year Corvettes and unleaded fuel

In the process of retrofitting the old 1.94/1.60 heads to run unleaded fuel. I have several machine shops in my area (East Bay San Francisco) that can perform the task. I was wondering if anyone in the area would have any recommendations for me on the shops they have dealt with here.

Mark.
 
In the process of retrofitting the old 1.94/1.60 heads to run unleaded fuel. I have several machine shops in my area (East Bay San Francisco) that can perform the task. I was wondering if anyone in the area would have any recommendations for me on the shops they have dealt with here.

Mark.

If you mean machining for and installing hardened valve seats, don't waste your money and risk turning your heads into scrap iron when they cut into a water jacket. You don't need hardened seats unless you're towing a loaded box trailer uphill all day long at 100mph. Photo below shows what can happen when machining old heads for seats - instant scrap.


ValveSeatWater.jpg
 
Agreed. It is absolutely not necessary to install hardened seats unless you are going to be in a high load situation such as racing and heavy towing. Don't risk your heads. I've also heard of the hardened seats coming loose over time and really making a mess of things.

Tom
 
Agreed. It is absolutely not necessary to install hardened seats unless you are going to be in a high load situation such as racing and heavy towing. Don't risk your heads. I've also heard of the hardened seats coming loose over time and really making a mess of things.

Tom

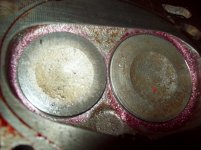
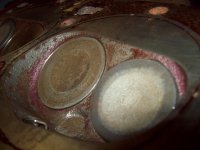
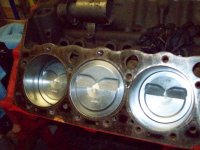
I am worried about getting into the water jacket on these old heads. My problem is that the last valve job has the valves buried fairly deep in the combustion chamber.100_2839.jpg100_2837.jpg100_2840.jpg The first one has the highest valve position (with new intake valve) and the remaining two are deep in the pocket. I am waffling back and forth on just getting a 290/350 GM Performance short engine or re-doing the 327. It is not the original 327 that the Coupe had when it was built. I will have to buy new pistons due to the large pop-up top pistons 100_2841.jpg that I will have to buy racing fuel to use. It has an old Erson Hi Flow M1 flat tappet mechanical lifter cam. The block is 0.30 over. I would love to play with this old school hot rod motor, but all I want is a driver. It will never be that numbers matching survivor. The crate engine will be the easiest and maybe the least expensive way to go. The 290/350 has iron heads and will take the old 461 Winters intake.

Mark.
 
Last edited:
You would probably be better off financially going with the crate motor. There are several crate motors that have come out since my last build that I could have purchased cheaper that the cost involved in the rebuild. My last rebuild was aimed at being a low buck but quality street 355 for my shop truck.That 350/290 would make a nice driver dressed up like a Corvette engine on the outside. Plus you have the warranty and eliminate all the hassle of rebuilding. There is always something that pops up unforeseen that adds to the cost.

On the other hand, those look to be 64cc 2.02 heads. Have you ever calculated the static CR with those pistons and some 76cc heads? The dome doesn't look too tall. You would need to know how many cc the domes are. There are lots of modern options with bigger chambers and 1.94 intakes that will perform better than those old heads. Match the right performance hyd cam and it would be a nice package.

Tom
 
I am thinking the same thing, the 350/290 will be easier and less expensive. It will also have a hydraulic roller cam. I have no problem with adjusting valves but if I don't have to that will be that much more time to be driving. That 327 is hinky due to the die grinder that was used on the numbers. Not a bad engine but it will be a long time before it will be ready to install. For the same money I can drive over to a Chevrolet Dealer and roll home with a warranted, one piece rear main seal, 4 bolt main all new engine. I will need a externally balanced flywheel for this new style engine. I have to check to see if the heads are drilled for perimeter valve cover bolts and the old school Winters 461 intake manifold. I have the intake and the finned aluminum Corvette valve covers. I can then make the engine at least look like a Mid-year engine.

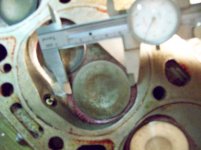
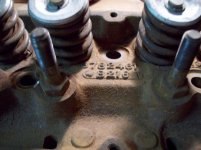
The only issue is that I have all these engines. Oh well, there is always E-bay. I put a caliper on the intake valves and they are under 2 inches (49.5mm or 1.94 inch) across. The casting numbers are 3782461 L105 GM14 and 3782461 B218 GM17 which come up as 302/327/350 from 1961 to 1970 Dual Quad FI 4-brl Corvette 2.02/160 Double hump 64cc chamber heads. The valves are not 2.02. They would have to be 51.3mm.
Corvette monday 009.jpgCorvette monday 010.jpgCorvette monday 014.jpg


Mark.
 
I put a caliper on the intake valves and they are under 2 inches (49.5mm or 1.94 inch) across. The casting numbers are 3782461 L105 GM14 and 3782461 B218 GM17 which come up as 302/327/350 from 1961 to 1970 Dual Quad FI 4-brl Corvette 2.02/160 Double hump 64cc chamber heads. The valves are not 2.02. They would have to be 51.3mm.

Mark.

461 castings were machined for both 1.94/1.5 and 2.02/1.6 valves - depended on the application; when machined for 2.02/1.6 valves, an unshrouding cut was also taken adjacent to the intake valve for improved flow. Yours are the standard 1.94/1.5 version.

:beer
 
The photo on the GM Performance parts site shows perimeter bolt valve covers. Also it's a 350 so It's internally balanced. Your balancer and flywheel will work. The text also says it has the 12 bolt intake pattern which is old style.

" The 350/290 HP engine is internally balanced and requires no balance weights on either the flywheel/flexplate orthe harmonic balancer. A non-Vortech design intake manifold must also be used. When using the 350/290 HP
engine as a replacement for an original equipment engine, the performance intent of this engine should be
considered. The torque curve is higher and consequently may require a torque converter with a higher stall speed
on automatic transmission equipped vehicles. Consult with a reputable torque converter manufacturer for
assistance in selecting the correct torque converter for your application."

Tom
 
Hey thanks Tom Bryant and JohnZ,

I am going to put the 461's back on the old motor and pick up the 350/290. The higher torque curve should not be a issue with the AP 4.11 to 1 Positraction differential. Will be using a Tremec 5 speed with 0.64 5th. 4.11 gears would spin the engine to much (3,200 in 4th) with my Muncie M21 4 speed at highway speeds.

The 350/290 will dress up like a C2 engine. Can use the old flywheel and 403 bellhousing. Headed to F.H. Dailey to order the new engine.

Life is good. I like the boys at GM Performance, they understand!

Mark.
 
I think that will be a great package with the 5 speed.
 

Corvette Forums

Not a member of the Corvette Action Center?  Join now!  It's free!

Help support the Corvette Action Center!

Supporting Vendors

Dealers:

MacMulkin Chevrolet - The Second Largest Corvette Dealer in the Country!

Advertise with the Corvette Action Center!

Double Your Chances!

Our Partners

Back
Top Bottom