Welcome to the Corvette Forums at the Corvette Action Center!

No battle plan survives contact with the enemy.

Understood, Mark. You are the one with firsthand knowledge of the condition and you know what you're doing. :)

For most things I, too, prefer the less intrusive repair possible. When it comes to wiring, however, I've seen the charred remains of vehicles left after a wiring issue set things ablaze. Originality doesn't help when it's gone up in smoke.

Mac
 
Mark

Have you thought about finding a corvette salvage yard with a badly damaged Vette, and getting the
wiring harness from that? The connectors wouldn't have to be pristine, because you will just be using
a chunk of the wire, and the rest of the harness could serve as future replacement pieces of the
correct color, Might be a little more expense than you want, but it would fill the bill........
Good luck with it! :thumb
Andy :w
Heck, for that matter, does that wire combo exist in other GM harnesses? Might be easier to locate
a Buick for parts than a Vette!
 
Good point about using from a used harness. I have sourced plugs, connectors and wire from some I have laying around here from time to time. I agree with Mark that there is a very good chance you can find the black with pink stripe on another GM car of the era. May even be free if you walk a yard and cut out the piece yourself.

Tom
 
Try Lectric Limited. They manufacture restoration harnesses so they must have the proper colors.

Tom

Another route to go... there is a guy on the internet that who sells custom EFI harnesses and does a lot of really neat stuff.

Like an AWD LT4 S10 :thumb
EFI Connection - S10 "Wildside" Project

I have purchased harnesses for EFI swaps from him- he's a really nice guy. I would bet he could send you a PayPal invoice for whatever individual stuff you need. I think he has access to just about every GM wire color and connector ever made.

Oh- here's a list of wires and colors...
EFI Connection, LLC - Automotive TXL Wire

He has 18ga pink/black.

You nailed it Kane, He has bulk wire in most GM colors. Blk/Pnk in 20, 18 and 12 gauge! You order by the foot, and you get a price break if you order more than 50 ft. Minim order is 10 feet of color/gauge unit. He is out of Eire PA. I have ordered the wire from him today. This makes my day. I can now be happy!
 
Last edited:
Understood, Mark. You are the one with firsthand knowledge of the condition and you know what you're doing. :)

For most things I, too, prefer the less intrusive repair possible. When it comes to wiring, however, I've seen the charred remains of vehicles left after a wiring issue set things ablaze. Originality doesn't help when it's gone up in smoke.

Mac

Having worked on German cars for my entire career I have seen plenty of wires with the smoke let out of them. Once the smoke gets out you need to fix 'em. When you see a blackened end on a wire the smoke is about to escape! I have replaced a few harnesses in cars that when the one wire shorted to B (-) it melted everything into one fused mass. Kinda stinky too. The only way to get the stench out of a car like that is to take the grill emblem off and put it on a new one.
My reasoning behind using the correct wire color is that if I am going to change anything on or in the harness it needs to reflect the original colors. GM used Black for the grounds on that year. IGN (+) was Black/Pink. So if I put a black wire to the IGN (+) and later someone comes along and puts that wire to ground they will let the smoke out of that wire and could start a fire as soon as the key is turned on. I worked on the first electronic fuel injected cars in the late 60's and the entire EFI harness used white wires, all the same diameter. Every sensor had white wires. It was ugly. After a few rapid oxidation events the harnesses were changed to colored wires.
 
Last edited:
Having worked on German cars for my entire career I have seen plenty of wires with the smoke let out of them. Once the smoke gets out you need to fix 'em. When you see a blackened end on a wire the smoke is about to escape! I have replaced a few harnesses in cars that when the one wire shorted to B (-) it melted everything into one fused mass. Kinda stinky too. The only way to get the stench out of a car like that is to take the grill emblem off and put it on a new one.
My reasoning behind using the correct wire color is that if I am going to change anything on or in the harness it needs to reflect the original colors. GM used Black for the grounds on that year. IGN (+) was Black/Pink. So if I put a black wire to the IGN (+) and later someone comes along and puts that wire to ground they will let the smoke out of that wire and could start a fire as soon as the key is turned on. I worked on the first electronic fuel injected cars in the late 60's and the entire EFI harness used white wires, all the same diameter. Every sensor had white wires. It was ugly. After a few rapid oxidation events the harnesses were changed to colored wires.
I'm trying to imagine the twisted logic that suggest making an entire harness from a single coloured wire with the same diameter. :ugh

I wish I wasn't familiar with the stench of melted wires. It must be the escaping smoke that smells... another good reason to keep the smoke inside the wires.
:thumb

Mac

It was 1968, the Volkswagen Type Three arrived on this shore with Air Flow Control Electronic Fuel Injection. At that date the designers weren't using the micro processors we have today. Pretty much it was wired like a computer of 1968. The wire had a number on it. The bundle of wires next to it had duplicate numbers. It really wasn't much of a computer. About like a simple calculator of today. It was about the size of my cable modem I'm looking at right now.
You should have heard the whining and sniveling from all the older mechanics (I was a fresh 20 years old at the time)! The business was going to the dogs! :rotfl

Yes, the smell of super heated Poly Vinyl Chloride is hard to forget.:ugh
Nowadays it's hard to find a mechanic who knows how to tune a carb. Technology keeps marching forward. Back in 1968, microprocessors were in the midst of making the leap from concept to reality.

History of Computers and Computing, Birth of the modern computer, The bases of digital computers, Microprocessor

I've worked on an old wire wrapped mainframe distribution style computer back in the 1980s. It was a relic but it kept working and the owner kept paying for an annual maintenance contract so NCR (my employer at that time) kept servicing it. You don't know frustration until you've tried to troubleshoot an intermittent wire wrap on a distribution. Rather than numbers, the wires had colour codes.

I wish I could forget the stench of escaped smoke...:puke

Mac

I had to do quite a bit of research on the Holley to relearn my lost knowledge on carburetors! I had worked on CSI (Constant Stream Injection) and EFI (Electronic Fuel Injection) for so long I had forgotten! I couldn't just reprogram a EPROM (Eraseable Programmable Read Only Memory) in the control module. In the beginning we changed the microprocessor chip in the control modules. With the advent of OBDII (On-Board Diagnostic 2.0) the manufacturer supplied us with diagnostic tools that would rewrite EPROMS.

This Coupe is SOOO much simpler! But, I just have to apply modern electrical theory and my understanding of practical safety into my car.

Cool link on the development of microprocessors Mac!

Mark.
 
Last edited:
Fuel tank

At this stage on the work I need to install the fuel tank to start the new engine in the actual Coupe body. Well I have tried to get it in the car. I did install the filler neck. Oops, you should install the filler neck after the tank is in the car. Yea, I am becoming a seasoned Corvette mechanic. The rear valance has to come off. No big deal just 6 bolts and two very interesting machine screws with an odd assortment of washers. I plan on finding out what actually belongs on the lowermost position when I reinstall the rear valance. The rear bumpers can stay on the body. I tried to put the tank in place but with the filler neck on it will not rotate into place. Let's start over and do some research before I make any more mistakes.

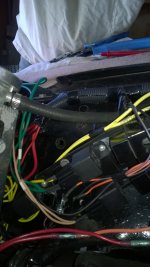
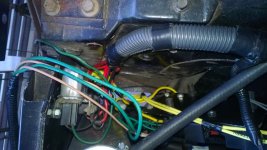
The overlay on the wire harness is compete less the headlight relay addition. I am adding relays to the headlamps to prevent voltage drop to the lamps. I do plan on driving the Coupe and dim headlights are not an option. The battery is connected and I am testing the electrical looking for problems that may be there after sitting for so long. I have added a Key-on relay to supply power to accessories that were not in the original harness.

Then a once over to check for loose clamps, screws and bolts that may have been missed in this verrry long reconstruction. I have a vacuum (Air Lift System) for the cooling system to check for leaks (checks the heater core along with the rest of the cooling system) before filling it with coolant. No need to spill Anti-Freeze Haz-Mat in the garage.

I have figured out most of the installation issues using the assembly manual and am grateful for that reference. The Corvette Action Center Enthusiasts who have chipped in with their invaluable advice and suggestions have made my reconstruction of this project not only possible but enjoyable at the same time. Many thanks to you!

Soon I will be able to turn this Coupe over to the painter.
 
I'm looking forward to the progress pictures! :)

Mac
 
It runs and has ben tuned!

Installed the fuel tank and flushed the hard lines. Replaced all the rubber lines. Had the engine running for an hour or two and the plugs were sooty black when I pulled them. Ordered the jets from Holley, the 19172225 came with #74 jets in it and it was just too much fuel. Plugged in some #69 main jets and now I have a nice toasty brown color WP_20151111_007.jpg . I got about 11 inches of vacuum at the manifold (literature from GM stated that this engine should run at that) curb idle @ 800 RPM. Timing set @ 0 degrees @ idle and 37 degrees at 3400 RPM. Down sized the accelerator pump spray jet (with one that I had from previously) It is too small. Have one coming from Holley. Slight hesitation on acceleration. I do have photos of the wiring changes and will post later. I need to install the hood plus the missing hand brake parts and will drive it to the painter.
 
Last edited:
Thank you for the update! Sounds like you are getting close.
 
Wiring update

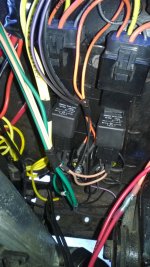
I have added a relay panel where the old voltage regulator used to be.
WP_20150820_003.jpg
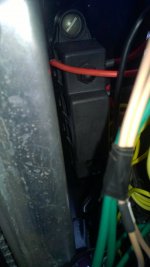
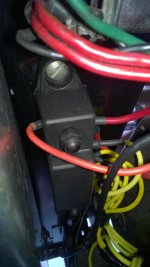
Also added a B(+) buss to the radiator support close by.
WP_20150820_004.jpg WP_20150820_005.jpg WP_20150820_002.jpg WP_20150820_001.jpg
Manufactured a plate for the relays (5) two for the (fused) dual electric cooling fans, one for the high beams, one for low beams and one for the key on ignition (+). Large (#8 gauge) red cable from alternator B(+) terminal to the B(+) buss. The current load to the fans, headlamps, and ignition (+) relay are drawn from this buss.The yellow wires are the B(+) to the relays. The voltage sense cable (#12 gauge) from position #2 of the 2 terminal connector from the alternator also terminates at this buss. Terminal position #1 of this connector is for the dash light. Terminating the voltage sense cable at the B(+) buss will adjust the current load of the alternator at the greatest amp draw of my system. A #10 gauge red cable runs to the B(+) terminal of the starter.The battery is charged using the #02 gauge cable from the starter B(+) terminal. The green and tan wires are the light switch bypass headlamp relay wires tapped in to the harness on the driver side radiator support Packard 56 connector just in front of the drivers side wheel house. I have 13.4 Volts at the battery positive post with the engine running and both cooling fans operating. The headlamps are bright on low or high beam circuits.
 
Last edited:
Looking good Mike!:thumb I sure would like to see a "walk around video" of the project
where it stands right now. Believe me, if I lived closer I would already have been
to see it a half dozen times or more by now! :L Keep us posted on what's happening.
Andy :w
 
Walk around video.

As soon as I get the Coupe off the jack stands and moved outside I can walk around it. Right now the passenger side is against the garage wall cabinets. I am working on benches and platforms to access the top side repairs and a creeper for underneath access for the hand brake repairs. I should replace the missing anti-sway bar(s) before getting it on the ground.

Mark.
 
Final ratio 11.79:1 in 1st gear

Okay I have done some calculations on the AP rear axle and the Tremec 3550-12 transmission. With a 2.87 1st gear and 4.11 differential (2.87 X 4.11 = 11.79:1) the Coupe should accelerate nicely. When I was quite young my neighborhood friend had a 1955 two door post Chevrolet with a 265 Four barrel Rochester 4-Jet, Muncie 4 speed and 4.56:1 differential (2.52 X 4.56 = 11.49:1). He was good until a privileged hotshot showed up with a new "off the lot" 409 Dual Quad 1964 Impala. The streets of Balboa had a new fast stoplight to stoplight bandit.
 
There's a reason why the Beach Boys wrote a song about the 409... :lou

Mac
 
There's a reason why the Beach Boys wrote a song about the 409... :lou

Mac

Yeah, the song probably would have gone nowhere if it had been...........
"She's barely alive, my 265" ! :L
Or even worse......."I'm gettin my kicks, with my Blue Flame straight 6"!;LOL
Andy :w
 

Corvette Forums

Not a member of the Corvette Action Center?  Join now!  It's free!

Help support the Corvette Action Center!

Supporting Vendors

Dealers:

MacMulkin Chevrolet - The Second Largest Corvette Dealer in the Country!

Advertise with the Corvette Action Center!

Double Your Chances!

Our Partners

Back
Top Bottom