Welcome to the Corvette Forums at the Corvette Action Center!

No battle plan survives contact with the enemy.

You've been around long enough to know that "anytime" doesn't work. Set a date and time, then folks will commit. It's how life works. :w

Mac
 
You've been around long enough to know that "anytime" doesn't work. Set a date and time, then folks will commit. It's how life works. :w

Mac

So very true, I just chose to not be a "Pushy Personality" in regard to my requests. In the end they (my sons) decided on the time an date. I have plenty of things I can do with the Coupe until the engine rests in place. I am almost finished in getting that truly horrible paint off the body.:cool!:

Mark.
 
YEE-HAW! Good luck with the Department of Motor Vehicles!
Andy
 
Epic Day!

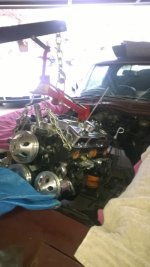
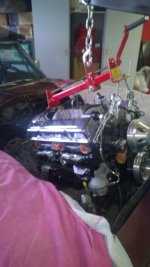
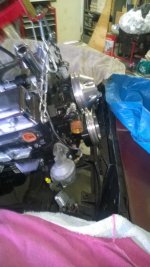
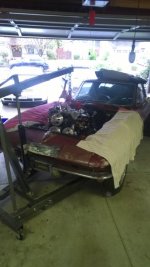
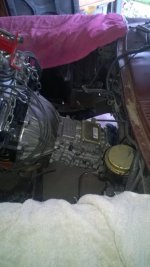
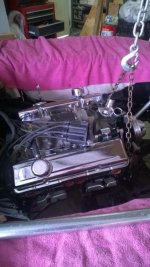
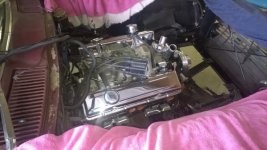
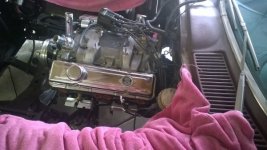
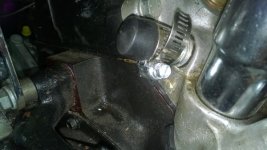
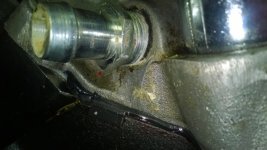
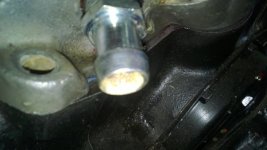
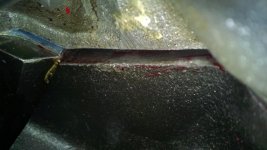
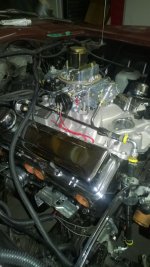
View attachment 18231View attachment 18232View attachment 18233View attachment 18234It all came together yesterday. Aaron, James and I installed the engine. We loosened the core support, moved it forward. It was out the way then. The Tremec was installed along with a lot of the accessories. During the install we removed the power steering pump, fuel pump, oil filter, starter and motor mounts to allow the space needed to wiggle the engine/transmission into place. That 5 speed is a tight fit.

I was interested in seeing how much we had to remove off the basic engine to slide it past the mount horns on the frame. During the install the drivers side punched a hole in the oil filter (oops!), time for a break and a little clean up. A quick discussion on speaking up when pointy things are near stuff and game on. It was a Fram I had installed for the cam run-in and I was going to replace anyway so no feelings were damaged because a hole was poked in that filter.

With the filter off the next object to come into play was the starter. Removed the starter, the power steering pump was next. Removed that and the fancy sliding engine support had to be set aside (ran into the front of the body with the ram on the crane) for more reach into the engine bay. A longer arm on the crane would be better for the pointy nose on this Mid-year coupe.

Set some 6 inch 4X4s between the still installed motor mounts and the frame, a floor jack under the 5 speed and removed the engine support. A chain was bolted to the cylinder heads and we're in tall cotton! Now a transmission jack would have worked better because the wheels of the floor jack do not like to slide sideways. Now we were within a few inches of being in the right spot, I do so love being in the right spot! We needed to lift the engine a bit to get the motor mounts over the frame horns. Rats! Crunchy sounds from the gearbox pushing on the FRP tunnel. Okay remove the motor mounts. At that time we lost James, time for class in San Francisco. A lot of jockeying around getting the rear transmission housing where it need to be and its in the Right Spot! Slide the mounts, power steering and starter in place. Tighten the fasteners and call it a day. 8:00 AM to 11:45 AM engine installed. Well setting in place with a lot of future work to complete.

I should have had a larger crane, transmission jack and not have the universal joint mount in the transmission. Getting the crane and jack past the Accountant didn't work out and I wasn't thinking about the tight fit in that coupe. That is what makes this fun! Creative use of available tools.

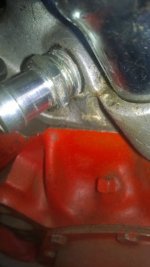
We noticed a oil leak on the front of the intake manifold. Need to fix that, install the distributor and time the engine. I will put Aaron on installing the Hooker side pipes. That should change minds on that subject I think. He thought it was a PITA when the engine was on the run-in stand.

It is a long way to the trip to the DMV but progress is being made.

Mark.

Harrumph, it seems like the photos did not come through.
 
Last edited:
Pictures

Picture 1 You can see the sacrificial oil filter still installed. WP_20140326_001 - Copy.jpgPicture 2 Starter and fuel pump still on the engine. WP_20140326_002.jpgPicture 3 The core support moved forward.WP_20140326_003.jpg
Picture 4 Post destruction of the oil filter. WP_20140326_004.jpgPicture 5 Yes the transmission is part of this. WP_20140326_005.jpg
Picture 6 Switched over to the single chain. The decision was made to remove the motor mounts and install them on the body. WP_20140326_006.jpg
Pictures 7 & 8 Well! As I live and breath there is a engine and transmission in the right spot.WP_20140326_007.jpgWP_20140326_009.jpg
 
Last edited:
Do you like the engine lift leveler? I've never used anything but a length of chain but some guys swear by them.

Mac
 
Do you like the engine lift leveler? I've never used anything but a length of chain but some guys swear by them.

Mac

I was working in a dealer for a German car product when the Snap-on guy offered me a smoking deal on the leveler. It worked okay in this application. The crane (inexpensive Harbor Freight model) that I was using was WAY too small. That led to not being able to get the engine/transmission all the way in place to lower it in. Issue #1 was the threaded rod used in the fabrication of the leveler. Too small (3/8 18), it should have been 1/2 13 and Acme thread. The handle needed to be removable due to interference with the crane arm, allowing the handle to be exchanged to both ends of the leveler would be best. Issue #2 is the loaded point of the threaded rod. At the angles necessary the loading on that threaded rod was very high. The loaded point at the handle used two washers as a bearing. It needed a Torington bearing or another anti-friction device ( bronze washer, UHMW plastic washer ) other than two plated washers. I did try lubricating it with engine oil, transmission oil and high temperature wheel grease. None of these worked satisfactorily. It was a struggle but it was necessary to allow the steep angle that I needed to get with the engine and transmission assembled.

With all that said, this was the first time I used that style leveler. The factory tools I used at the dealer were and still are very pricy.
 
Last edited:
Good review. I guess now you know why the Snap-On guy gave you such a smoking deal.

Mac
 
"No plan of operations extends with certainty beyond the first encounter with the enemy's main strength" Helmuth Karl Bernhard Graf von Moltke, as a German Field Marshal in the 1800's was quoted with saying applies here. You have no idea what the outcome will be until you get started.

Everything was under control, then we lifted the engine with the crane. In the resulting chaos we installed the engine and transmission in my Coupe. No one was harmed and collateral damage was light. :upthumbs

And yes I did learn just what a "Smoking Deal" that engine leveler was.

Mark (still learning at 65).
 
Okay my original 1965 Corvette Coupe was made in the rust belt of the United States. It now has an engine and transmission that were made in Mexico. Window seals and channels made in China and will have paint on it made in Germany. This is the state of the industry today. A Frankenstein brew of many different countries. Not having cubic money this is my reality. Purists will be horrified, RestoMod jurists will be crying "Not Enough". I will be driving this Corvette with a very large smile. Thanks for all your help from another grey haired old dude in a C2 smashing bugs and burning gas!

Mark.
 
Last edited:
Compatibility with the GM crate 290/350

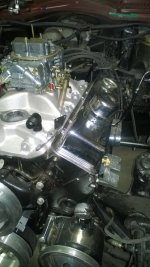
Ah yes, project creep. Well I was re-installing the Winters 3844461 intake due to the oil leak we found during the engine install. We noticed that the passenger side front black neoprene seal had "slipped" and was hanging out about 1/2 the width of the seal, oil was collecting on the front of the engine after running it about 40 minutes. I had replaced the manifold gaskets and seals. Torqued the bolts. I was golden! After letting the manifold set over night I was rechecking the torque on the manifold bolts and was surprised to find the passenger side front seal was poking out AGAIN!
Here is the seal out of place. Manifold seal has moved.jpg Manifold seal 2.jpg
Here are 3 photos showing the difference between the manifold and the 10066036 (350/290) block. Seal removed showing diffrence.jpg Differance second view.jpg differance view 3.jpg
This is the 3782870 (327) block and the manifold. 3782870 block manifold example.jpg

It looks like we are buying a manifold.

Mark.
 
That's just happening to prove your title for this thread is accurate…

Mac
 
Availability

Just ordered a P/N 10185063 ZZ series manifold that is recommended for the 350/290 engine in the Long Block Specifications document. It is coming out of Michigan in around 7 days. The aftermarket has plenty of carburetor intakes. I just want a GM part. They engineered the thing in the first place. Should have bought a LS3 and been done. I just had to try to be as original as possible. I wanted the Corvette script valve covers, Winters 461 intake and the 069 distributor. That just isn't going to happen.

With the engine missing and the stuff I had highly "suspect", I was just chasing my tail pursuing that ideal. A driver needs to run. I will make this Coupe run. I do have and will retain the other matching original parts. I guess the next guy will have to locate a correct year engine and heads and do the exhaustive restoration to make it a correct but not matching number Coupe.

I think I have them (my two partners) convinced to keep the Milano Maroon color. Now all I have to do is discourage the ankle biting Hooker Hedder side pipes. That hot chrome injury waiting to happen is just too dangerous to any flesh that gets close. I can just see a polyester pant leg melting into someones leg. I would like the exhaust system under the car where it belongs.

Mark.
 
Last edited:
Polyester? Who wears that anymore?? :D

I like the look and the sound but the scalded skin is a definite disincentive.

Mac
 
I'm sure that you won't have a problem with the pipes but passengers that don't ride in the car every day will burn themselves. It happened several times on my '67 coupe no matter how many times I warned them.

Tom

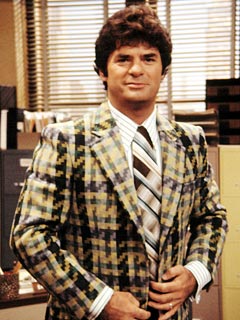
What? No leisure suites in the closet waiting for the big comeback, Mac?
 
Rather than throwing away my leisure suits, I gave them a decent burial.

Mac

Herb+Tarlek.jpg
 
Polyester? Who wears that anymore?? :D

Mac

The uniform that I wore at work for 18 years was cotton polyester blend, they were not "double knit" like the '70's leisure suits. In some cases they melted but usually they just charred black and crumbled. Some of the modern "slinky" fabrics that the ladies wear can melt.

Mark.
 
Ongoing saga of the Maroon Monster

The manifold fit like a dream. P/N 19170093 770 cfm Holley carburetor is on the way. Have the fuel tank straps and associated anti-squeak rubber straps to install the fuel tank. Tank is going in. Clutch works but I am going to have to pull the "Z" bar to install the "Bitchin" hooker side pipes. Will also have to pull the starter to get the passenger side exhaust header in place. Also the spark plugs and the wire heat shields to make sure I don't get in the middle of the installation and have to backtrack like I did with the engine/transmission install. Tachometer works (spun it up with a drill to 2200 RPM).
I have the original 069 point distributor. I will use that for now because of the tachometer drive cable. Corvette Central has a HEI /W tach drive distributor for a hundred n fifty clams. I don't know if that will fit. Another question is will I need to get a mellonized drive gear for the distributor with flat tappet hydraulic camshaft P/N 3896962. If I understand correctly the mellonized gear is for steel roller tappet cam shafts
Once I have it driving it is going to paint. Blue not Milano Maroon. I tried.
The lower control arm bushings on the rear axles are toast. The front end looks like all the rubber was replaced.

Mark.
 
The lower control arm bushings on the rear axles are toast. The front end looks like all the rubber was replaced.

Mark.
Mixed blessings.

Mac
 
Progress, yes I know it is taking too long.

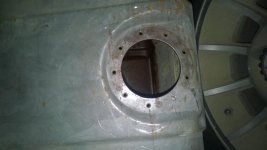
WP_20140710_001.jpg WP_20140710_003.jpg New GM Performance manifold and Holley. Special Heavy Duty parts! WP_20140710_002.jpg Yikes! I broke off the screw in the original fuel tank. Nice job Mark.
I was talking to Mark Hamilton of M.A.D. Enterprises the other day and he had mentioned some of the issues with using a mechanical fuel pump. If the under hood temperatures get high enough fuel cavitation on the input side fuel line is possible (high temps and lowering the pressure of the line as the pump pulls in fuel) stopping the pump from moving fuel. The drive-ability symptom would be; after a extended drive in high heat condition (traffic, 100+°) then hot soak for a pit stop (fuel, food or bathroom break) the engine will start and run for a few miles and then sporadic stalling (float bowl emptying and no flow through the pump). Engine may or may not restart after cooling off (extended cranking, no start). The fix would be a "pusher" electric fuel pump at the tank. I have worked on fuel injected (electrical fuel pump) cars since 1967 when VW came out with the first of their injected engines (of course Chevrolet had the Rochester fuel injection several years before that). The issue had never happened to me. Cool, I have learned something!
Still waiting for the new distributor, vendor issues.
The fuel tank has rust inside it and I can clean it with some acid (vinegar, 5% acid) but the tank was originally electroplated with zinc. Am I just inviting a disaster down the road when and if the rust reforms and gets into the fuel. Several companies offer tank coatings but I have had problems with those separating from the tank surface and clogging my filters in my old motorcycles (and that was before unleaded fuel). Maybe I'm over-thinking this, there is a tank filter sock and a fuel filter in line of this fuel supply system. Not to mention inlet filters on the Holley itself. I did find a layer of fine rust particles in the old Holly when I had it apart to refresh it. Those had gotten through a inline NAPA filter and original in-tank sock.
 

Corvette Forums

Not a member of the Corvette Action Center?  Join now!  It's free!

Help support the Corvette Action Center!

Supporting Vendors

Dealers:

MacMulkin Chevrolet - The Second Largest Corvette Dealer in the Country!

Advertise with the Corvette Action Center!

Double Your Chances!

Our Partners

Back
Top Bottom